Van Conversion to Camper
The FULL GUIDE
to Create
a Do-It-Yourself Dream Van
Van to Campervan Conversion
TABLE OF CONTENTS
11. CEILING, WALLS AND FLOOR
12. KITCHEN AND STOVES
13. BATHROOM AND SHOWER
14. FURNITURE AND STOWAGE PLACE
15. ANTI-THEFT AND ON-BOARD SECURITY
16. OPTIONALS AND EXTRAS
17. INTERNET AND CONNECTIVITY
18. TOOLS FOR VAN CONVERSION
19. PRODUCTS FOR VAN CONVERSION
20. USEFUL RESOURCES AND LINKS
21. HOW MUCH DOES IT COST?
22. CONCLUSION AND USEFUL TIPS
This is the general summary of the article that will allow you to easily navigate through the various chapters.
To return to this point, you can click the following button at any time:
INTRODUCTION
WHY A VAN CONVERSION TO CAMPER MAY BE FOR YOU?
In recent years, more and more people are entertaining the idea of breaking away from the routine and pursuing their own freedom by embarking on a van conversion project.
Converting a vaninto a small house on wheels entirely Do-It-Yourself is a project certainly brave, at times complicated, certainly fun and incredibly rewarding!
It is an experience that teaches you to solve problems of any kind, makes you an expert in Do-It-Yourself and, most of all, allows you to bring your ideas and your ideal motorhome to life.
If you, too, are caressing the crazy idea of converting a van with your own hands, welcome to the community: you’re in the right place to discover if a van conversion project is for you! 🙂
WHAT WILL YOU FIND IN THIS MAXI-GUIDE?
In this veeery long article, I have gathered all the information and advice you will need to choose your van, convert it into a campervan and adapt it to YOUR needs and taste.
At the end of each chapter of this guide, you will also find in-depth articles and/or video guides to help you understand the details of each van conversion steps.
VAN CONVERSION: CAN YOU DO IT TOO?
If this is your first time visiting this blog, let me introduce myself, my name is Dani🙂
On a sunny day in 2020, locked in the house due to an unexpected global pandemic and unable to travel, staring outside the window, my mind started flying.
I wondered if I could too, without any previous skills, convert a van into a campervan entirely by myself.
And after wondering, I still can’t believe it, but I did it!
Not only I did succeed, but I also documented every single step with articles, photos, and step-by-step videos to help anyone crazy enough to jump into a similar adventure to turn a dream into reality!
Carrying out a van conversion in campervan entirely DIY is possible and if I made it, I’m sure you can too!
Happy reading! 🙂

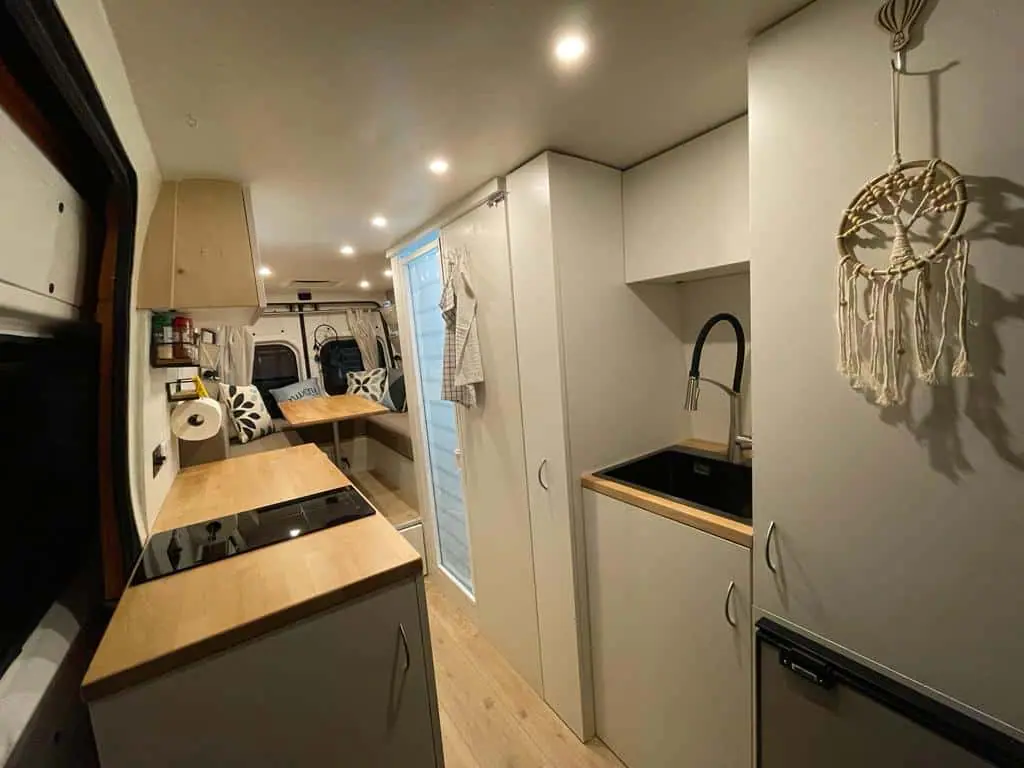
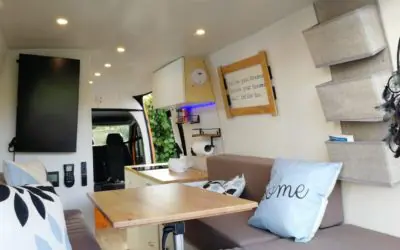
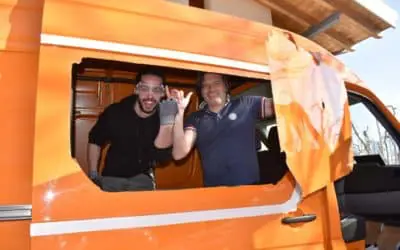
THIS IS ARANCINO: OUR SELF-CONVERTED CAMPERVAN
Create your own van with the DIY method in Italy?
It can be done!
What is Vanlife?
Vanlife is the choice to travel while living in a camper van/van (usually Do-It-Yourself). It’s a fairly recent trend, exploded in America in recent years, but still little known and appreciated both in Europe and in Italy.
Can I do it too? Is it possible to camper a van here in Italy?
Loving to travel madly, and inspired by many (but many!) videos seen online of travelers who decide to change their lives, buy a van, turn it into a house on wheels independent and travel the world, I ran away from the madness of wondering: “is it possible to legally camper a van in Italy?“.
And then again,“can I do it too, without any knowledge of carpentry, electricity and machines, but with only my desire to do and learn?“.
Well, the moment these questions popped into my head, I knew I had to try to give us some answers.
Being stuck at home by the various lockdowns (I normally worked in tourism) and having so much time available, I armed myself with good will (a lot of good will!) and I set to work .
Cutting the short story short, I discovered that yes, I could do it too, and that like me you can too.
Guides to Campering a Van Do-It-Yourself
During my journey to turn a VW Crafter van into an RV, I decided to meticulously gather and sort through all the resources and information that may be needed to camper a van from start to finish.
On this page, you will find Complete Step-by-Step Guides that will help you turn your work van into a camper van, leaving nothing for granted and with videos of all the key steps.
I sincerely hope these articles come in handy for those who, like me, wake up one day dreaming of the freedom of living in a DIY van and, like me once upon a time, don’t even have a clue where to start getting their hands on it 😉
IN-DEPHT GUIDES
Complete guides FOR DIY VAN CONVERSION
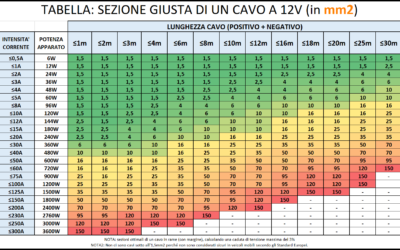
An undersized cable does not carry enough current. A cable that is too undersized can lead to a fire. An oversized cable, on the other hand, simply costs more and is a waste of money. Are you...

The Portable Power Station is an increasingly used accessory on camper vans and RVs, but when does it really make sense to purchase and own or install one? In this article we try to shed some light...

How much does it cost an entirely DIY van to campervan conversion? The queen of all questions... In this article, I want to show you all the costs of my conversion from start to finish, so...
The Electrical System is often one of the most complicated steps in a DIY van conversion. How much energy is needed? What apparatus/devices to purchase? How to connect them? How much would it...

The Interior Outfitting of a DIY converted van is both an aesthetic and structural choice. In this article, you will find useful information and inspiration ideas for customizing the Walls, the...

Cooking in Camper is one of those things, that makes you feel at home wherever you are! Gas, Diesel or Electric Stove? What equipment and accessories you need on the Road? How much space do you...

Buying a trivalent or compressor RV refrigerator? Horizontal or vertical? 12V or 110/220V? In this article you will find all the information you need to choose the best fridge for Your Van,...
A Camper is not a Camper if it does not have a bed. Where to Sleep and... Dream! In this Guide you can find the inspiration you need for creating a DIY Bed in Your Campervan, And I'll show...
If you are Campering a Van you surely must have wondered: How does the Bathroom in a Motorhome work? In this Guide I show you the various types of Bathrooms on the market, I explain how they...
A Roof Fan helps keep your Vehicle's humidity under control and change stale air. In this guide you will find everything you need to know about mounting a Maxxfan Deluxe fan on the roof of...
A Shower in the RV for some people is not necessary, for others it is a real necessity to be totally independent! In this guide I'll tell you how I built the shower of my converted van...
You dream of transforming your Campervan DIY and have never touched an electrical cable before? Or do you want to implement some changes to your Factory RV? In this guide you will find EVERYTHING...
Want to know how to "connect" the electric cables in practice in a converted van? Stripping, Crimping, Wire Leads, Clamps, Tubing, Cable Ties and much more... You've come to the right place...

Where to look for useful tools, accessories and products for campervans? Is it better to rely on local stores or online? In this article, I'll share my experience and show you what I used for my...
No one likes to be cold at home, not even if this is on Wheels! In this article, I'll show you all the possibilities to warm up your Van / RV and enjoy the warmth even on the coldest winter days....

A cosa serve l'isolamento in un Furgone Camperizzato? Come funziona la trasmissione di calore? Quali materiali si possono usare per coibentare il tuo Camper e quali sono i loro vantaggi e...
How much water do you need in your motorhome? Which Tanks to Choose? How to install them? Pipes, Pump, Joints... Find out everything you need to know about creating your RV's water system! ...

If you're entertaining the idea of building a do-it-yourself van to turn it into a Camper, this page is for you! Is it possible to homologate a do-it-yourself motorhome in Italy in 2021?...
Converting a Van for many is a dream. It's freedom, it's creativity, it's life. Let's not forget though, that converting a van Is also no joke at all. 10 things to know before starting a van...
Do you have a Van you'd like to convert but it doesn't have the windows you'd like? In this guide, you'll find everything you need to know about installing totally DIY windows for your future RV!...
Choosing a van is like choosing a Companion of Adventure: it has to be the right one! Which van do I want to convert? This is the first question that will come to your mind if you are...
WHAT ARE THE BEST VANS FOR A DO-IT-YOURSELF CONVERSION? When you're first approaching the idea of converting a van into a camper, the model choice can be a headache. How tall is this one? How long...
1. HOW TO CHOOSE THE VAN
RIGHT FOR YOU?

Have you decided to embark on the crazy adventure of van conversion? Great!
Do you already own a van? If yes, that’s awesome!
On the other hand, if you don’t have one yet, the first thing you should do before starting a van conversion is to get one! ;D
In this chapter, I’ll briefly show you the vehicles that are best suited to be converted into small or large D-I-Y campervans.
In addition, I will also help you to understand your needs better and find the van that best suits them.
Let’s get started right away! 😀
CARS AND MINIVANS

Cars and Minivans are the right vehicles for small conversion projects, for those who want to sleep out just a few nights or for short trips “on the road”.
Small in size, these vehicles can be parked anywhere, consume little fuel, and are extremely maneuverable.
Minivans have enough room for a queen-sized French bed, a kitchenette and maybe even a refrigerator.
Being so small of course, they require a great deal of imagination and creativity to optimize the space as best as possible.
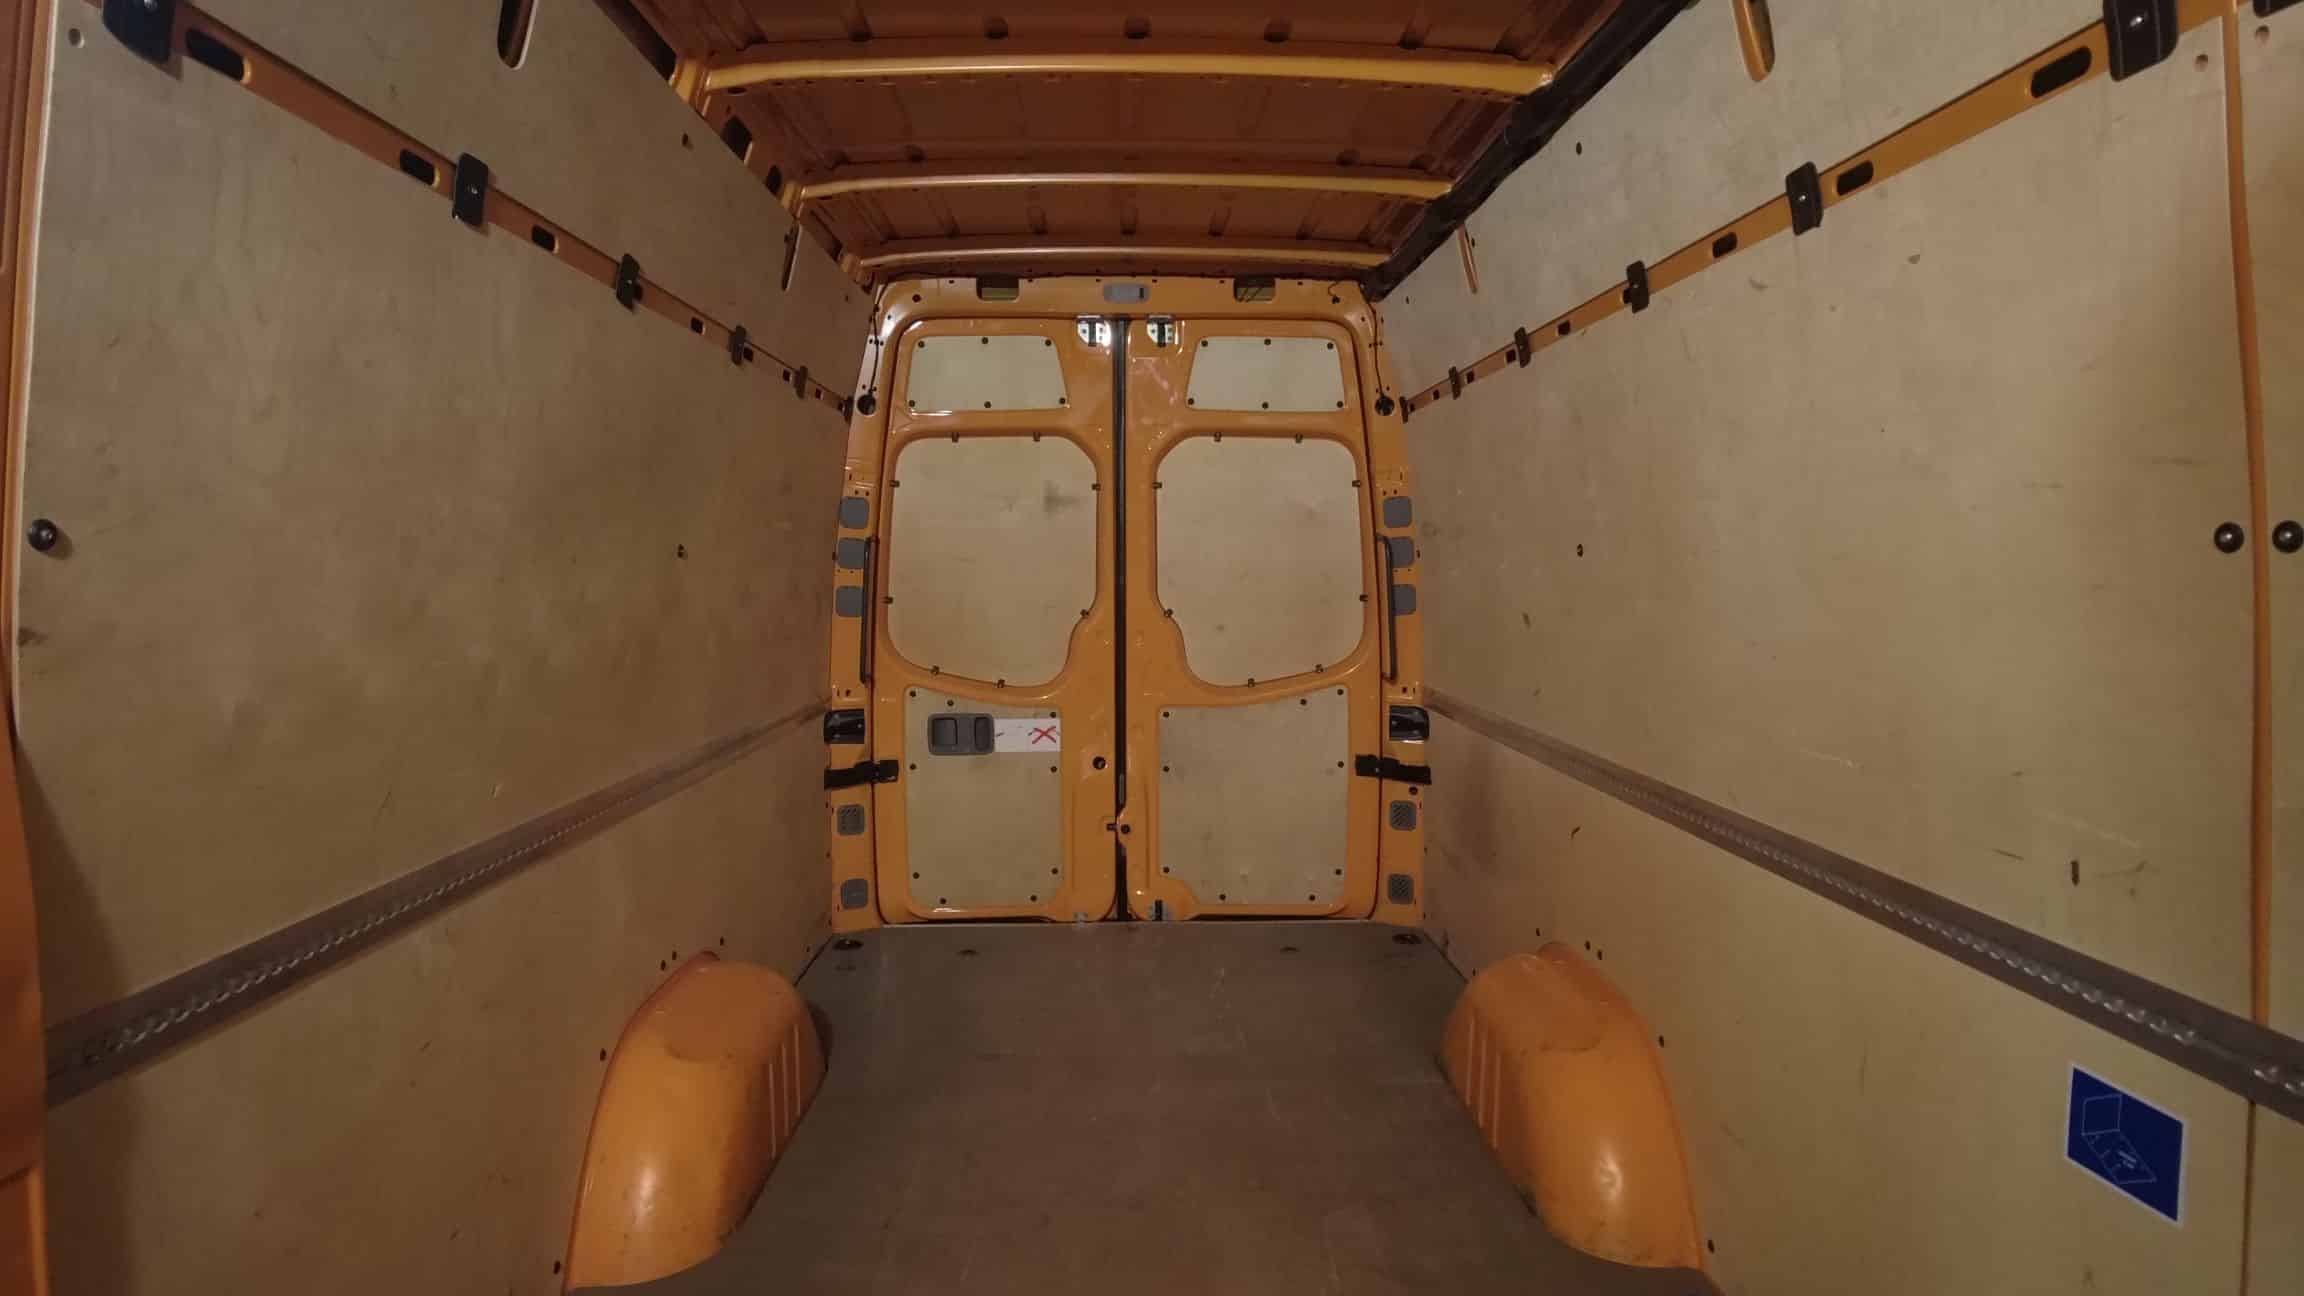
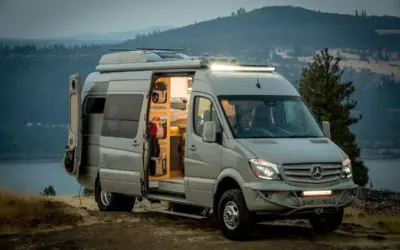
COMMERCIAL VANS

Commercial/Freight vans (category N1) are the most common choice (and the first one that comes to mind!) for those who want to carry out a van-to-campervan conversion with a fixed setup in mind (definitive and not removable).
Empty inside and available in a wide range of sizes (there are heights and lengths to suit all tastes), this type of vehicle makes up for the perfect blank canvas to create a Do-It-Yourself RV that completely follows your taste.
They consume more than minivans and aren’t as easy to park (especially long ones), but if you’re foreseeing medium to long trips or even living in your van full-time, these are probably the vans you’ll want to look into.
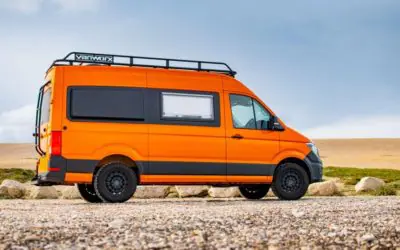
The most used vans are the Mercedes Sprinter, Fiat Ducato, VW Crafter, Ford Transit, Iveco Daily, RAM Promaster, and Citroen Jumper. Find more details in the depth-article:
All the Best Vans for a Conversion (with Sizes!).
.
BOX VANS

Box Vans are an alternative to typical commercial vans.
Built on the same basic vehicle, box vans feature (as the name suggests…) the “box”, which is a large squared-off stowage space instead of the normal cargo area.
The perferctly vertical walls and the greater height maximize the available space (always precious inside a small house on wheels) and simplify the van conversion .
Compared to commercial vans, however, box vans have slightly worse aerodynamics (they consume more fuel) and are a little less suitable for unpaved terrain.
M1 MINIBUSES (MAX 9 SEATS)

Nine-passenger M1 vans are the cousins of N1 commercial vehicles, but used to transport people (note: NOT as RVs!).
This type of vehicle is usually fully windowed, making it suitable for those who have a very bright, window-filled project in mind.
Of course, the main downside of the minibus vans is that they are obviously much harder to isolate than a regular van perhaps not so fitting for extreme temperatures.
Note for Italians: At the moment, this type of vehicle cannot be legally converted in Italy with neither a fixed nor mobile campervan setup (we talk about this in the Chapter 2 about homologation), so I suggest you to consider it only in case you are planning to pass an approval test in Germany.
VOLKSWAGEN VANS

The classic Volkswagen van deserves its own category: Kombi, Bulli, Westfalia, VW Van… whatever name you use, we’re always talking about the iconic VW Transporter, now in its sixth re-edition (and maybe soon also electric! 😉 ).
The classic models are of course the VW Transporter I and II.
Small, maneuverable, hippi, iconic, and incredibly photogenic, the VW Van is a vehicle well suited for summery, hippi-style, instagrammable roadtrips.
That said, there’s also a point to be made that these impossible-to-insulate vans are extremely expensive and break damn near as much (as they’re all very outdated), but they can also be fixed with little.
Certainly they are not the most suitable vehicle for a Do-It-Yourself campervan conversion or for travelling in comfort, but they are certainly suitable for travelling in the spotlight, to relive a dream and to immortalize shots of legendary old times now gone.
4X4 TRUCK

A van isn’t enough for your needs and you want to make it really big? Why not choose a 4×4 truck then?
Generally used for military missions or in any case in particular contexts, these trucks are vehicles suitable for all types of terrain and have a really giant cabin in which you can space out and truly build a house on wheels.
Getting your hands on one of these vehicles is not easy, and it certainly takes a lot more time and resources than a van.
Nevertheless, some people choose this type of vehicle and the results are undoubtedly amazing.
COACH / SCHOOL BUS

Dulcis in fundo, we find the Schoolbuses and the Coaches: vehicles for projects really of another scale!
These types of vehicles are obviously expensive, hard to find, difficult to homologate, require a D license to drive, and certainly a lot of time to be converted into campervan.
Nevertheless, if you like challenges and have enough resources at your disposal, why not try building a real palace on wheels? 😉
This type of vehicle is the only one that offers enough room to carry around a Jacuzzi…and really anything else you can think of to put in it!
HOW TO CHOOSE THE RIGHT VAN FOR YOU CONVERSION?
Choosing the van, as we mentioned, is the first step in being able to begin your van to a campervan conversion.
At first, especially if you don’t know anything about motors, it can be very difficult to untangle the jungle of automotive brands and models and understand which is the right one for you.
Since I’ve been there myself, and I’ve spent a lot of time studying the topic, here below I want to leave you some food for thought that I think will help you to order your mind🙂
UNDERSTAND YOUR NEEDS – WHAT ARE YOU LOOKING FOR?
- How do you plan to use your future campervan? Looking for a vehicle for short weekends, road trips, or a full-time experience? What comforts do you need? Do you plan to travel on dirt roads?
Your intended use of your van will obviously guide you in choosing a larger or smaller vehicle. Bigger means more space, but at the same time also means more expensive and time-consuming to convert.
- What is your budget? How much does the vehicle cost you? And how much does it cost you to convert it into a Campervan?
Before embarking on any van conversion to campervan project, make sure to put your project down on paper and clearly define your budget and allocate your costs. Buying the vehicle is certainly one of the biggest expenses in creating a D-I-Y Campervan, but don’t underestimate the cost of the conversion which usually reaches at least 1/3 of the price of the vehicle (and in the case of a more “premium” transformation it can cost as much or more as the vehicle itself!).
- Which Van Height and Length fits best the setup you have in mind?
Each commercial van model is produced in various heights (H1, H2, H3) and lengths (L1, L2, L3). To understand which model can best satisfy your needs, it is essential to plan from the start an hypothetical van layout and keeping it in mind at all times: bed? Table? Bathroom yes or no? Shower Yes or Shower No? Need a Fridge? Heating? How much storage space do you need? Take a tape measure in your hand and think of everything! If it helps, draw an outline on the ground and try moving around to really understand how the different spaces feel to you (it helped me a lot!).
- You are looking for a used vehicle. How many kilometers are too many? How old should a good used van be? Does environmental certification matter?
The older and more used a vehicle is, the less it will cost but also the higher the likelihood of having reliability issues in the future (and so maintenance costs!). The main commercial vehicles are built to last over 300,000 km, and if kept well they can easily reach over 500,000 (there are cases where some have even reached a million!). Personally, I advise you to look for used vans with 150 thousand km at most, better if under 100 thousand and with a Euro 5 certification or higher if you live in Europe (to avoid severe restrictions on circulation in the future). Of course, depending on your budget you may have to make tradeoffs on these values.
- What vehicles are available around you? How do you plan to use the van you will find in the long run?
To find a good deal, it’s important to get an idea of the most common used vehicles available around you: the more vehicles of a specific type there are, the better the price normally is. If, on the other hand, you plan to buy a vehicle from abroad, remember to consider the cost of fuel to bring it to Italy and the cost of nationalizing it. In the end, there’s no “right” price for a van to convert, but it all depends on what you intend to do with it in the long run: travel with it for years? Small weekend getaways? Family Travel? Consider everything and then make your choice 🙂
READ: DEEPENING 1
HOW TO CHOOSE THE BEST VAN FOR YOUR NEEDS
Discover all the questions you should ask yourself, and the things to consider in the choice of your van.
If you still don’t feel sure what you’re looking for or would like some more detailed insights, I recommend reading the in-depth article opposite.
Article Index
KNOW THE VANS ON THE MARKET
1. Types of Vans Suitable for Van Conversion
THINK BEFORE YOU SEARCH
2. All the Things You Need to Consider
3. Characteristics of Used Vans: How to Search?
THE ONLINE SEARCH
THE BEST VANS TO CAMPERIZE DO-IT-YOURSELF
When choosing a vehicle, there are several parameters you may (and should) want to take into account.
These include:
- Cargo Bay Dimensions (Height, Length, and Width)
- The curvature of Internal Walls
- Extra Equipment already present (anti-theft systems, windows, smart radio, antenna, fan, etc.)
- Efficiency and Consumption
- Longevity and Spare Parts Availability
- Driveability and Interior Comfort
- Price and Convenience
Analyzing all these parameters for each van model you want to consider indeed takes a lot of time and effort…or does it?
Luckily for you, not anymore! In fact, in the in-depth discussion below, I’ve collected all the interior and exterior dimensions and the pros and cons of each type of camper van and minivan.
I figured that, since I had done a lot of research anyway when choosing my VW Crafter, it was a shame not to share 🙂
READ: DEEPENING 2
THE BEST VANS FOR A DIY CONVERSION (WITH ALL DIMENSIONS!)
Discover the most common vehicles used for van conversion, with all pros, cons, and dimensions!
In this in-depth article you can find all the interior and exterior dimensions, pros and cons of all the best vehicles for van conversion.
Specifically, the article discusses in detail:
- Best Large Vans
: Mercedes Sprinter, Volkswagen Crafter, Man TGE, Iveco Daily, Fiat Ducato, Peugeot Boxer, Ford Transit, Nissan NV400, Renault Master, Opel Movano, RAM Promaster
- Best Medium Size Vans: Opel Vivaro, Renault Trafic, Fiat Talento, Nissan NV300, VW Caravelle, VW Transporter
- Best Small Size Vans: Ford Transit Connect, VW Caddy Maxi, Opel Vauxhall Combo L2, Peugeot Partner L2, Citroen Ber
IMPORTANT NOTE IF YOU WANT TO CARRY OUT YOU
VAN CONVERSION IN ITALY
Once you’ve identified the right van model for your Do-It-Yourself conversion, before proceeding with the purchase, I suggest you read the next chapter on homologation.
At the moment, in fact, in Italy the law is not exactly accommodating with self-built campervans, and depending on the type of equipment you have in mind, you may need to use some bureaucratic stratagem, perhaps even at the purchase stage.
2. HOW TO HOMOLOGATE A DIY CAMPERVAN (FOR ITALIANS)

WHAT DOES IT MEAN TO “HOMOLOGATE A VAN”?
When you change the intended use of a vehicle, i.e. you convert it and permanently use it for a different purpose than the one written in the vehicle registration document (e.g. as in converting a cargo van into a camper), this vehicle must be “homologated” (or “taken for testing”).
The approval/testing process is required by law to verify that the changes and installations made to the vehicle are law-compliant, safe, and sufficient to change the intended use of the vehicle.
When a vehicle passes a homologation test and gets approval from the designated engineer, the changes made to the vehicle are certified, the new intended use is entered on the vehicle registration paper, and you can then legally register a new plate and drive with the newly converted vehicle.
In the case of the homologation of a camper van, “homologate” means to convert a van of category N1 (transport of persons) to M1 (transport of goods) with destination and wording “Caravan”.

WHEN DO YOU NEED TO HOMOLOGATE A CAMPERVAN?
When you install on your campervan fixed non-removable equipment (insulation, fixed walls/beams, floor, ceiling, firmly attached furniture, fixed electrical system, etc.), the vehicle must necessarily be approved/tested in order to legally travel in the EU.
Failure to homologate your vehicle can lead to big fines, problems with insurance in case of an accident and, of course, the rejection of the vehicle at the review stage.
On the other hand, it is not necessary to homologate your vehicle if your campervan layout is not definitive but comprises of just mobile equipment, i.e. with furniture and accessories that can be easily removed in a reasonable amount of time (more details later).
IS IT POSSIBLE TO HOMOLOGATE A CAMPER VAN IN ITALY?
The answer is: Nyes!
You can, but it really is a pain in the ass…. bureaucratic undertaking 😉
Let me explain. In Italy at the moment it is theoretically possible but practically impossible to homologate a Do-It-Yourself camper van (you will find more details in the in-depth study at the end of this chapter).
Nevertheless, there are four possible ways to get around the bureaucratic wall and legally travel with a self-converted campervan in Italy. These are:
Four ways to travel legally with a Self-converted Campervan in Italy
1) Buy a vehicle/van that has already been converted to a “camper” (homologated camper/caravan on the vehicle registration paper), empty it, and refurbish it as you like (respecting any technical specifications registered in the vehicle booklet under “special notes”).
2) Convert it using a mobile setup (no permanent changes, all setup secured with straps and joints). In this case, you would technically be transporting the furniture in a cargo van, so traveling would be legal.
3) Buy the vehicle in Germany, insure it for export and request a German export plate with a red stripe, convert it into a campervan before the plate expires, go back to Germany to homologate it with Tuv/Dekra, and then bring it back to Italy to nationalize it.
4) Rely on a specialized agency (eg. NonSoloCamper.it, Omologare.it, etc.) that will erase the vehicle from the Italian registration, re-register it in Germany, pass the homologation process and re-register it in Italy. Here the cost increases (2000-4000 euros), but it’s a sweet price to pay to avoid all the bureaucratic odyssey.
Although Italian law is definitely not ready nor accommodating for the increasingly widespread phenomenon of DIY van conversion to campervan, we have seen that there are ways to circumvent the law legally.
I won’t go into the details of each of the four routes in this article as the homologation/legal approval is not the main point of this article. However, I leave you here below two much more in-depth articles that might help you understand the bureaucratic dynamics to homologate a campervan in Italy and how to navigate them to achieve your goal 🙂
READ: DEEPENING 3
HOW TO HOMOLOGATE A DIY CAMPERVAN IN ITALY
A step-by-step guide to explain to you in detail all the steps to pursue the ways to approve a DIY campervan in Italy legally.
Is the bureaucratic process for approval discouraging you before even starting? I know how it feels too, but fear not!
With this in-depth article we will go through everything there is to know about homologation in Italy and Germany. I’m not saying the process is always short or easy, but with the right information I’m sure you can save a lot of your precious time to focus more on crafting your dream on wheels 🙂
Article Index
1. How Homologation works in Italy
2. Two Ways to (Legally) circumvent the Rules in Italy
READ: DEEPENING 4
HOW TO NATIONALIZE A SELF-CONVERTED CAMPERVAN
Practical Guide to the TUV Homologation in Germany (with contact!) and Italian import/nationalization.
If you have chosen to buy a German vehicle, convert it with a permanent setup and homologate it as a motorhome in Germany before importing it back to Italy, this article is for you!
In this article, I tell you about my experience and explain step by step all the paperwork and bureaucratic practices necessary to complete each step.
Article Index
1. Preliminary remarks: Permanent Conversion and German vehicle
2. Approval in Germany: With whom, where, and how?
3. Nationalizing in Italy (pt.1): the Revenue Agency
Once you’ve got the most suitable vehicle for your project and you’ve decided which road you want to take to get it legally homologated and drive it, it ‘s finally time for the most fun: Do-it-yourself camper!
From the next chapter on, I’m going to walk you through step by step how to truck a van from start to finish😀 Come on!
3. INSTALL WINDOWS ON
A DO-IT-YOURSELF CAMPER

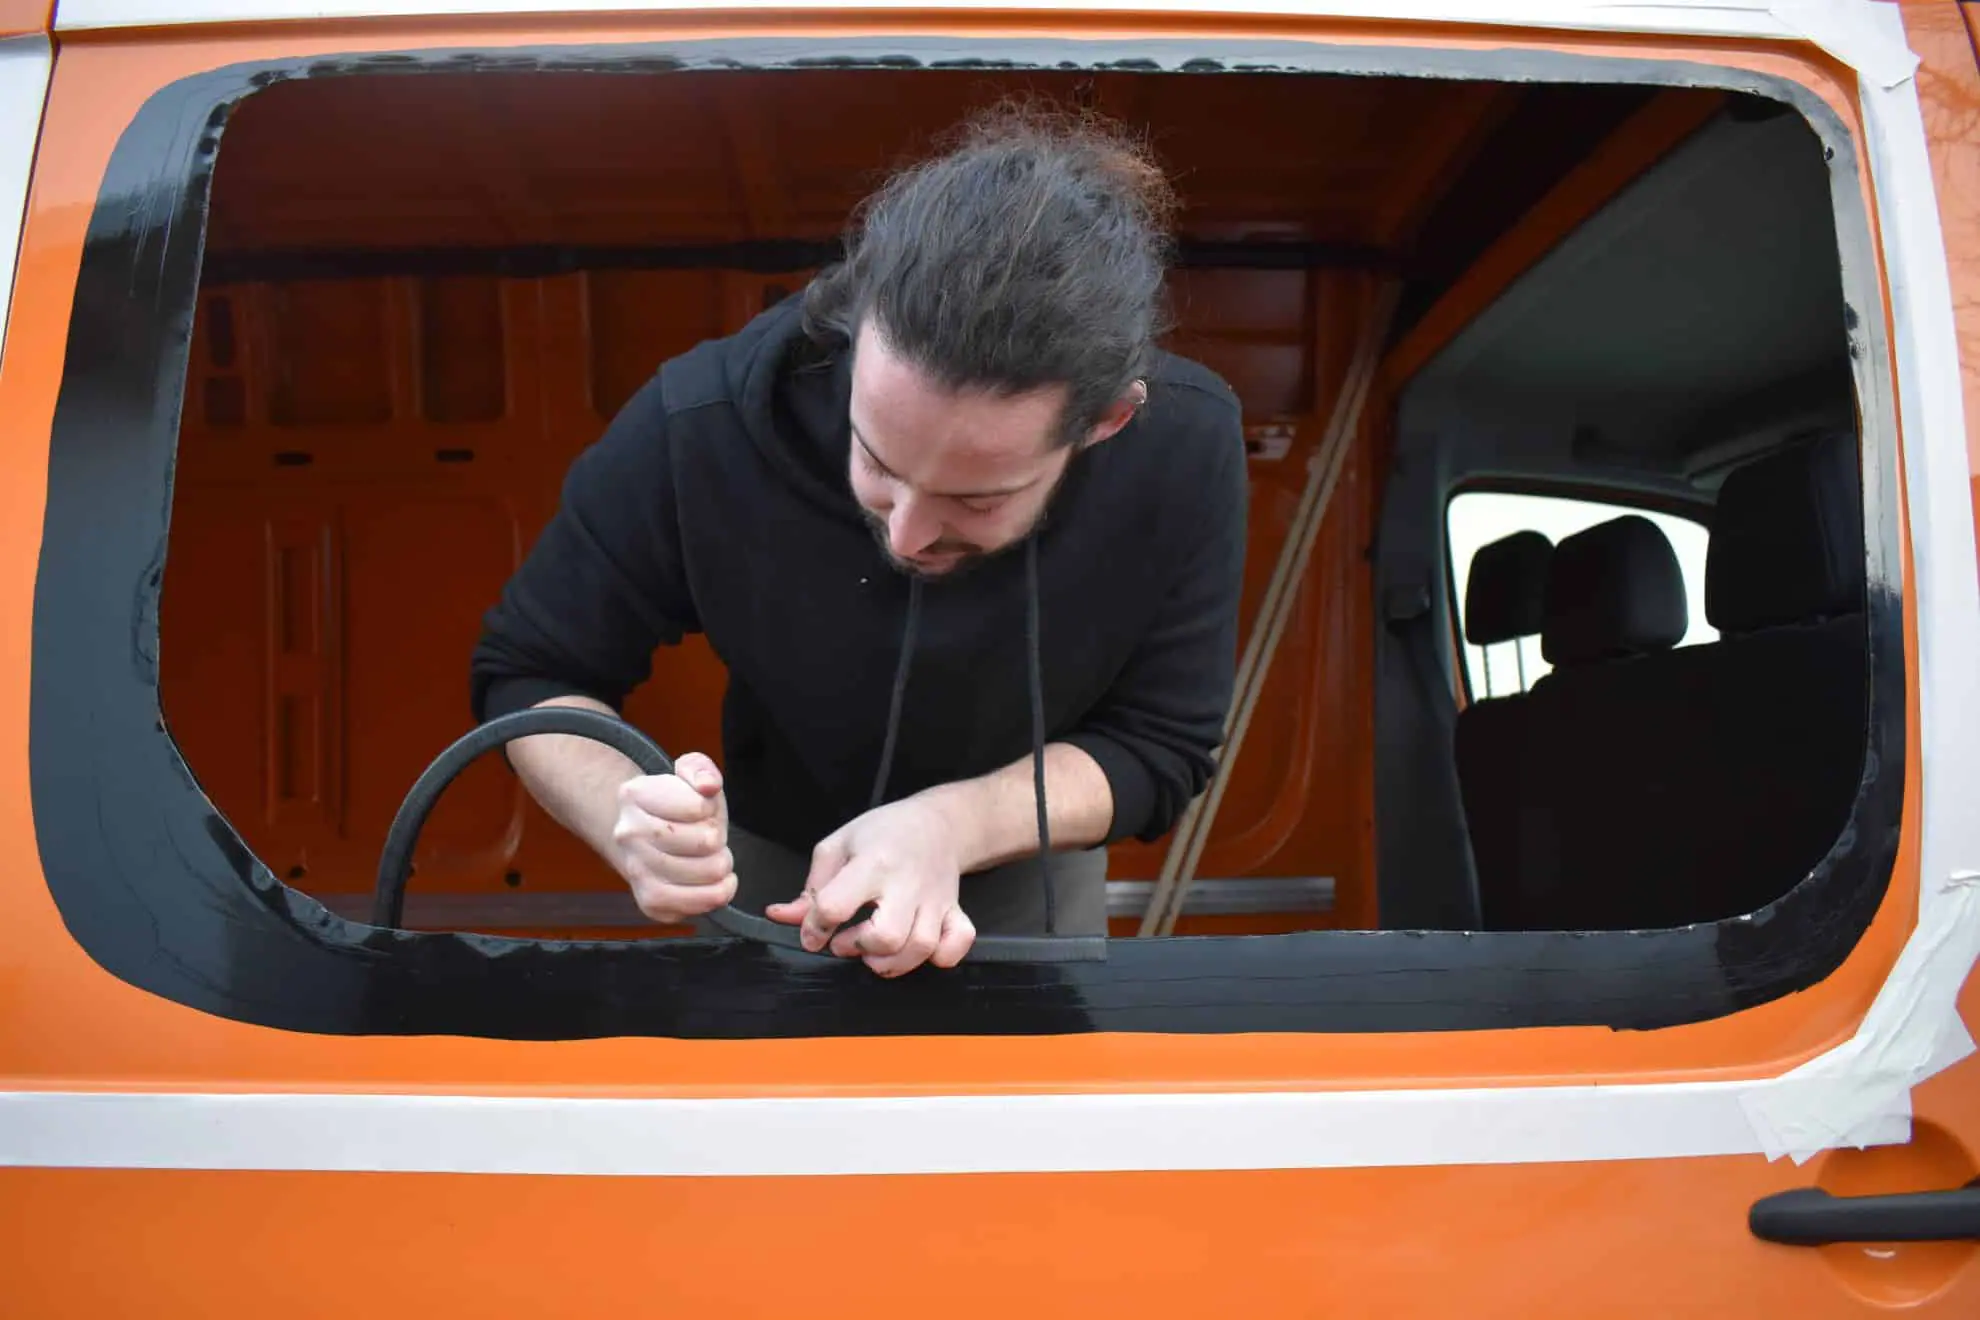
One of the first things you need to do in a van to campervan conversion project, is to make sure you have the windows you need and, if not, cut holes and install new ones.
Cutting and installing windows in your new van might be indimidating and may seem something dangerous and difficult too.
After having done it though (without any previous experience), I can tell you that it’s not as impossible or hard as it seems, and that with a little attention and the right tools it can be done by anyone inclined to learn about DIY.
WHY YOU NEED WINDOWS: VENTILATION AND TEMPERATURE CONTROL
The windows of your van, are your eyes on the outside world when you’re inside, but they also play an essential role in providing proper ventilation and regulating the humidity and temperature of your home on wheels.
Here are the main advantages of installing windows in your van conversion:

NATURAL LIGHT AND OUTWARD VIEW
Every window in a van is an extra view of the outside world. In addition, having natural light inside the living space undoubtedly helps our bodies to maintain a natural biological rhythm.

VENTILATION
Combined with a ceiling fan, a strategically placed window can help to create a pleasant flow of fresh air into the van, remove kitchen odors, carbon monoxide concentration and stale air.

HUMIDITY CONTROL
In addition to removing stale air and changing it with fresh air, a window is one of the essential accessories (along with ceiling fan and heater) to remove moisture from the interior of the van and prevent condensation (which could lead to mold and/or rust problems in the long run).

TEMPERATURE CONTROL
In the absence of a ceiling fan or air conditioner, a window is the best solution for controlling the interior temperature of a van. In fact, with a window you can cool (in winter) or heat (in summer) the living space if necessary, without wasting energy.
WHAT TYPES OF RV WINDOWS ARE THERE?
Most RV windows are designed for specific van models: for example, windows designed for the doors of a VW Crafter or a Mercedes Sprinter will hardly fit on a Fiat Ducato; exactly as those of a Fiat Ducato will probably not fit on a Ford Transit, etc.
Keeping that in mind, the TYPES of windows found on the market for camper vans generally are almost always of the following types:

SLIDING DOOR WINDOW
Custom sliding door opening windows, each make/model of vehicle requires a specially shaped window.

BACK DOOR WINDOWS
Non-opening windows for rear posts. As with the above, each vehicle model requires specific windows.

COMPASS WINDOWS
Generic windows suitable for all types of vehicles. Compass opening allows you to keep them open even in rainy weather.

SLIDING WINDOWS
Generic sliding windows, suitable for all types of vehicles. Ideal in the bedroom or kitchen area for a view of the outdoors.

CEILING SKYLIGHTS
More difficult to install but definitely impressive. Ideal for “stealth” camping, and being inconspicuous.
HOW MANY WINDOWS DO YOU NEED IN YOUR CAMPERVAN?
The number of windows to install on your van should depend a lot on your preferences: having extra windows certainly has advantages (ventilation, humidity control, view, natural light, etc.), but obviously, as we will see better later, too many windows make the vehicle difficult to thermally insulate and thus less suitable for extreme temperatures.
Here are some insights to keep in mind:
- If you need to choose, it’s preferable to a side opening window on the sliding door, rather than the windows on the rear doors (although these are very aesthetic and in the common imagination there is the idea of waking up looking out, there are very few times when you do, usually end up obscuring them)
- If you build a bathroom/shower room, install a small window in the bathroom (we forgot about it and it’s probably our main regret – it greatly helps to control odors and humidity)
- Don’t forget to consider the location of the ceiling fan (if you will be installing one – super recommended): a window should be placed on the opposite side of the van to create a good airflow
WHERE TO FIND WINDOWS FOR YOUR DIY CAMPER?

Searching the internet you can find windows of all kinds and for every vehicle.
Below you find links to great window-selling sites (which I also used) and some of the best RV windows of each kind:
Windows for VW Transporter, VW Crafter, Mercedes Sprinter, Opel Vivaro
- Camperglass.uk
(I ordered my three windows from them – UK based company)
Windows for Fiat Ducato
Best Sliding Windows
- Waeco Dometic Seitz S
(with mosquito net + blackout roller blinds)
Best Compass Windows
Best Camper Skylights
- Dometic Mini Heki Smart
(small) - Dometic Heki 2
(large)
General Windows for Camper
Once you’ll have chosen the right windows for you, it‘s goint to be time to install them.
To find out how to do it DIY, I wrote a detailed step-by-step guide that you can find below in Deepening 5 : )
READ: DEEPENING 5
HOW TO INSTALL WINDOWS ON YOUR VAN - DIY GUIDE
Discover all the steps to add windows on your van: cutting steel, bonding, finishing and tricks to get the job neatly done!
If you never even thought you’d find yourself installing DIY windows on a vehicle and you have no idea where to put your hands: fear not, this is the article for you!
In this article, you will find a detailed guide (with photos and videos) with all the information you need to install new windows on your van entirely by yourself!
Article Index
2. Buying the Right Windows for Your Vehicle
4. Preparing the hole before Applying Windows
Once you’ll have added to your van all the windows you need, it will be time to plan in detail the future layout of your project.
How to do it, we’ll see in the next chapter 🙂
4. PLANNING THE VAN LAYOUT

Before you start building anything, it’s important to think, dream, and put down on paper the project you have in your head and all the elements you want to include in your D-i-Y Campervan.
After all, a well-defined layout will be your northern star throughout the conversion process, and visualizing the end goal will significantly help you to plan the steps to follow.
Obviously, the details of your project will change dozens (or hundreds!) of times during your van conversion (depending on the products you will find, the problems you will encounter, the solutions and ideas that you will adopt along the way, etc.), but for now, the important thing is to create at least a general mapping of your dream on wheels 😉
In this chapter, I hope you will find some food for thought and inspiration to create YOUR very own camper van project.
DESIGNING THE RIGHT LAYOUT FOR YOU: THE ESSENTIAL AND OPTIONAL ELEMENTS TO CONSIDER

Depending on your vehicle’s size (small, medium, or large), your budget, and the magnitude of your van conversion idea (low-cost, standard, premium, luxury) you’re probably considering putting more or fewer items in your future campervan.
In this section, we make a list of the elements and accessories you should probably consider when designing the interior composition of your van conversion setup.
Essential Elements (the bare minimum)
Without these four elements, we wouldn’t even be talking about RVing: they are the essential foundation of any tiny house on wheels.
- Bed: A place to sleep (and dream!) is the first thing to think about in any RV!
- Stove: it doesn’t have to be a full kitchen (it can be!), but at least a small portable gas stove is something that can’t be missed in any camper project!
- Table: A place where you can eat, work or read (you won’t say?! 😉 )
- Stowage Space: Place to load your own clothes and travel luggage
Basic Optional Elements (found in almost every “campervan”)
- Fridge
- Thermal Insulation
- Freshwater Tank
- Greywater Tank
- Batteries and Charging Systems
- 12V DC Electrical System
- Ceiling Fan
Premium Optional Elements (for the most ambitious projects)
- WC/Bathroom
- Black Water Tank
- Shower
- Sink and Water System
- Kitchen Top
- Wall cabinets
- 230C AC Inverter and Electrical System
- Solar Panels
- Heating System
- Swivel Seats
- Awning
- TV & Satellite
- Bike-Carrier
- etc.
Throughout this article, we’ll cover all of these points (and more!) in detail. At the moment, to help you design the layout of your van, I recommend you to start already thinking about what elements you would like to include in your design, take measurements, and check that everything fits in your ideal layout.
At this stage it’s not necessary to have a drawing to the centimeter, however, it is essential to be sure that everything is in its place. Better to double-proof the spaces now, while your van is still a white canva, rather than discover it when it will be too late to change the project!
3D DRAWING SOFTWARES
Paper, Pen, and Patience can definitely take you anywhere.
That said, when the project to camper your van starts to get a little bigger and more ambitious, they can also drive you crazy and cost you a lot of valuable time!
Luckily, we live in an age where technology can come to the rescue and help us plan our entire van conversion down to the millimeter (and twist it quickly when necessary, with ease!).
Below I want to show you two programs that can help you plan the most complex van layouts:

Rhinoceros
A very advanced 2D and 3D editing and drawing program. It takes a while to figure out how to use it, but the rendering engine is very strong and you can build anything in 3D with pinpoint accuracy. License prices are very high, but you can also find free versions of the program to download on the internet.

Rhinoceros
A beginner’s and Open Source tool for 3D modeling. Of all the programs of this kind, SketchUp is probably the easiest to learn and use starting with no basis in CAD. Using Sketchup is free for personal projects, just sign up and get started.
REMOVABLE OR PERMANENT SET-UP?
Before you start thinking about the whole layout: where to put the bathroom, how big should the bed be, the thickness of walls and insulation, etc. etc., etc… it is important first of all to notice the elephant in the room: removable or permanent setup?
Creating a mobile/removable van conversion setup generally costs less, but requires a great deal of creativity and imagination to lock everything in place.
The main advantage of such a setup, is that it doesn’t require you to go through the whole approval process in the EU (you save time and money!). The disadvantage: in some choices, since you can’t fix stuff firmly with screws, you are more limited. In fact, in a mobile set-up, almost everything will have to be interlocking and/or secured with straps, so that it can be removed in a “reasonable” amount of time (a couple of hours at most).
On the other hand, creating a fixed/permanent layout allows for more building flexibility and design creativity, as there are fewer logistical restrictions and everything can still be firmly attached to the van’s body with glue and screws.
Important in this case is to verify with your future vehicle inspector (or national DMV) who will proceed to test the vehicle, that all their guidelines (especially related to safety) are respected (if you already know where you will homologate the van, my advice is to contacts early to make sure you meet all guidelines during construction!).
Depending on the type of setup you choose, you will need to think about your layout differently.
In this section I hope to have given you some food for thought; when you are ready to go on, let’s start getting our hands dirty with our van conversion into a campervan 🙂
5. VENTILATION AND FAN

WHY IS GOOD VENTILATION IN AN RV ESSENTIAL?
To make a small environment (such as the interior of a motorhome) liveable and enjoyable for long periods of time, necessarily requires some tricks. One of the main ones, without a shroud of doubt, is good ventilation!
Keeping our small home on wheels ventilated in fact, is important for several reasons:
- eliminate moisture and prevent condensation (the number one enemy of your metallic vehicle!)
- eliminate odors and stale air
- bring in fresh air and create a pleasant breeze in the summer months
To ventilate your van, there are several solutions, more or less effective and more or less economical.
Window installation, we’ve seen it before. Now let’s take a look at all the others, one by one!
WIND/RAIN DEFLECTORS (BUDGET CHOICE)

The deflectors are accessories that are fixed directly above the windows of the vehicle, and that allows the partial opening of the windows, protecting them from rain, snow, and wind.
Simple to install, they require no maintenance nor power, but they contribute solidly to preventing condensation in the living cell (and masking a slight opening of the windows at night).
See Models:
Deflectors for Mercedes Sprinter/Crafter
Deflectors for Fiat Ducato/Boxer
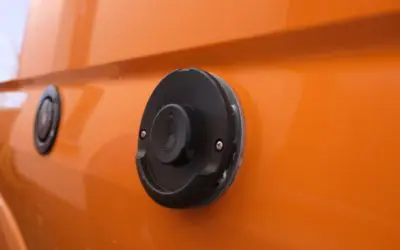
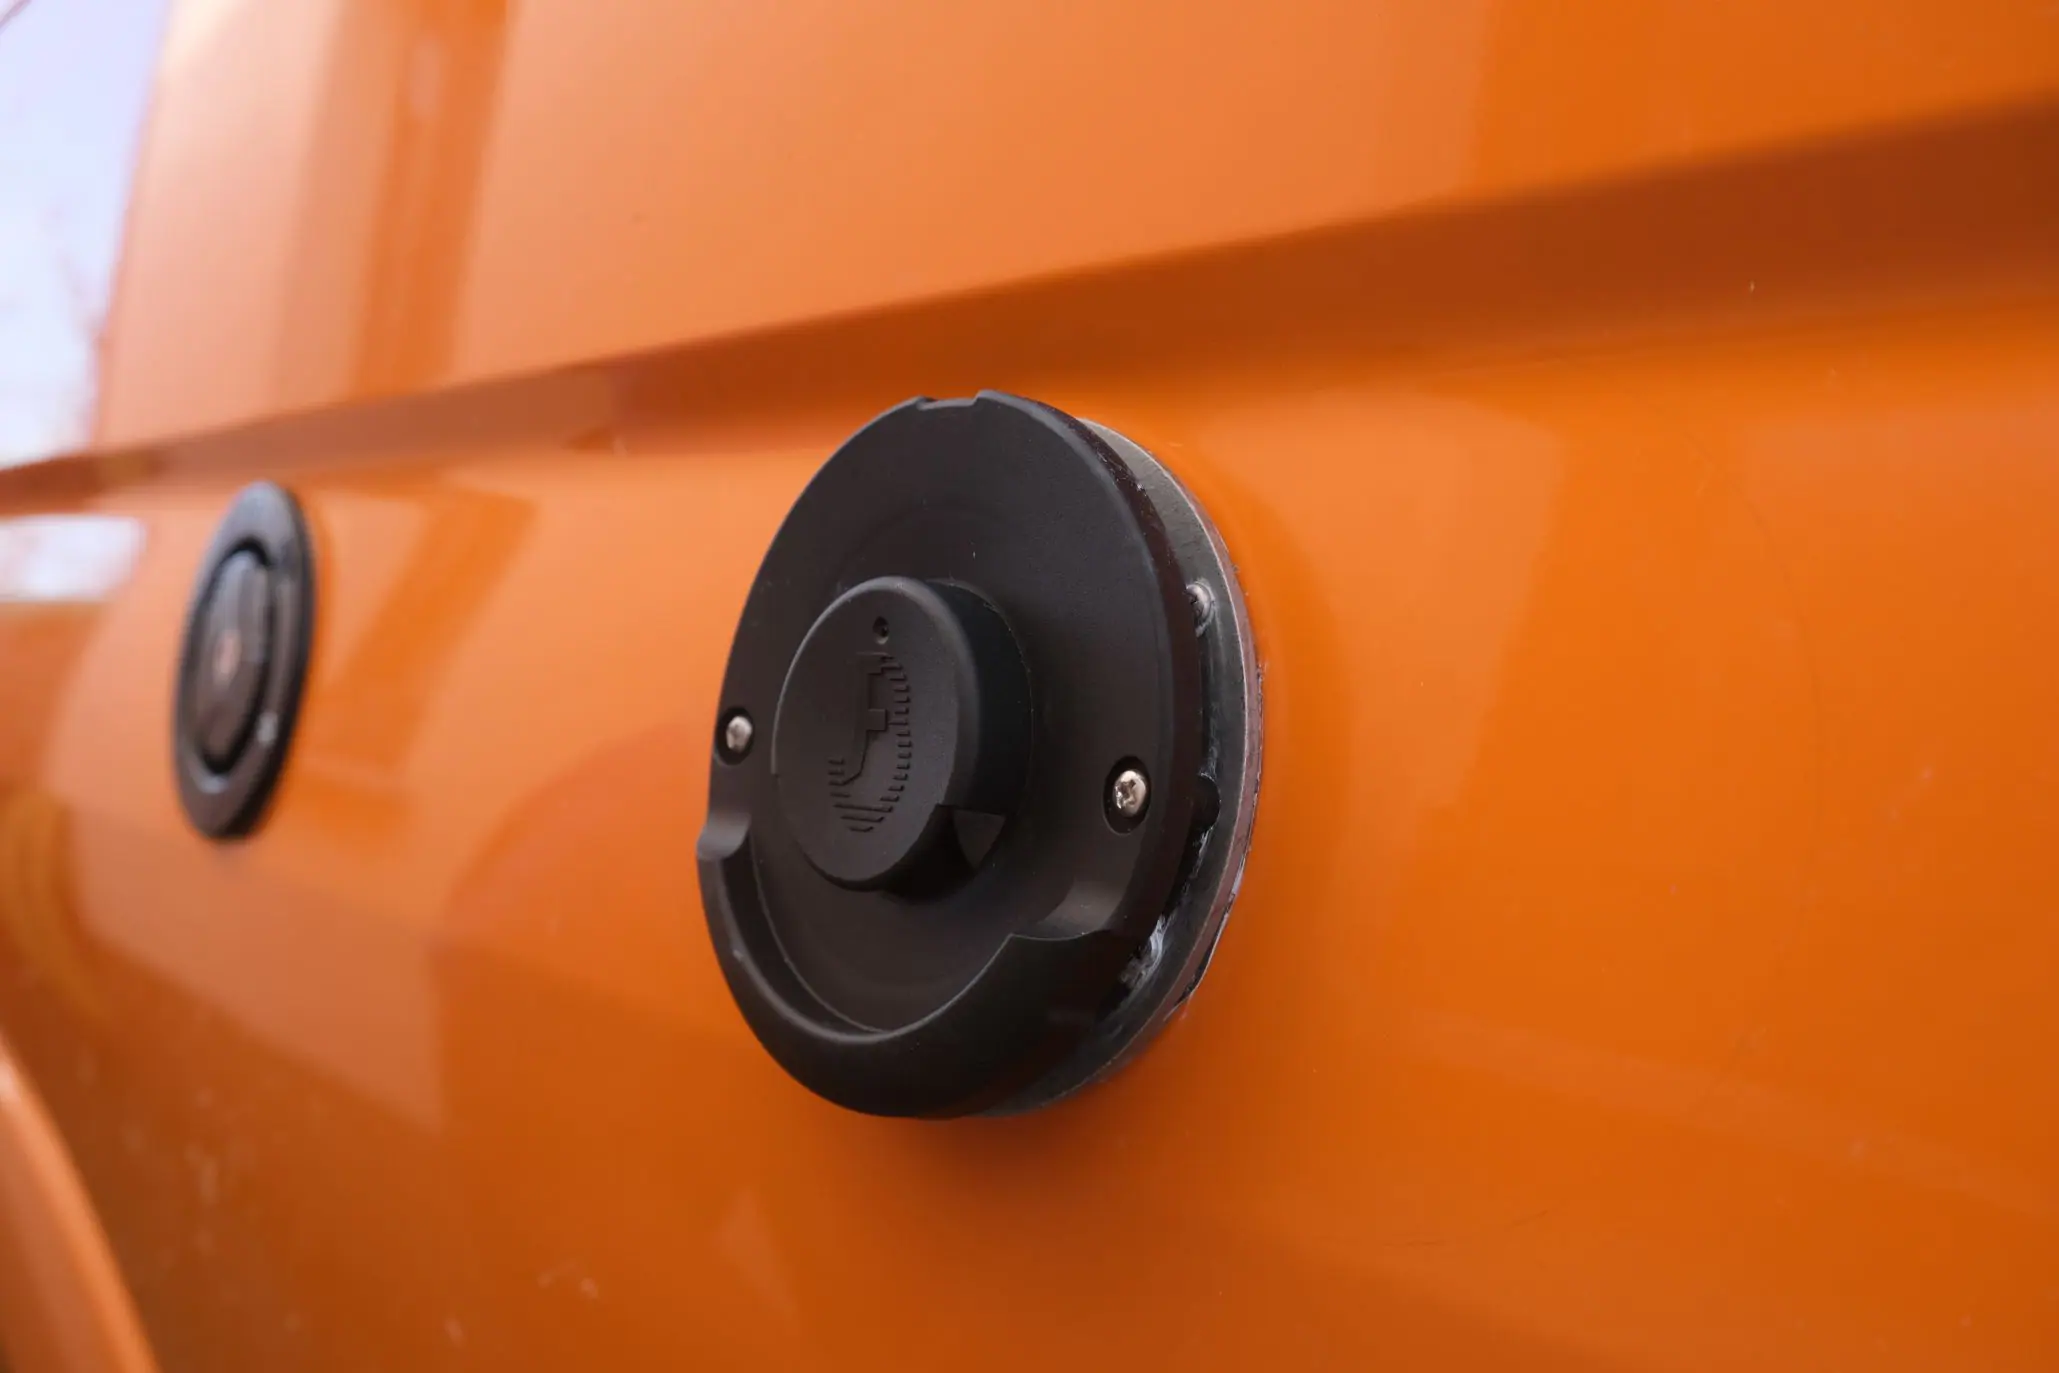
AIR INTAKES (PERMANENT LOW-COST SOLUTION)

The air intakes (or ventilation grilles) are solutions (really very cheap) to install on the walls of your van, which let the air pass both inward and outward.
It’s important to note that since they are permanent solutions, grates that are too large could compromise the insulation of your van (if you’ve decided to thermally insulate it!).
Normally, the vents are rainproof and equipped with an internal mosquito net to prevent insects from sneaking inside your vehicle.
I installed a 7cm diameter one next to my toilet which, along with a 12V fan, helps eliminate odors 24 hours a day.
If you are interested in knowing how to install an air intake in your van, I suggest you read the article
Inlet Holes for the Services of Your Van – coming soon-
.
MANUAL CEILING SKYLIGHT

There are situations in which opening a window is not always convenient or possible: maybe the parking spot is not quiet (like in a city/country), maybe it feels unsafe, or maybe we simply want to conceal our presence and not give the idea of staying overnight in a certain place.
In all these cases, a roof-mounted skylight can be an economical solution to maintain good ventilation inside the vehicle while being stealthy!
See the Best Ceiling Portholes:
Flame Vent Porthole (Low-Cost Quality)
Dometic Mini Heki (with blackout blind)
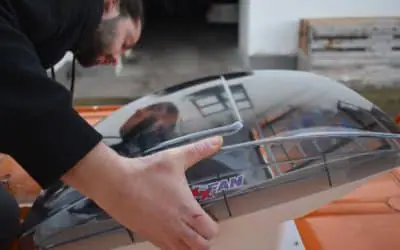
ELECTRIC CEILING FAN

Ceiling fans are the most expensive, but also the most effective and popular solution for ventilating large camper vans.
Depending on the model, these ceiling fans can have different power levels, suck outside air into the van or reverse the flow by bringing stale air outside, have a cover that allows use even during rain, be controlled by remote control etc. …
Best Ceiling Fans:
Maxxfan Deluxe (premium choice, recommended!)
READ: DEEPENING 6
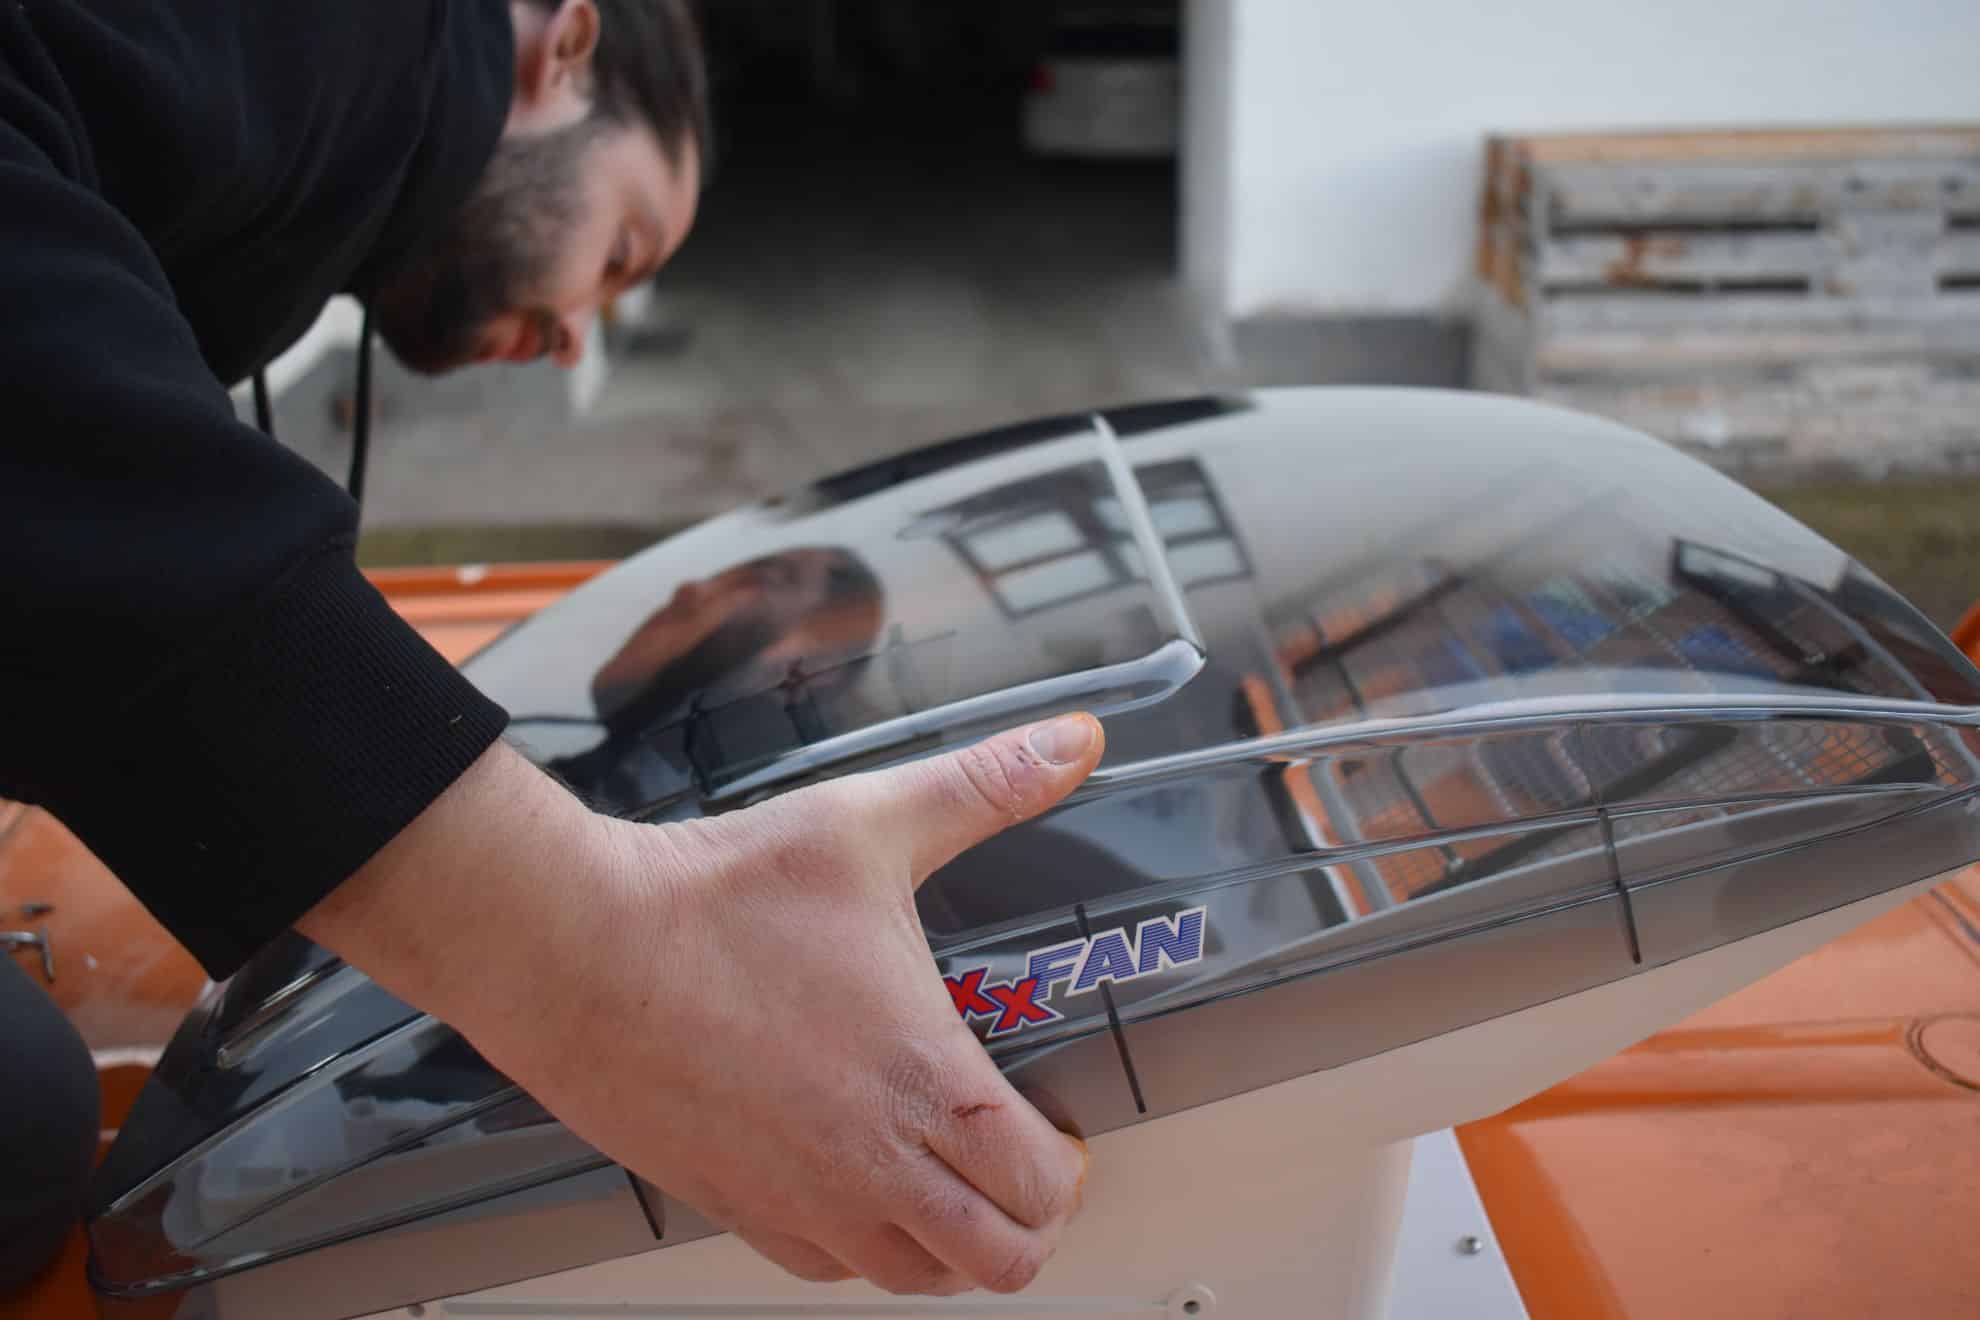
STEP-BY-STEP GUIDE: HOW TO INSTALL A MAXXFAN ON THE ROOF OF YOUR VAN
Discover all the steps (and tricks!) to easily install a Maxxfan vent on the roof of your future campervan with this comprehensive guide (includes photos and video).
Installing a Do-It-Yourself Ceiling Fan is definitely one of the most stressful parts of converting a van into a campervan – you eventually have to cut a hole in the roof of your new vehicle!
Don’t worry too much though, in this in-depth article you will find a step-by-step guide (with photos and videos!) that will help you to achieve this small-big step in the path toward your dream van! 🙂
Article Index
1. Choosing the Right Fan for Your Needs
3. Cutting the Hole for the Fan
6. ELECTRICAL SYSTEM

The electrical system of a camper van is probably one of the most complicated projects to do Do-It-Yourself if you don’t have prior knowledge of electricity and something that scares many people.
Having said that, if you are not afraid to learn, in this section and in the IN-DEPTH Maxi-Guides you will find all the information you need to wire the electrical system of your motorhome in total safety.
I did it from scratch, banged my head on it, asked and requested information when uncertain, and I wrote these guides to save you days of research and existential doubts 🙂 Let’s get started!
BATTERIES: UNDERSTANDING YOUR NEEDS

The service batteries of a camper van are the heart of your electrical system and the source that will power all your electrical equipment.
The batteries can be of 4 different types:
- Lead-Acid (fragile, short-lived, can explode: not recommended)
- GEL (good for extreme climates, but not long-lasting)
- AGM (the solution to save money, quite bulky/heavy, average longevity)
- Deep Cycle LifePo4 Lithium batteries (the best batteries available at the moment, fully exploitable, long-lived, obviously come with a higher price-tag)
Normally, all RV service batteries operate on a direct 12V current.
Battery capacity, on the other hand, is measured in Ah (Ampere/Hour).
For GEL and AGM batteries, it is recommended to use only half of the nominal ampere/hours (so if the battery is 100ah, it is possible to use only 50ah), otherwise, the longevity of the battery is lost. LifePO4 lithium batteries, on the other hand, can be safely drained down to 90 percent of rated capacity without risking damage.
How many AHs do you need to meet your needs?
The first step to creating an electrical system suitable for your van conversion project and tailored to you is to understand what electrical equipment you will install and assume an average diary use (in minutes or hours). To do this, in the
Maxi-Guide to the Electrical System with Scheme (deepening 8), you will find practical advice for choosing the batteries and an Excel table that will help you to understand in detail what kind of battery capacity you need.
Once you have figured out how many AH of batteries you need, it will be time to move on to building the various circuits of the electrical system: charging (to charge the batteries) and consumption (to power your equipment).
CHARGING SYSTEMS: SOLAR, ALTERNATOR AND SHORE POWER

To recharge the batteries of a camper van, there are 3 methods:
- With Solar Energy (collected by the solar panels on the roof of the van, this can be converted to 12V DC by a Charge Controller and then transferred to the batteries)
- With Kinetic Energy (the engine sets the vehicle in motion, part of the energy produced is harvested by the alternator which transmits it to the starter battery and transmitted to the service batteries through a Battery-2-Battery Charger or an Isolator)
- With Shore Power (220V electricity is taken from a power plug, a battery charger converts it to 12V electricity and sends it to the battery bank)
Depending on your project and the intended use of your camper van, you will have to choose which charging method you want to install: one, two, or all three. Of course, every charging method you install is one more opportunity you have to recharge your batteries!
Recharging from shore power is convenient if you plan to spend time in campings often. solar panels are suitable if you plan to spend a lot of time in free-standing while recharging from the alternator is very convenient for road trips or routes where you drive a lot.
Suppose you are interested in knowing in detail each charging circuit and its components. In that case, I suggest you once again refer to the article Maxi-Guide with Electrical System Diagram (it really is a MAXI-Guide😉 ).
READ: DEEPENING 7
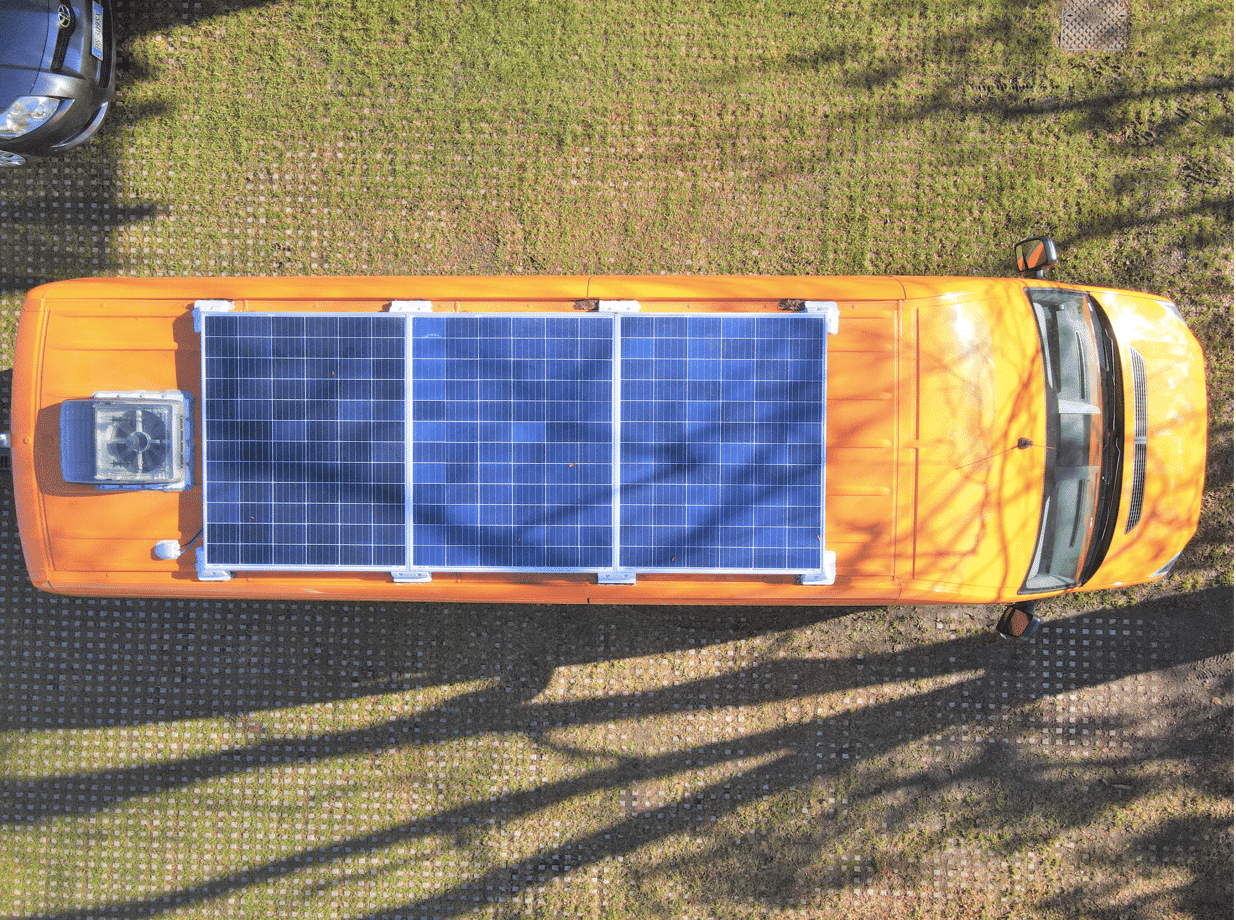
HOW TO CHOOSE AND INSTALL YOUR SOLAR PANELS
How many Watts of Solar do you need on your Van? Mono or Polycrsristalline? How to fix them on your van roof? Here you find all the answers to those questions and more!
In recent years, solar technology has made a great leap forward and solar panels are becoming lighter and better performing every year.
In this in-depth article, you’ll find a complete guide to choosing, installing and wiring solar panels for a camper van (with detailed photos and videos of every step of the installation!).
Article Index
1. How many watts of solar power do you need?
2. What solar panels exist and which are the most suitable for a motorhome
3. How to attach the panels to the roof of your camper van
4. How to connect solar panels and what cables to choose
12V DC AND 220 AC ELECTRICITY: WHAT’S THE DIFFERENCE?

Many RV accessories (e.g. LED lights, refrigerators, water pumps, fans, USB sockets, etc.) run on 12V and, since this is equal to the operating voltage of the batteries, they can be powered directly from the batteries (of course, after passing through a
fuse box).
The more energy-hungry appliances (those that we commonly use at home, such as kettles, chargers of PC / cameras, hair dryers, induction hob, etc..) normally work with AC 220V (or AC 110 in the USA), which is that same energy that we have in the plugs at home).
For this, it is necessary to transform the energy stored in the batteries (12V) into AC usable by these devices (220V): this transformation is entrusted to an apparatus called an inverter.
For more spartan van conversion projects, 12V is more than enough to obtain the minimum necessary comforts (fridge power, lights, USB charging…). For more ambitious projects, an inverter is almost a must.
Depending on the consumption of 220V that you plan, of course, you will have to choose an inverter of the appropriate power (there are inverters of various sizes, read the Deepening 8 to understand which might be the most suitable for your needs!).
If you want to get into the electrical system details, here below you will find two “tomes” of knowledge, in which you will find answers to all (ALL!) your questions (and if you don’t find it, you can always write me a message 😉 ).
READ: DEEPENING 8
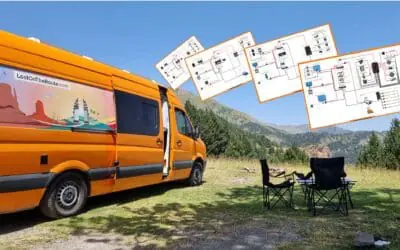
MEGA-GUIDE TO YOUR ELECTRICAL SYSTEM WITH WIRING SCHEMES
In this guide you will find everything (but truly EVERYTHING!) you need to know to plan, build and wire a customized electrical system for your van conversion.
Are you converting a van into a campervan and you never touched an electrical wire before? Or do you want to implement some modifications to your RV and you are not sure where to put your hands?
Welcome to the MEGA-Guide to the electrical system of a Campervan. Written with a neophyte-approach in mind, this in-depth article is a bible for anyone who wants to try wiring a campervan DIY for the first time 🙂
Article Index
1. Understanding the Electrical System of a Motorhome (Simplified Diagram)
2. Understanding Electricity: Power (Watt), Voltage (V) and Intensity (A)
3. How much energy do you need? Calculate your Energy Need
4. Batteries for Camper: Types, Features and Which to Choose
5. How to connect Batteries (in series or parallel)
6. Recharge the Batteries of your Motorhome Method 1: Solar Panels
7. Recharge the Batteries of your Motorhome Method 2: The Alternator
8. Recharge the Batteries of your Motorhome Method 3: Shore Power
9. Keeping Cables Ordered: What is a Bus Bar?
10. Fuses: What are they, which ones to choose and how to install them?
11. How to Choose the Right Cables for Your Circuits
12. How to Install 12V DC Circuits in Your Van (Cables, Fuses, Multiple Devices and Switches)
13. How to choose an Inverter for your Camper
14. How to Install Electrical Outlets and AC Circuits
15. Checking Battery Charging with SmartShunt and Monitor
16. Conclusion: Detailed Diagram of the Electrical System of a Camper/Van Camper
BONUS: Video explanation of the electrical system of my camper van (IT – english subtitles)
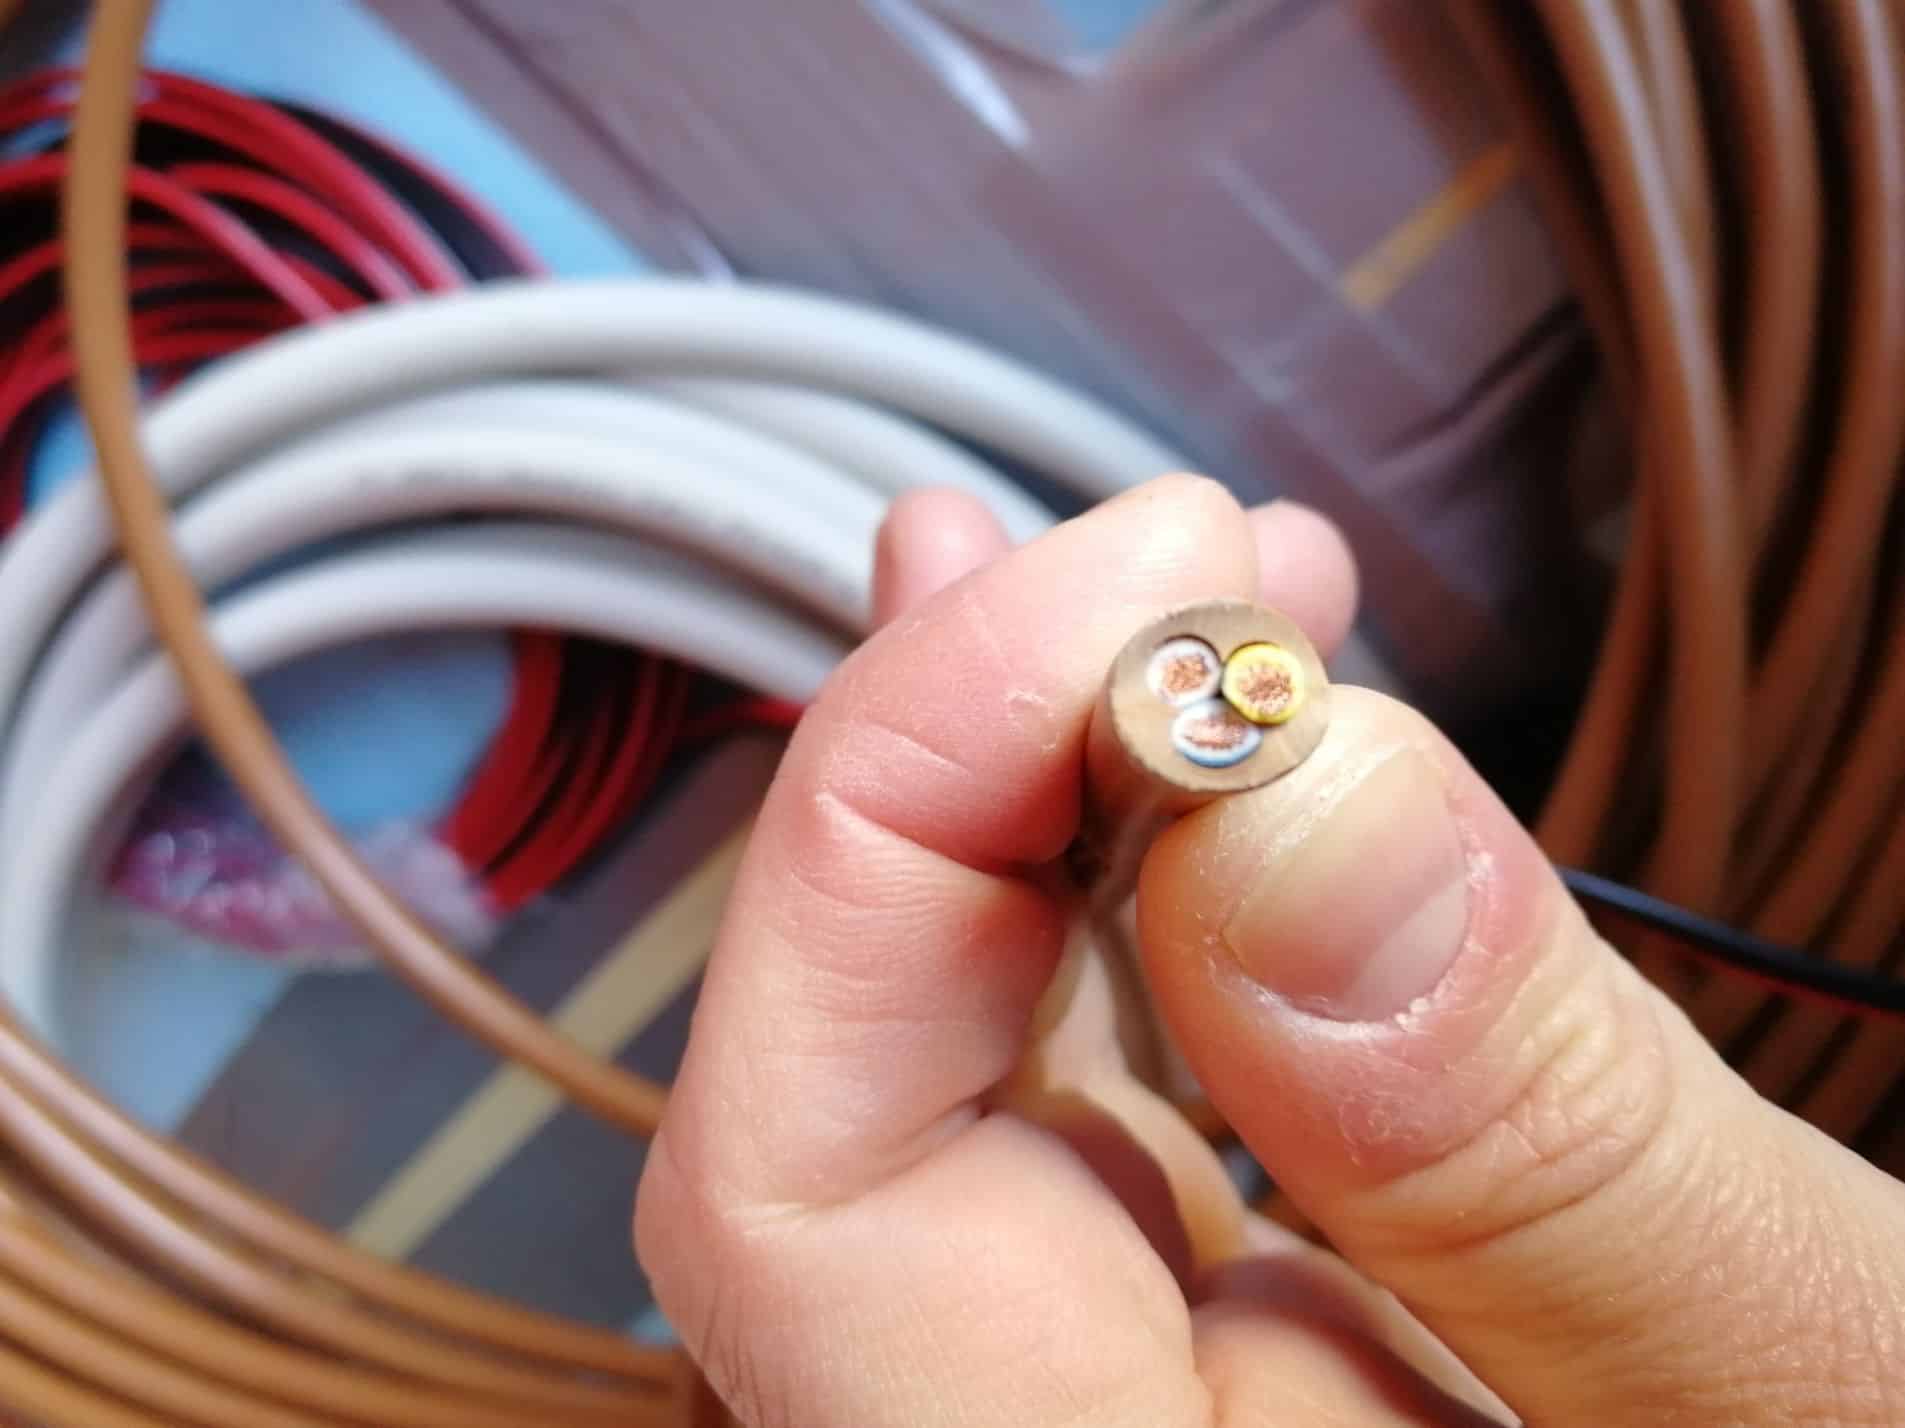
READ: DEEPENING 9
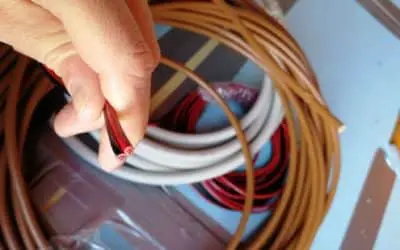
DIY VAN CONVERSION: HOW TO CONNECT THE CABLES WITHOUT MISTAKES
Are you wondering how to physically “connect” your cables to your appliances?How to Strip, Crimp, Joint, Fix, Protect your cables? You are in the right place, get ready to learn!
If the previous one was a more theoretical guide to choose and connect all the components of your electrical system, in this in-depth study you will find practical advice to “get your hands on” and connect the ends of the cables.
Article Index
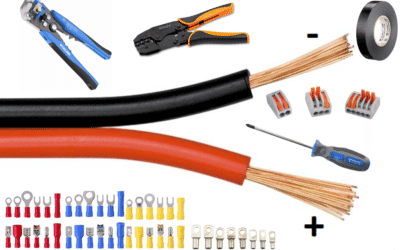
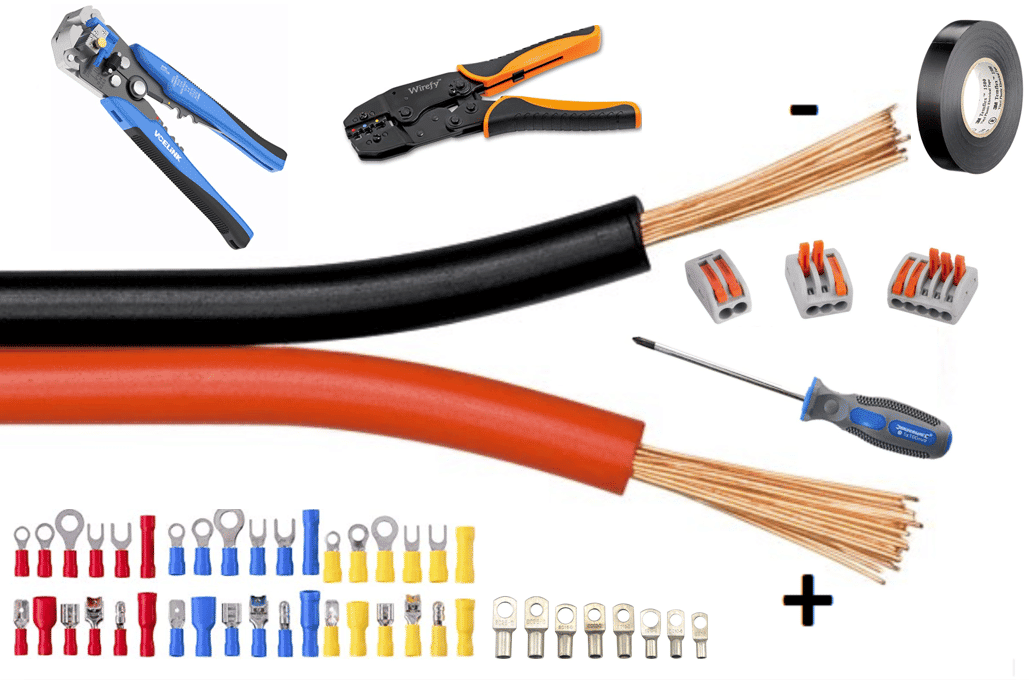
1. Tools for Wiring Electric Cables
2. Preparing the Van: Layout and Conduits
3. Sliding Cables into Tubes and Keep Order
4. How to Strip Wire: Wire Stripper and Cutter
5. All Methods for “Soldering” Multiple Electrical Wires Together
6. Strip and Crimp: How to do it?
7. Useful (and Practical!) Tips for Wiring Your Electrical System
LIGHTING AND LIGHTS
When converting a van into a campervan, one question that will surely pop into your mind is what lights make sense to mount.
I want to make your research easier: 12V LED lights.
The advantages of 12V LED are numerous, making this type of light a really easy and straightforward choice:
- easy to install, they attach directly to the battery and do not require an inverter
- the power consumption is minimal (from 1Watt for the spotlights, to 10Watt for the largest lamps)
- LED bulbs have incredible longevity (even over 50,000 hours!)
- do not overheat or burn (no fire hazard!)
- there are so many shapes (strips, spotlights, bars, etc.) and colors
- They are products of excellent quality and come at a lower price, relatively cheap to buy
Below I want to leave you with 4 LED lamp ideas that you might want to include in your van (which I personally have used in mine and can recommend!).

12V ACEGOO LED SPOTLIGHTS
Dimmable spotlights easy to connect and install into the ceiling, with very minimal consumption (1W).

MULTICOLOR 12V LED STRIPES
LED strips that change color with remote control, ideal for under cabinets, ambient lights and inside cabinets.

12V WALL READING LIGHTS
Simple and Elegant Led Reading Lights. The consumption here is also minimal (3W).

CHRISTMAS LIGHTS WITH AAA BATTERIES
Small battery-operated LEDs, to give a homey touch to small corners or objects of your campervan.
7. WATER SYSTEM

Water is essential to ensure the high livability of your RV and, of course, to take care of your hygiene.
In this chapter, let’s briefly look together at the major components of an RV water system that, depending on your design, you may or may not necessarily need.
If you instead want to go into the details of a van hydraulic system and how to connect everything, here you find a practical guide that explains to you just that:
Complete Guide to the Water System + Diagrams to Connect Everything by Yourself
.
FRESH WATER AND TANKS

Freshwater is the starting point of any RV water system: in other words, “freshwater” means the clean (and generally drinkable) water you use for drinking, washing, and cooking.
Depending on the van conversion project you have in mind and the water use your plan, you may be interested in installing a larger or smaller freshwater tank or canister.
There are tanks of all types, shapes, and sizes: they start from a capacity of 5-10 liters (with portable tanks), up to over 300L (with fixed tanks). The standard tanks are rectangular in base, but there are really all kinds of shapes (
wheel arches tanks, inflatable tanks, trapezoidal tanks, etc.).
Obviously, the larger a tank is, the greater your autonomy in terms of water and the longer you can stay on the road without having to find a water supply.
The downsides of a large tank are size (water takes up a lot of space!) and weight (the more liters of water you carry, the greater the weight of the vehicle and therefore the more gasoline you consume).
Therefore, it’s important to find the right compromise to meet your water needs while minimizing fuel waste.
Where to Find Clear Water Tanks
- Camping-Life.it: italian site specialized in camping and camper materials. I ordered my clear water tank from them (and many other things!); very fast and professional
- Osculati.it:
another Italian site specializing in RV accessories, offer a large amount of tank, even non-standard sizes, and shapes
- Amazon.com:
on Amazon you can find everything but really everything; I have made 153 orders during my van conversion), and sometimes even good tank deals
- BoxDoccia.it: Italian site specialized in bathrooms, but also offers tanks for clear water of various sizes and at great prices
To help you in choosing the right tank for you and its characteristics (inspection cap, pre-threaded holes in the right places, color, shape, etc.) I suggest you read the in-depth article on the van hydraulic system. 🙂
GREY WATER
The “gray water” of an RV, also called “soapy water,” is the residual water that comes from the sink and, if there is one, the shower: it normally contains soaps, dishwashing detergents, shampoos, and perhaps food residue.
Since they cannot be emptied everywhere, but only in designated places (special service areas, toilets, sinks, or grates where soaps normally end up – e.g. at a carwash – ), they must be collected in a special tank: the gray water tank.
The tank of gray water is generally smaller than that of clear water (because the opportunities for discharge are usually greater than those of loading) and, even in this case, can vary in size and shape from a few liters up to over a hundred.
To save space inside the van (always invaluable), it is sometimes also possible to find custom tanks to be fixed under the van floor (I did, ordering a tank+kit from CakTanks UK). Going this route, you have to be careful in winter when temperatures go below zero to prevent pipes and tanks from freezing completely (perhaps using an anti-freeze!).

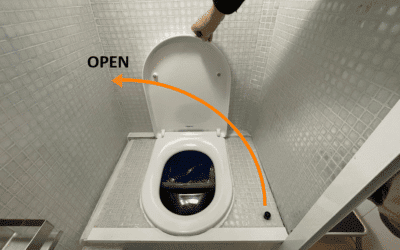
BLACKWATER
The “blackwaters” of a van or RV, are the wastewater from the toilet (in case you choose to install a Chemical toilet).
Most Chemical toilets have their self-contained tank (the “cistern”) that simply detaches and empties manually; while some more elaborate solutions include an automated faucet that drains from the bottom of the van.
Blackwaters generally smell HORRIBLE as they contain solids, liquids, toilet paper, and chemical products. If you’re interested in learning more about Chemical toilets (and Composting Toilets too!), I recommend reading this article:
DIY Campervan Toilet: How to Build a DIY Toilet in your Van
HYDRAULIC PUMP AND ACCUMULATOR

Besides the tanks, before you can connect everything with pipes, valves and fittings, one more fundamental part of any good water system is missing: the hydraulic pump!
The pump in fact, is the heart of your system, that “pumps” (you won’t say!) the water from the freshwater tank, towards the various utilities (sink, shower, toilet) that you are going to install.
There are various models, but mainly they are divided into 3 types:
- Foot Pumps
They do not require any electrical connection and operate mechanically when pressed with the foot. They are ideal for those who only want to install one faucet and reduce water waste to a minimum.
- 12V Immersion Pumps:
A low-cost solution where the pump is immersed directly into the tank and is automatically operated when the tank is full. These types of pumps are less durable than traditional hydraulic pumps and more difficult to maintain, but the price certainly makes them great value for money solutions.
- 12V Hydraulic Pumps:
The standard for those who want to go big and install one (or two!) sinks and a shower. These pumps create a constant pressure inside the pipes so that when the taps are opened, the water can be ready to come out as it does at home. I have installed a Shurflow Trailking 7 and I can really confirm that they are fantastic devices!
In the case of 12V pumps, it’s worth noting that the pumps push water intermittently,” as they are essentially composed of a plunger that pushes water toward pipes and utilities. Therefore, by installing only a pump, water from the faucets and shower would come in “hiccups”.
To overcome this problem, you can optionally insert in the system an expansion tank/accumulator ,which is nothing more than an apparatus that helps to maintain a constant water pressure in the pipes and therefore to provide water from the taps smooth and regular as that of the taps at home.
USEFUL MATERIALS FOR THE WATER SYSTEM OF A CAMPER VAN
Working with water is certainly more intuitive than putting your hands in an electrical system, but it’s not something you can improvise, penalty: lots of water all over the camper (it happened to us several times during our van conversion!).
Depending on your design, the water system of a camper van can also become very complex and require a large number of fittings and components.
Therefore, before you begin the actual installation, it is important to understand how every component of a well-made water system works, even the smallest ones. Some of the components you will likely need to include:
- quick-fittings (to join pipes with minimum effort)
- non-return valves (to prevent water backflow)
- tap valves (to shut off pipes in case of emergency or maintenance)
- Drain/antifreeze valves (to empty boiler and tank in case of temperatures below 0°)
- tank fittings (for extracting or storing water in tanks)
- screw fittings, gaskets, and Teflon (to create drip-proof connections)
- One-way and two-way taps (for mixing hot and cold water)
- the boiler (to heat the water of your camper van)
- the nozzle (to refill water from outside the van)
- etc.
If there is a tiny mistake in the water system, you can be sure that the water will immediately point it out to you.
Since there are so many small fittings to be done properly and potential weak points in a water system, I thought I’d make your life easier here too, and write a Maxi-Guide with Scheme that can help you from start to finish to create the perfect hydraulic system for your van: you will find it in the following deepening!
READ: DEEPENING 10
VAN CONVERSION MEGA-GUIDE: HOW TO CREATE YOUR HYDRAULIC SYSTEM DIY
How much Water do you need in your Van? Which Tanks should you Choose? Pump? Pipes? Accumulator? Discover all you need to know to plan and install the perfect Hydraulic System for your Needs!
In this in-depth article, you will find a neophyte-proof guide that will guide you through the components of a RV/van hydraulic system and give you all the tools to plumb it like a pro! 🙂
Article Index
1. Simplified Diagram of a RV/Van Hydraulic System
2. Understand your Daily Water Needs: how much water do you need?
3. Choosing and Buying the Right Tanks for Your Van
4. Choosing a Hydraulic Pump, Filters and Expansion Tank
5. Installing the Water System: What Pipes to Use?
6. How to connect all parts together: Fittings, Valves and Detailed Diagram
7. Install a Probe to keep an eye on your Tanks
8. How to Heat Water in Your Van
9. Faucets and Shower: Useful Tips
10. Tools Needed to Install Your Water System
11. Practical Tips for Connecting Your System without any Losses
8. THERMAL INSULATION

“Thermal Insulation”, in easy words, consists in filling the walls, ceiling and floor of your van with heat insulating materials to keep the warm inside the van in winter, and keep the cool in summer.
HOW DOES HEAT TRANSFER WORK?
To get the job done in an optimal way, it’s important to understand how heat transfer works inside a vehicle. Heat, in fact, is transferred from a warmer body to a colder body in 3 possible ways:

- Conduction: heat passes from one hot object to another (colder one) that comes in contact with it (for example, like when you scald your tongue with hot coffee!).
- Radiation: heat is transmitted through the air or an empty body (for example, the sun’s rays that warm your head in the summer)
- Convection: in a fluid or liquid, heat rises to the top and cold rises to the bottom (for example, in a sauna, the higher you sit, the hotter the air will be)
If you’re interested in better understanding heat transfer, I strongly recommend reading the deepening 11 below on thermal insulation, where I explain in more detail the practical implications of the various heat passages (convection, radiation, and conduction) and how these should affect the way you decide to insulate your van).
WHY YOU SHOULD INSULATE YOUR VAN? DO YOU REALLY NEED IT?

Metal is a terrible insulator against heat, and unfortunately, your van is almost entirely made of metal.
This means that the sun will heat the inside very quickly (ever parked a car in the sun in the summer?😉 ) and that in winter it will cool down the moment you turn off the heating (like a car parked in winter!).
A campervan, however, is not a car that stays simply parked: it is a small apartment in which to eat, live and sleep! For this reason, in the process of converting your van into a campervan, it is important to create an environment that remains as enjoyable as possible in all seasons and weather conditions: warm in winter and cool in summer.
To do this, we resort to thermal insulation, i.e. the insertion of thermo-insulating materials in the walls of our vans, so that they let through as little heat as possible (whether this is to the inside or outside).
If you’re planning to use your RV in all four seasons, insulating it thermally is almost a must!
I’d say skipping the insulation may be possible for recreational vehicles that are only to be used in warm weather (when a simple fan or blower can still create a draft that makes the inside of the van breathable).
If you’re thinking of braving the winter without thermal insulation, be prepared to spend a lot of money on heating fuel, or dress like a Michelin Mascotte ;D
Insulating a van costs relatively little, and it is possible to insulate permanently even non-approved N1 vans with a removable setup (for Italy/EU).
For this reason, I would generally recommend it to everyone: yes it’s true it’s an extra job to do, but traveling in an insulated van is a whole other experience.
MATERIALS: ALL THE OPTIONS FOR THERMALLY INSULATING A VAN

Let’s start with a very important premise: there is not ONE ideal/perfect material to create an excellent thermal insulation, but there are MANY materials (each with its pros and cons), which if used correctly can ensure an excellent thermal insulation .
That being said, the most common materials used to insulate a camper van are:
- Denim
- Sheep Wool
- Rock Wool
- Glass Wool
- EPS Panels
- XPS Panels
- Polyiso Panels
- Reflectix Foam
- Polyurethane Foam
- Cork
- Thinsulate
For more details on each of these products, to see their qualities, pros, cons and how to use them, I recommend you read the in-depth study Complete Guide to the Thermal Insulation of a Camper Van.
Instead, below I thought I’d leave you with a summary table of the main qualities of the various materials so that you can compare them with ease.
Materials were categorized according to six different characteristics: Coefficient of Insulation (R-value), water resistance, ease of installation, sustainability, toxicity, and price per square meter.
INSULATION OPTIONS – IN BRIEF –
| Materiale Isolante | Valore-R | Impermeabile | Installazione | Sostenibilita | Tossicita | Prezzo m/2 (R=6) |
|---|---|---|---|---|---|---|
| Lana di Vetro | 3,5 | NO | Con Maschera/Guanti | Media (Produzione Inquinante) | Alta | 2,5 |
| Lana di Roccia | 3 | SI (al vapore) | Con Maschera/Guanti | Media (Materiale Riciclato) | Media | 4 |
| Lana di Pecora | 3,5 | NO | Facile | Alta (Prodotto Naturale) | Nulla | 10 |
| Pannelli XPS | 5 | SI | Medio | Scarsa (Produzione/Post-Uso Inquinante) | Bassa | 5 |
| Pannelli EPS | 3,8 | NO | Medio | Media (Smaltimento Inquinante) | Bassa | 8 |
| Pannelli Polyiso | 6,5 | SI | Medio | Media (Materiale Riciclato) | Bassa | 8 |
| Sughero | 3,8 | SI (trattato) | Facile | Alta (Prodotto Naturale) | Nulla | 20 |
| Schiuma Poliuretanica | 6,5 | SI | Medio (cola e appiccica) | Scarsa (Gas CFC Inquinanti) | Media | 18 |
| Reflectix | 1 | SI | Facile | Media (Riciclabile) | Nulla | 10 |
| Thinsulate | 3,3 | SI | Facile | Alta (Materiali 100% riciclati) | Nulla | 28 |
| Denim | 3,5 | NO | Facile | Alta (Fibre di Cotone Riciclate) | Nulla | 5 |
READ: DEEPENING 11

THERMAL INSULATION FOR A VAN CONVERSION: THE ULTIMATE GUIDE
Complete Guide to all insulation options, physical properties and how to use them in the best way (with photos and video).
In this article, after a detailed discussion on heat transmission and the various insulation materials suitable for insulating a camper van, I want to tell you about my experience of thermal insulation, made with XPS panels and polyurethane foam.
Article Index
1. The Theory: Understanding How Heat Is Transmitted
2. Characteristics to consider when choosing the insulation material
3. Summary of the most common Insulating Materials on the Market
4. My Choice: How I Insulated My Van – Step by Step
5. Protecting Yourself from the Cold in Winter – Extra Advice
6. Protecting Yourself from the Heat in Summer – Extra Advice
9. HEATING IN THE VAN

To experience your Van at its best even in the winter season, installing a heater is a wise (essential!) investment.
That said, before we look together at the various types of heaters on the market (gas, diesel, and electric), it’s good to remember that managing the interior temperature of a van is not just a result of the heater, but several factors that include:
- ventilation (windows, vents, fan, etc.),
- thermal insulation (which we have seen above)
- preparation (winter equipment, weather forecast, etc.)
Having said that, let’s now move on to see the various types of RV heaters.

GAS HEATING


Gas heaters are among the most used by factory motorhomes/RVs, and they work powered by LPG (mainly propane, but also butane).
These days they are installed more and more infrequently as the world of wheeled homes is moving more and more toward diesel/gasoline and (slowly) electric as well.
In order to homologate a van in Germany with gas heating (or cooking), a gas installation certificate from a TUV technician is also required.
The positives of gas heating, is that with two cylinders you have a range of weeks, the exhaust gases are less polluting than diesel heaters and relatively low maintenance costs.
The downsides, of course, are the price of the cylinders and their availability (not always easy abroad), as well as the risk of carrying gas on board in the event of an accident.
Personally, I would advise you to choose a gas system only if your vehicle already has a system (to power the fridge or the kitchen), so that you can continue to use it.
The models of gas heaters are not so many, below I leave you the most popular:
For more detailed information on each heater (consumption, kilowatts, price comparison, operation, best models, instructions, assembly, etc..) I recommend you to read the in-depth article at the end of this chapter.
DIESEL HEATING


Diesel (or gasoline) heaters are among the most widely used by modern RVs and the ones that are the most popular in Do-It-Yourself campers with permanent setups.
Their main convenience is that they can operate by drawing fuel directly from the vehicle’s tank.
Low fuel consumption and the convenience of being able to get it just about anywhere are the main reasons why many (including me!) have decided to go with a diesel heater.
The most established brands of oil-fired heaters are:
To which in recent years have been added very fierce Chinese competitors with excellent products and prices, including:
For more detailed information on each diesel heater and the best models on the market (consumption, kilowatts, price comparison, instructions, assembly, etc..) I recommend you read the in-depth article.
.
ELECTRIC HEATING


Heating your vehicle solely using electricity, without any kind of combustion, is certainly a tempting idea that appeals to many (I’ve been dreaming about it for a long time too!).
Imagine: cleaner (no exhaust fumes), more practical to install Do-It-Yourself (no pipes, just plugging it in the socket) and more convenient (no need to refill fuel). On the internet then, it is also easy to find electric heaters e electric fan heaters for prices sometimes much less than 100 Euro.
So far, so good, except for one small detail: electric heaters are really energy intensive.
For this reason, unless you have a really powerful battery bank (500/600ah+ lithium), it could be very difficult to heat all night long without connecting to the 230V of a power station (and anyway, even with a giant battery bank, you might have problems to recharge them at high latitudes or in winter).
Personally, I would only advise you to choose an electric heater if you are planning to rely on organized campsites often.
For boondocking, on the other hand, diesel heaters still seem to me to be the best option for the time being, while an electric heater could simply be used for support/emergency backup.
For more detailed information on each electric heater and the best models on the market (consumption, kilowatts, price comparison, instructions, assembly, etc..) I recommend you read the in-depth article.
READ: DEEPENING 12
HOW TO HEAT YOUR VAN?: GAS, DIESEL OR ELECTRIC?
Nobody likes a freezing home, and that goes also for homes on wheels! In this article, I show you all the options on the market to heat your DIY Van and enjoy a cozy warmth during the cold winter days!
In this in-depth review, I decided to make some order to the vast world of RV heaters.
Inside, you will find information on the operation of the various types of heaters, information on the best models, prices, consumption, pros and cons.
Lastly, I’ll also tell you about my experience with a JP Heater combi boiler/heater that I ordered directly from China.
Article Index
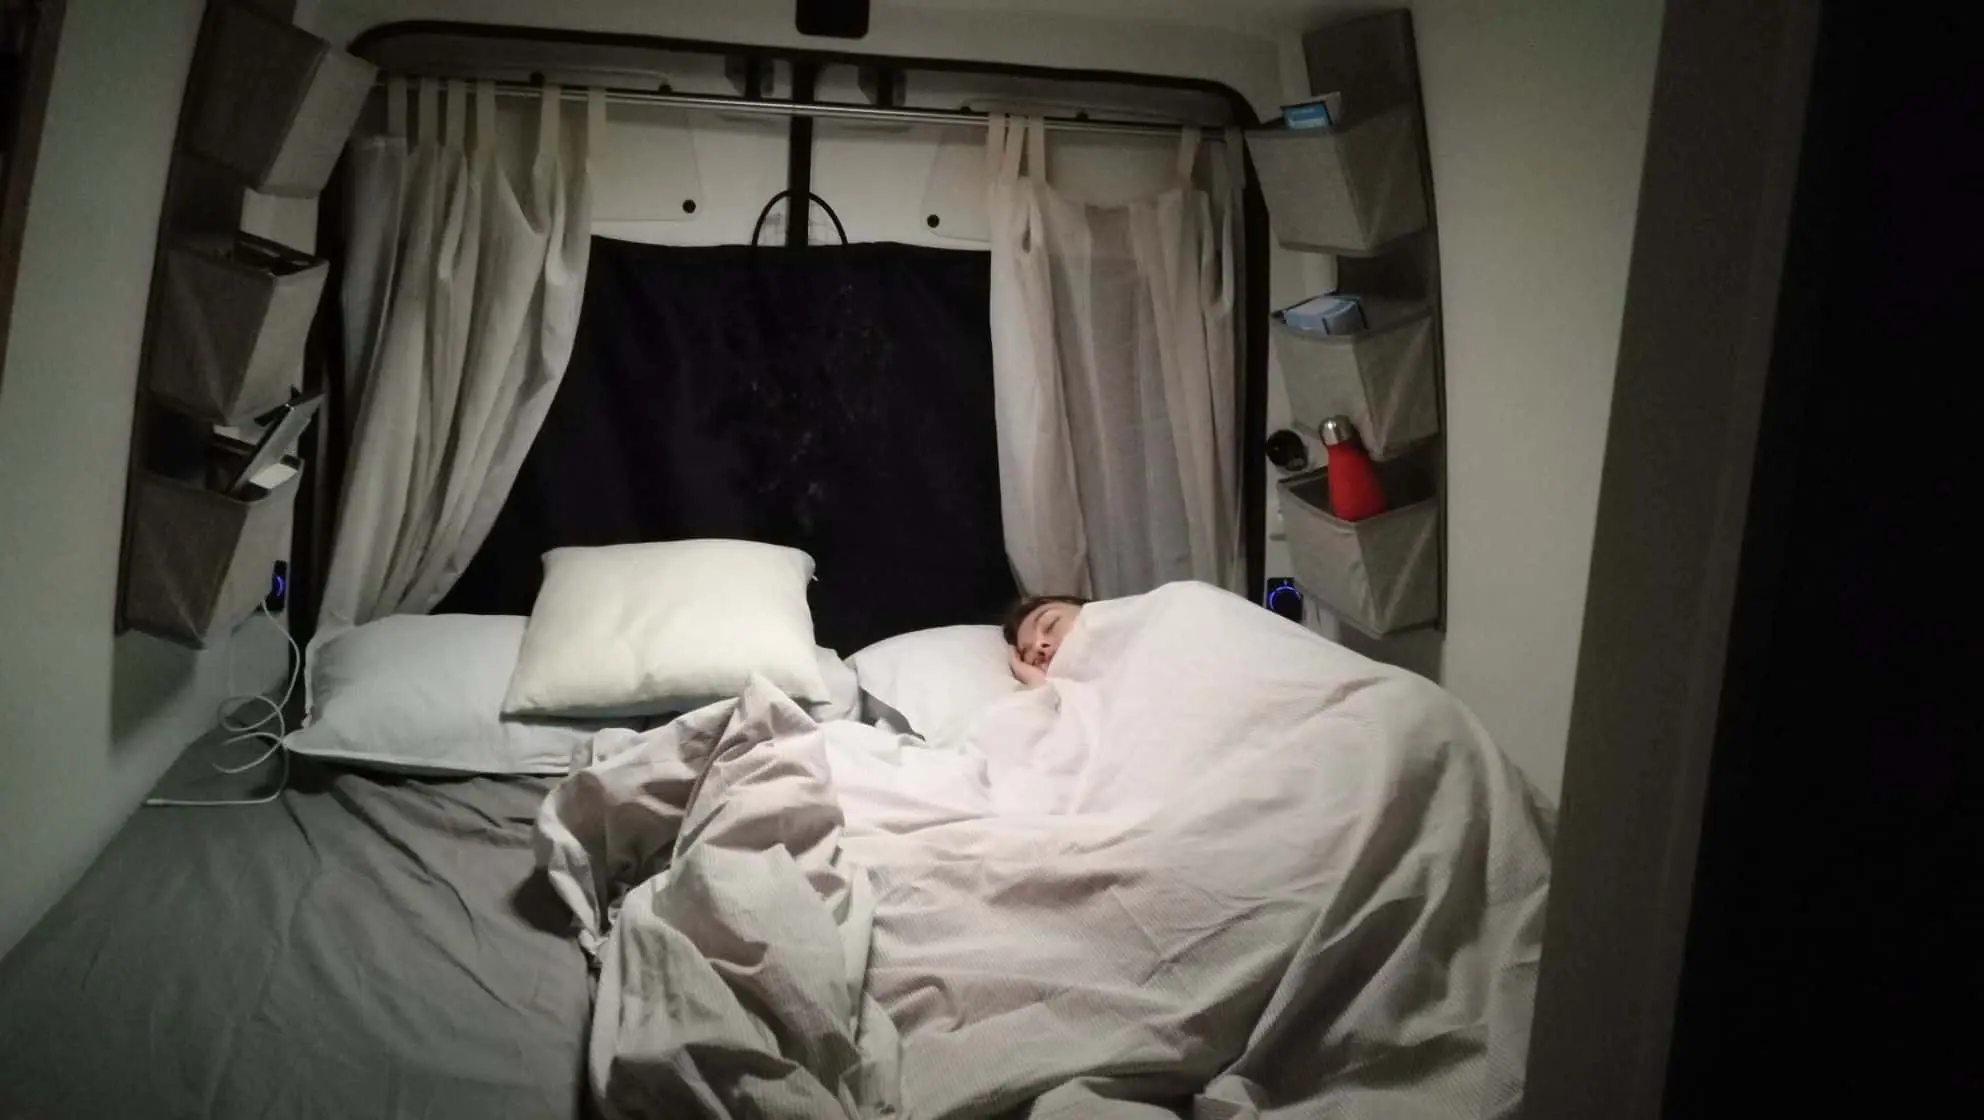
10. BED AND DINETTE

The bed is an essential part of any camper van and probably the part of your van that you will use the most. That’s why it’s important to design a bed that’s comfortable and tailored to your needs.
In this article, I want to give you some food for thought and ideas for creating your own custom bed; however, if you’re interested in going into more technical details about the construction or each bed option, I recommend reading the in-depth discussion at the end of the chapter.
UNDERSTAND YOUR BED NEEDS
The ways of inserting and/or hiding a bed inside a campervan are many, and as we will see there are some creative ideas.
To find the one that best suits your needs and layout, I recommend asking yourself the following questions:
- How many beds do you need in your camper? Traveling alone, with two people, or with family are all different situations that will require different bed planning.
- How big does your bed need to be? Beds found in homes normally have standard sizes, and so do mattresses. If you don’t want to go for a custom-made mattress, you might want to keep the following measurements in mind: mattresses are normally three lengths (190-195-200cm) and 6 widths (standard single 80cm, large single 90cm, single 120cm, French size 140cm, standard double 160cm, King Size 180cm). Plan on a combination of these widths/lengths to make sure you find a ready-made mattress that is tailored to your needs.
- Bed layout: can you sleep horizontally or do you have to sleep lengthwise? If your height allows, you can consider sleeping horizontally relative to the direction of travel: for those lucky enough not to be too tall, this bed arrangement can save a lot of space!
- Foldaway or Fixed Bed? Space in a camper van is scarce and precious: every inch counts. Because of this, many people decide to install some kind of “hide-a-bed” mechanism to free up space to use during the day. A “hidden bed”, can be constructed in a variety of ways (see below) and helps to increase the usable space inside the van. The flip side of the coin though is that compared to a fixed bed you might need to make the bed every day (something that for some is not a problem, but for others is out of the question from the start).
- Need a space to work or a dinette to eat? If you are interested in using the space occupied by the bed also during the day, you can consider a bed that can be converted into a dinette; which then becomes a table or seat when needed.
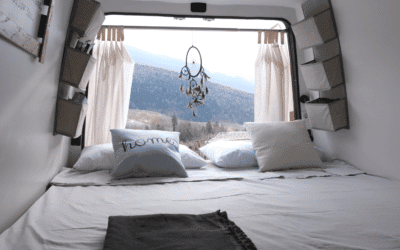
Answering these questions will probably help guide you as to which bed model is closest to your case. Below, I show you 10 of the most popular ideas.
10 BED IDEAS FOR A DO-IT-YOURSELF RV: FIXED, POP-UP OR DINETTE?
Below I show you 10 DIY bed ideas that you could use in your van conversion. If you’re interested in knowing the pros and cons of each, seeing step by step how we built the bed of our VW Crafter and getting other valuable advice to help you make the best choice, I recommend reading the in-depth article at the end of the chapter.
Note: photos are from Google Images, if you know the source or they belong to you, get in touch to get linked 🙂
FIXED BED

CONVERTIBLE BED-DINETTE

MURPHY BED

PULL-OUT BED

ROCK’N’ROLL BED

BED IN THE FOLDING ROOF

BUNK BED

BED WITH EXTENDABLE BENCHES

ELEVATOR BED

HAMMOCK IN VAN

READ: DEEPENING 13
VAN CONVERSION TO CAMPERVAN: HOW TO BUILD A DIY BED
Discover ideas, tips and the right accessories to build the perfect bed for your vanlife needs!
A Camper is not a Camper if it doesn’t have a bed where to Sleep and… Dream!
In this Guide I offer some ideas for planning a DIY Bed in your Camper, and show you step by step how I built a Complete Bed/Dinette on my VW Crafter.
Article Index
1. How to choose the best bed for your Camper?
2. 10 Creative Ideas for the Bed on a Camper Do-It-Yourself
3. How I built my Do-It-Yourself Bed (convertible into a Dinette!).
4. How to Choose the Right Mattress for Your Van
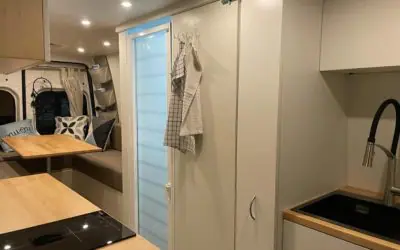
11. CEILING, WALLS AND FLOOR

Once you have insulated your campervan, studied the services (electricity, water, heating, etc.), and have a more or less precise idea of the interior layout, it’s time to cover the inside of your van: ceiling, walls, and floor!
The options for lining the interior of a van are many and choosing the right material to use is very personal.
After all, the floor, ceiling, and walls are elements that will remain in plain sight once the project is finished, so you’ll want to keep an eye on stylistic/aesthetic choices too, in addition to their functionality. Below, I’ll show you some ideas of how you can clad a van internally: of course, there are many other possibilities 😉

WALLS AND CEILING
Before choosing the materials for the walls and ceiling of your van, it is important to ask yourself the following questions:
- Is it light? Having to clad a mobile vehicle, every extra kilo counts and will forever increase your fuel consumption: so light is better!
- Is it easy to cut and shape? Since this is a Do-It-Yourself project, it’s important to choose a material that you know you can comfortably work on yourself with the tools at your disposal. Consider that in the vast majority of vans, the walls are quite crooked and not perferctly squared, so you’ll have to be flexible in following them.
- Is it easy to clean? Think ahead: the material you’ll be using needs to be something that in case it gets dirty, can be cleaned easily!
Given the previous questions, it’s not too surprising that the most popular material in DIY caravanning is a malleable material that everyone can afford: wood!
That said, it’s not the only material you probably want to consider. Below I show you the most popular ceiling and wall covering options.
PLYWOOD PANELS

Multilayer plywood panels are easy solutions to custom shape and use for the interior trim of a van.
Available in various thicknesses and produced with various types of wood (poplar, birch, walnut, etc.) and endowed with good flexibility and mechanical elasticity, these panels are also found in large sizes. This makes anchoring them to walls and ceilings easy and relatively quick.
Personally, to cover my van I used plywood panels from 8mm thickness for walls and 4mm for the ceiling (less heavy), treated with two coats of waterproofing varnish (to avoid mold) and a white water-based enamel finish, to give a “home wall” feeling and at the same time extra-waterproof the surfaces and make them easily washable with a wet cloth if they get dirty.
WOODEN BEADS

When we think of a DIY van conversion, most of us think of wooden beads.
In fact, these interlocking planks, in addition to being relatively inexpensive, are easy to use (even if they take a little time to be screwed!) and help to create a very “homey” feeling, chalet / cabin on wheels style.
They can also follow the curves of even the most crooked interior walls.
Note: If you are planning to homologate your van in Germany, consult with the TUV/Dekra inspector who will have to do the testing to make sure that they accept the beads as a coating (some make a fuss about safety issues in case of an accident) and possibly get instructions on how to secure them safely.
PVC FOAM

An innovative and modern material for those who like to experiment.
PVC foam beads are a material that resembles wood to the touch (it can also resemble marble or stone!), but much more technological: the PVC foam makes the material lighter, scratch-resistant, flexible, but at the same time mechanically very resistant.
Unlike wood, which being a living material can wear/crack with temperature changes, PVC is a plastic material that can last unchanged for many years.
ALUMINIUM COMPOSITE PANEL (APC BOARD)

Aluminum composite panels are a suitable siding material for colors who are looking for a modern or similar design to factory campers.
This material consists of two very thin layers of aluminum sandwiched together on a softer, more flexible inner material (usually polyethylene).
The main advantages of this material, are that it is thin (3-4mm thick is sufficient even for walls), available in many different textures and colors and that, once installed, does not require any treatment: it is already waterproof and easy to clean.
FLOOR
Once the floor of your van is insulated, it’s normally a good idea to cover the insulation layer with a plywood floorboard at least 8-10mm thick. In this way, you’ll level out all the micro protrusions and get a nice, smooth, and flat base on which to build your layout and anchor your furniture.
Below, let’s take a look together at the most popular options for covering and refinishing the floor of a camper van.
LAMINATED WOOD AND PARQUET

Using real wood and building real wood flooring is definitely a great looking and elegant option that helps give your van a “Chalet” style feel.
The downsides of using this type of material though, are its water permeability, ease of scratching, and the expensive price (both for buying and maintaining it).
Laminate, on the other hand, is an option that can still give a parquet effect, but at a lower cost and with greater durability. In addition, laminate manufacturers can create color shades of any kind and even give a stone or tile-like finish.
PVC VINYL – “A CLICK” LAMINATE

Due to its incredible mechanical qualities and total waterproofing, it’s no wonder that PVC vinyl is an extremely popular choice for flooring a Do-It-Yourself RV (I too have chosen this route!).
Available in endless shades and textures, lighter than a parquet floor, and very easy to lay, cut, and install; PVC vinyl is a material that can be easily adapted to everyone’s needs. Also, it can feel a lot like wood to the touch, but also like tiles in case you choose other patterns.
Laminate “click” vinyl is the most premium and mechanically strong choice among the various PVC alternatives, followed by laminate to glue and full sheet.
Negative notes: vinyl is slightly less long-lasting than wood, and because it is made from petroleum, it is also a less sustainable alternative.
PVC VINYL – FULL SHEET

Vinyl sheet is perhaps the absolute easiest floor covering to install: you cut it to size and glue/screw it to the wood deck below.
The advantages of this type of coating are: easy and quick to install, many textures/colors to choose from, waterproof and inexpensive (it is one of the materials that costs less!).
The main disadvantages are aesthetic: at a glance and to the touch, a vinyl PVC sheet appears to be a cheaper and less “premium” solution, it does not look much like real wood.
Also, in case it cuts or breaks somewhere, it is very difficult to make a proper repair.
CARPETS/CARPETS

Walking on a carpet or rug is something that makes you feel at home: soft, cozy, warm in winter, and slip-resistant…
The main problem with this type of flooring, however, is one: maintenance! As it is easy to think in fact, the longevity of a carpet/rug does not depend only on the initial quality of the same, but also and above all the care with which it is cleaned and sanitized every day.
For this reason, a carpet is an ideal floor covering for those people who are willing to take care of it; but it is something that should be avoided at all costs if you don’t take the responsibility of devoting the right amount of time to it.
Unkempt carpeting can indeed be an ideal nest for dust and bacteria.
RUBBER

The rubber coating is a waterproof bonding solution that costs very little.
These two features, make the rubber ideal for covering those parts of the floor that are out of sight and little used (like the back garage!) where installing expensive and valuable vinyl would be a waste.
On a negative note, this type of rubber flooring weighs a lot!
12. KITCHEN AND STOVE

Another thing that can’t be missed in a camper van: the kitchen!
Having a refrigerator to store your food and a stove to cook it in fact, are two of the things that most make you feel at home wherever you are. In this chapter, let’s take a look at the various stove options and types of RV refrigerators together so that you can choose the best ones for your project.
PORTABLE SOLUTION: GAS COOKER

If you’re planning to camper a van with a mobile set-up or in a very spartan manner, the quickest and fastest solution for cooking, and one that requires no installation, is simply a portable gas stove.
These types of stoves, which are extremely inexpensive, practical and easy to use, work with propane or butane gas canisters. Insert the canister, turn the knob, and voila: fire ready to cook!
The maintenance cost is relatively low (the price of the canisters) and the portability is certainly an advantage if you want to cook outside the van (in my case for example, although I have installed an induction hob, I still keep one of these gas stoves for cooking outside or for making picnic away from the van).
Best Portable Gas Cookers:
KITCHEN WITH GAS STOVE

The gas stove has long been the standard for factory motorhomes, whether with mobile cylinders or fixed gas tanks anchored inside or under the van.
In recent years, however, recreational vehicles have begun to move toward diesel or electric stoves, adopting an increasingly gas-free philosophy.
Personally, I would recommend installing a do-it-yourself gas stove only if you already have a gas system in your vehicle for other services (e.g. three-way refrigerator or heating). If not, I would advise you not to venture into creating a gas system (which requires certification to legally circulate).
With that being said, below you will find the best brands of gas stoves for RVs:
See Models:
CAN 1 Fire Stove with Integrated Sink
Noxton – 2 Burner Stove 3000-1750Watts
Hisense – Built-in 3 Burner Stove
KITCHEN WITH DIESEL STOVE

Cooking using diesel fuel directly from the vehicle’s tank? Apparently yes, it can be done now!
Diesel stoves for RVs are relatively recent inventions that are making their way to enthusiasts and are helping to supplant gas systems.
The main advantage of this type of stove is an almost infinite range: as long as there is fuel in the tank, the stove can run, and the fuel can be topped up almost anywhere.
Downside: they are still the most expensive stove on the market right now!
See Best Models:
ELECTRIC AND INDUCTION HOB

Technological advances in terms of more efficient solar panels and more economical and high-performance batteries have opened up in recent years to the concrete possibility of installing in campers and camper vans the
hot plates and induction hobs.
The positives of this type of stove are the affordable price, the absence of an open flame inside the cabin, and virtually no maintenance costs (with a proper electrical system, there is no need to spend money on fuel).
The sore point is that to support an electric/induction hob without connecting to the 230V column, you need a battery bank, solar system, or B2B charger of not indifferent size: this makes the initial investment higher than other options (but the cost is recovered over time).
See Models:
Portable Induction Cooker 1 Fire AmzChef
Built-in Induction Cookers 2-3-4 burners Autarkic
IsEasy 2 Burner Ceramic Glass Electric Plate
MICROWAVE AND OVEN

If you’re feeling ambitious and want to go big, why not include an oven or microwave as well?
Nowadays there are really solutions for all tastes and all spaces, both large and small. If you plan to attend campings or otherwise plug in often, even “home” appliances may be fine.
If, on the other hand, you plan a lot of free parking, remember that it is important to keep an eye on the wattage of your equipment to avoid draining your batteries too much.
Below I leave you links to models of highly efficient and energy-efficient stoves and microwaves, ideal for camper van.
See Best Models:
Tristar – Ventilated Oven 19L 800W
Candy – Microwave Oven 20L 700W
READ: DEEPENING 14
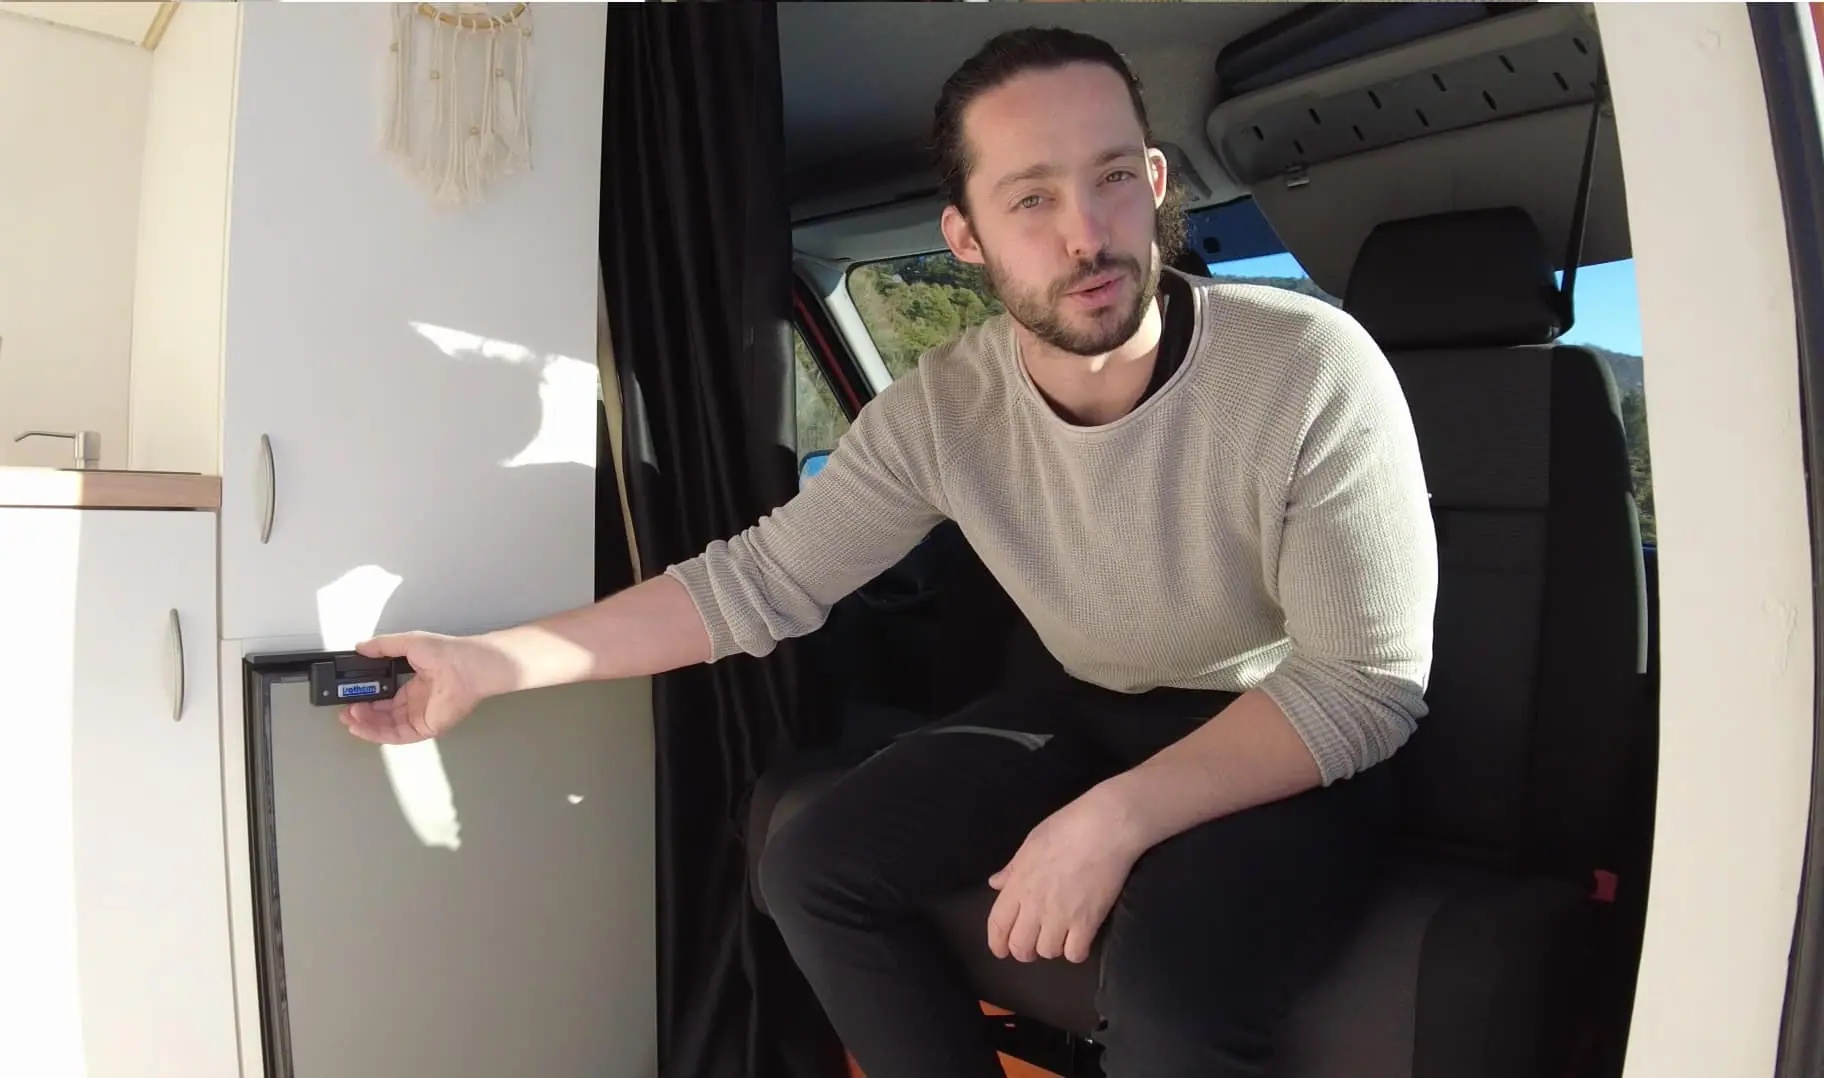
HOW TO CHOOSE THE BEST FRIDGE FOR YOUR VAN?
12V or 230V? Horizontal or Vertical? How many Liters? Discover all you need to know about RV fridges, with all pros and cons!
The fridge is undoubtedly the most important accessory of any well-made camper: having cold beer wherever you are is a comfort that is truly priceless!😉
In this in-depth study, I explain in detail how the different types of refrigerators for motorhomes work (trivalent, thermoelectric, compressor, etc.), what to look for when buying and what brands to look for.
Article Index
2. Vertical or Horizontal Fridge?
3. What size refrigerator should be on a motorhome?
4. Which one to choose? The Best Refrigerators for Campervans
5. Connecting Cables and Installing the Fridge in your Van
13. BATHROOM AND SHOWER

The bathroom first, and even more so the shower second, are two aspects of a campervan that may not be essential for the more modest projects (you can still live and take care of your hygiene in other ways, with a little creativity and adaptability), but that is essential to your mental sanity (and physical wellbeing!) if you plan very long trips or even to live in your vehicle full-time.
In this chapter, I want to show you the most popular toilet and shower solutions for camper vans.
If you’re interested in learning more, finding more inspiration, or seeing step-by-step how we built our shower bath on our van, I invite you to read the detailed insights you’ll find below 🙂

To begin with, let’s start by talking about the toilet.
Since a campervan is a mobile vehicle, as you can well imagine you can’t dump it directly into a sewer like at home, but you need some adequate containment solutions that will allow you to continue to travel and discharge all our physical residues only when you find a suitable place.
These solutions are commonly divided into 2 types: chemical toilets and compostable (dry) toilets. Below, I’ll briefly explain what each option consists of.
THE CHEMICAL TOILET: HOW DOES IT WORK?
The operation of a chemical toilet is very similar to that of a household toilet: you do your business in the bowl and you flush it away (obviously in this case not in the sewer, but in a black water tank).
The name “chemical toilet”, is given to this type of WC by the chemicals that are poured into the black water container with urine and feces to mitigate the odor and break down solid waste.
This type of toilet is currently the
the standard for all recreational vehicles
from factories (campers, buses, trains, etc.) and being a toilet system that has been around for so long, there are hundreds of models.
Although different models may vary greatly in price, size, maximum capacity, style, comfort, and extras; they all work in the same way: produce, flush, and all goes to black water.
Chemical toilets are components of an RV that are usually bought all in one piece, and therefore don’t leave much room for customization, except in terms of installation.
Interested in learning more? Find the pros and cons of chemical and compostable toilets in the deepening below!

THE BEST CHEMICAL TOILETS

Enders Portable Chemical Toilet
Best Budget Option

Thetford
“Porta Potti”
Best Quality/Price Option

Dometic Saneo
Built-in WC
Best Premium Option
THE COMPOSTING (DRY) TOILET: HOW DOES IT WORK?
The composting toilet is a relatively new concept for the recreational vehicle world, which for the moment seems to be much more popular and used in Do-It-Yourself Van Conversions rather than by RV-producing companies.
The operation of a compostable toilet, like a chemical toilet, is very simple to understand.
First, you sit down and do what you need to do, whether solid and/or liquid. Without flushing, the WC separates urine from solid excrement: pee ends up in a container in front, and poop ends up in a container behind where it is then mixed/covered with some other compostable material, such as sawdust, coconut fiber or similar materials.
By separating the liquid waste from the solid, you prevent the formation of most odors without resorting to chemicals.
In addition, at the end of the process, you have two containers, one for the liquid and one for the dry that if necessary, can be emptied independently and sustainably, without having to find a point of discharge of black water.
Interested in learning more? Find the pros and cons of chemical and compostable toilets in the deepening below!

THE BEST COMPOSTABLE TOILETS

Camco
Portable Toilet
Low-Cost Compostable Toilet

Nature’s Head
Composting Toilet
The Industry Standard

The Separett
Composting Toilet
The Best Premium Toilet
READ: DEEPENING 15
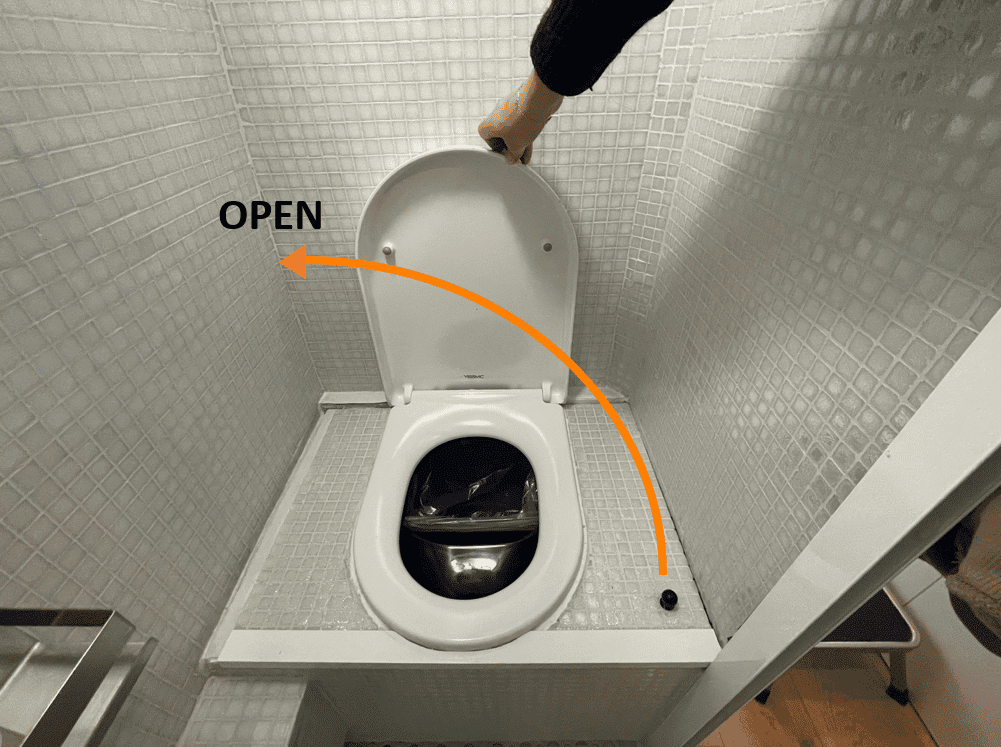
COMPLETE GUIDE TO RV TOILETS AND HOW TO BUILD A COMPOSTING TOILET DIY
Discover in details all pro and cons of chemical and composting toilets for van conversion, discover the best models on the market and get inspired if you’d like to build one DIY.
If you decided to start a van conversion into campervan, surely you have wondered: How does the Bathroom work in a Van?
In this Guide I show you the various types of Bathrooms on the market, I explain how they work, and I show you how you can save lots and lots of money and self-build an entirely DIY compostable toilet (with step-by-step photos!) 🙂
Article Index
1. Bathroom in the Camper: Need it or not?
2. Chemical Toilet vs Composting Toilet
3. How to Build a DIY Composting Toilet
The installation of a shower in your van definitely brings great benefits in terms of livability: you can wash whenever you want and wherever you want simply using the water that carries your vehicle.
In case you are planning long trips or even full-time living in your van, you can be sure that a shower will help you to take care of your hygiene without having to depend on external facilities and services: in the long run, this might result in lower costs and less time wasted searching for a place to wash.
The downside of installing a full shower is the space it takes up inside a van: valuable space that could be used for storage or other things (especially in smaller vans!). Fortunately, as we will see, there are also space-saving solutions to installing a shower in even very small spaces.

HOW TO SHOWER IN AN RV WITHOUT A SHOWER?
If you decide not to install a shower on your van, I want to leave you with a few ideas here on how you could still shower during your travels:
- Beach Showers: If you’re traveling on the coast or near beach resorts, beach showers are a free solution you can take advantage of
- Friends’ Houses: if you use your vehicle to visit distant friends, they will probably, if they are friends, invite you to use their shower without any problems 😉
- Lidos, Spas, and Pools: combine the useful with the pleasant! A day at a lido, spa, or pool can be a relaxing opportunity and at the same time a chance to take a good hot shower. Depending on which area you’re traveling to, admission may cost a little more or less, but in general, prices are never prohibitive.
- Rivers and Lakes: If you’re a bit on the wild side, and like to immerse yourself in nature, lakes, and rivers can be free solutions to wash you, relax and get going again. Of course, make sure the area is swimmable and safe, the water clean, and use an eco-friendly soap to avoid polluting the environment! In winter, brrrrr…. best wishes!
- Truck Parking Areas: Throughout Europe, there are parking areas for truckers with showers. Often these rest areas, created specifically for truckers, travelers, and campers, can be used for just a few euros. Through the site Truck Parking Europe, you can see all the parking areas and identify those with showers.
- Sports Clubs and Gyms: Where there is sport, there is sweat, and normally there is a shower. By politely asking to be able to take a shower for a small fee, hardly anyone will say no.
- Airbnb/Hotels/Ostelli: If after days of traveling with your RV, you still haven’t found any showers on your path and you realize it’s time, your last resort might be to reach into your wallet, reserve a night in a cheap hotel/hostel/Airbnb, and finally take a shower to get rid of that mountain goat smell ;D
- Buy a Solar Shower: a solar shower is nothing more than a water bag that can be filled if necessary and put to warm up in the sun. Once the water warms up (in a couple of hours) you can take a hot (outdoor) shower anywhere you want.
SHOWER IDEAS IN A SELF-CONVERTED CAMPERVAN

Below I want to leave you with six inspirational ideas of what a shower in a DIY RV might look like.
If you are interested in investigating them in more detail, or find more information on the topic “Shower”, I recommend you the in-depth guide that you find here below.
6 IDEAS FOR A DIY SHOWER

Complete
Wet Bathroom
The most labor-intensive project, but also the most convenient to use when finished.
A full bath-shower is ideal for Medium to Large Van.

Extractable Shower
in a Drawer
A space-saving solution that still requires good plumbing planning.
Suitable for those who want to save space and avoid a full shower.

Shower Under
the Floor
To be planned before insulation, an under-floor shower is truly a genius space-saving idea!
Ideal with a graywater tank installed under the van.

Shower
Exterior
The external shower is a solution to use your own load of clear water (even hot!) without sacrificing space for the shower tray.
In winter, needless to say, the thrill is guaranteed!

Shower
in a Bucket
A bucket, a tent, and a hula hoop to hold it up. A very “arranged” solution, but it does the job.
Suitable for those who want to save money and still have a shower 🙂

Solar Portable
Shower
A water bag, which hangs on the outside of the van and heats up in a couple of hours thanks to the sun’s rays.
Cheap and easy to use, great for summer, less so for rainy days (see on Amazon).
READ: DEEPENING 16
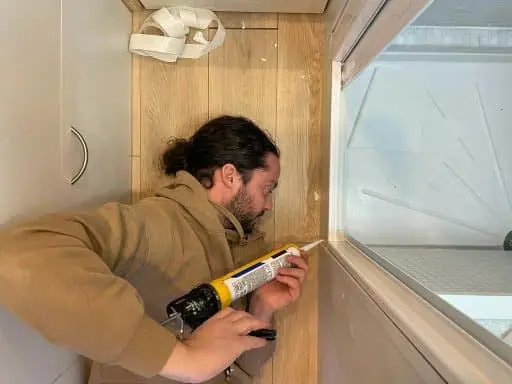
COMPLETE GUIDE: HOW TO BUILD A DIY SHOWER IN YOUR VAN
In this article I show you different shower ideas for your van and I explain you step by step how we built the shower of our van.
Installing the shower tray, waterproofing the walls, installing the faucets, the drain, the plumbing, the right tools…
In this article, after showing you various types of showers, I’ll show you how we built the shower on our VW Crafter completely by our own.
Article Index
1. Shower On-Board: Do you need one?
2. Ideas for Inserting a Shower in Your Van
3. How I Created a Shower in our Van
4. How to Install the Shower Pan
5. How to Build DIY Shower Walls
6. How to Waterproof the Shower

TIPS FOR PLANNING YOUR FURNITURE
The furniture on a camper van is what you’ll use every day and the part of your setup that will remain most in view.
Writing a detailed and complete step-by-step guide to create furniture is almost impossible as every project has different needs, different measures and requires different solutions. Furthermore, everyone of us has different preferences (of materials, finishes, cost etc.).
With that being said, below I want to give you some helpful tips to keep in mind when designing YOUR furniture:

- Think ahead of time about what you will be storing inside each drawer/compartment:
this way you can custom-build each compartment and avoid wasting space where you don’t need it. Consider space for: clothes, flatware, dishes, cookware, food, beer, cleaning supplies, bath products, dirty clothes, bed/bath linens, tools, worlds, RV gear, books, etc. (and check the space for beer twice, you never know 😉 ).
- Plan with Accessibility in Mind:
think about cables, pipes, heat tubes, or whatever else that might need to pass through the furniture; think about whether the furniture could preclude access to certain areas of your van. Remember to plan everything so that, in the unfortunate event that something breaks, you can access and work on it easily, without having to disassemble half of your van!
- Remember that on a Vehicle, Furniture needs a Firm Closure:
magnets latches chains or interlocking mechanisms. When planning your furniture doors, remember to plan for a locking system as well. Also, including an anti-slip mat and organizers inside the drawers are great ideas to prevent accidental damage while driving.
- Choose materials that will last:
Get your hands on them once right, so you don’t have to do it again. Building and installing furniture on a van already takes enough time; my advice is to think ahead and do it right the first time!
Once you’ve planned your furniture in detail and double-checked all the previous, it’s then time to get on with crafting it.
OPTIONS FOR FURNISHING YOUR CAMPER VAN
Creating the furniture and giving a soul to the inside of your campervan is one of the most fun and satisfying jobs (at last, you’re creating the “visible” part of your van, yeah!).
That being said, building furniture also takes a lot of time and, if you’re a first-timer, certainly a lot of mistakes. Depending on your skill level and willingness to learn, the main options for furnishing your DIY van are:

Build Your Own Custom Furniture
The most Do-It-Yourself and cheapest solution is obviously to build all your furniture piece by piece. Doing so will allow you to customize everything to your needs, but of course a lot of what you do will depend on your carpentry skills.

Adapting Pre-Built Furniture
A great way to avoid the stress of making everything from scratch, is to find some pre-built furniture (like from Ikea), and re-fit, fix, and re-model it to fit perfectly into the layout you have planned for your campervan.

In Chapter 18 you will find all the useful tools that you will need to build the furniture of your van entirely DIY.
15. ANTI-THEFT AND ON-BOARD SECURITY

In this chapter, I’ll show you some safety and anti-theft devices that I sincerely hope you will never truly need 😉
Converting your van into a campervan, if you’ve already started you already know, is a project that requires a TREMENDOUS amount of hours, and economic and mental resources.
Like a real house, the worst thing we can imagine after so much effort is that some stranger will sneak in to rob your things or, being a mobile vehicle, just steal it entirely!
Having good RV anti-theft insurance, depending on the value of your vehicle, certainly might give you some peace of mind if the worst might strike (is almost a must!).
That said, very often it’s much better to prevent the damage before it happens to avoid bureaucratic rigmarole and potential heart-breaking surprises (I don’t even want to imagine how I would react if the result of almost a year of work would be suddenly stolen or heavily damaged!).
Burglar alarms and anti-theft devices, as the word implies, exist for exactly that: to prevent theft!
Assuming that there is NO such thing as a perfect anti-theft device
(with the right tools and time on his hands, a thief could get around any protection), below I leave you with a list of the best anti-theft devices for RVs, divided into categories: deterrents, anti-intrusion, mechanical, and electrical/digital.
The best solution for your needs will have to be decided by you; what I can recommend, however, is to think about which anti-theft devices to pair together to create the best security conditions for your vehicle. If you’re interested in seeing the pros and cons of each type of burglar alarm listed below, I suggest you read the in-depth review The Best Anti-Theft Devices for your Van (Coming Soon).
One last piece of advice I feel like giving you is: preventing theft is better than dealing with the consequences! Below we will look at many types of anti-theft devices, each suited to a particular situation, but always keep in mind that the best anti-theft device is your behavior and the precautions you put into practice during your travels (here I leave you food for thought on good precautions to take).

ANTI-THEFT ALARMS AND DETERRENTS
The first category of RV anti-theft devices we are going to look at are burglar deterrents, which are those systems designed to deter thieves and discourage them from attempting to steal. Simply put, they are deterrence systems that try to convey to the thief the idea that the vehicle is not easy rob/steal or that it is risky to attempt it.

Alarm/GPS Stickers
Simple sticker that communicates to a possible thief the presence of an alarm and GPS installed in the vehicle. A small deterrent, but one that can still make a big impact.

Wired Alarm
A classic alarm, which once armed sounds as soon as someone tries to force a door or window. Assembly requires some familiarity with electrical wiring.

Wireless Alarm
An alarm that is easy to install and monitor even by phone. It can be mounted on any door and sounds when the door is forced open without permission.
ANTI-INTRUSION DEVICES
Burglar alarms are those burglar alarms designed to keep the thief out of the vehicle or otherwise hinder his access and stall him. In fact, what every thief hopes during a theft is to take as little time as possible, thus reducing the risk of being caught. Because of this, when confronted with solid anti-intrusion devices, a thief might give up and abandon the heist.

Door Chains
Very inexpensive chains similar to those found in homes. They must be armed from the inside, can slow down intrusion or act as a deterrent (with a powerful alarm!).

Protection for Locks
These are metal cards that fit inside the vehicle to protect the locks from attempts to strain, puncture, or unlock them from the outside by an unauthorized person.

Door Lock Padlocks
Door locks are the number one (but also the most expensive!) choice against attempted intruders: permanently installed on doors, they block them from opening without a key.
MECHANICAL ANTI-THEFT DEVICES
Mechanical anti-theft devices are tools that “mechanically” prevent the vehicle from moving or being maneuvered properly. Many of these devices are created with very garish colors to be easily noticed (by the thief), create a deterrent effect and make the thief give up before trying.

Steering wheel lock
A mechanical impediment that once installed on the steering wheel and locked with a key prevents steering. The highly visible color adds to the deterrent effect.

Wheel Locking Jaws
The jaws, positioned on the wheels, are a very visible anti-theft device that prevents the wheels from turning properly. Again, strong color is used as a deterrent.

Steering lock and Pedal
A combined mechanical anti-theft device that prevents the steering wheel from turning and the pedal (brake or clutch) from being properly depressed. The location makes it more difficult to tamper with.

Foot Lock
A simple and inexpensive piece of adjustable metal that, once installed on a pedal (brake or clutch) blocks its movement and correct operation. Given the narrow place, it’s hard to force or break.

Block-Shaft
The most effective and expensive solution among mechanical anti-theft devices: the steering column of the steering wheel is replaced and can only be locked and unlocked with an induplicable key.
ELECTRICAL/DIGITAL ANTI-THEFT DEVICES
Electric or digital burglar alarms, are burglar alarms with current operation, which take advantage of new technologies (GPS, WiFi, Rooms etc.) to deter, hinder, locate or trace the thief. There are many types, for all needs and for all budgets.

Killswitch
A simple hidden switch placed between the ignition circuit and the fuel pump relay. If in the “off” position, the vehicle will not turn on. To hide well 😉

GPS 24h Tracker
Installing a GPS system will help you quickly track down your vehicle should it be stolen, as well as provide many other useful statistics about your vehicle’s movement.
SAFETY ON BOARD YOUR CAMPER VAN: FIRE, GAS AND ELECTRICITY
In addition to anti-theft devices, which are useful for securing our van from attackers/robbers, it’s also important to think about preventing other hazards/accidents that could come from inside your vehicle. These include fire, gas/CO2, and unexpected electrical discharges.

Travel fire extinguisher 1Kg
Small safety extinguisher to nip potential fires in the bud. Easy to use (hoping you never need it!) and easy to place in a corner. On our van we have one 1kg and one 3kg estinguishers.

Carbon Monoxide Detector
In a small, enclosed space, a carbon monoxide detector is an investment in your safety; even more so if you use gas in your van/RV!

Magnetothermic circuit breakers
If you have installed an inverter and therefore use 220 high-voltage current, circuit breakers can protect you from possible failures, malfunctions and electrical discharges.
16. OPTIONALS AND EXTRAS

Let’s see in this paragraph all the non-essential optionals that can be installed on a camper van to increase its comfort and livability.
BIKE RACK
Visiting city centers with long vehicles (such as medium-large camper vans) is often a nightmare: the larger and bulkier your vehicle, the more difficult and stressful finding parking downtown becomes.
Usually, RV parks are a bit further away, in the outskirts, and parking close-by the points of interest is not always possible. The bicycle (or e-bike too!) in these cases, is a great way to shorten distances!
If you also like to take long bike rides, investing in a bike rack might be for you. Each bike rack on the market is usually designed for a specific model of van, although some claim to be “universal”.
Below I leave you with links to the Best Bike Racks for the most common camper vans:
Bike carrier Ducato/Boxer/Jumper
Bike rack Opel Vivaro/Renault Trafic

SWIVEL SEATS – PLATES FOR SWIVEL SEATS
Turning the Front Seats 180° is a quick and easy way to expand your living space while parked and gain two extra seats where you can sit to relax, work, eat or just have a beer ;D
Since every van is slightly different, if you plan to install a swivel seat plate, it’s important to make sure for good measure that the plate is the right one for your vehicle’s model.
Also, with the plate, there must be a CE certification (the manufacturer gets it after crash-testing) so that you don’t have any problems during the overhaul (for EU).
Plates for Swivel Seats of the most common Van:
Swivel Seat Sprinter/Crafter (single or pair seat)
Swivel Seat Ducato/Boxer/Jumper (one seat)
– (two seats)
Swivel Seat VW Transporter (Van)
Swivel Seat Opel Vivaro/Renault Trafic

REARVIEW CAMERA
An optional that, with a vehicle over 5 meters in length, I consider essential.
Parking a bulky vehicle isn’t always easy, and blind spots surely are a thing (you don’t have a center mirror in a van after all!).
Installing a rearview camera eliminates this problem and allows you to maneuver safely and stress-freely.
Rearview Cameras for Camper Vans:
Rearview camera for Sprinter/Crafter
Fiat Ducato/Boxer/Jumper camera
AutoVox Wireless Rearview Camera (Generic)

OUTDOOR CHAIRS AND TABLE (PICNIC)
As the weather gets warmer and temperatures rise, RV life usually moves outdoors: in the end, enjoying nature and the beauty of new places is the main reason why we travel (and trying new beers, yes, that too! 😉 )
Some chairs and a picnic table, surely can add great comfort and livability to your camper van.
Space-Saving Pic-Nic Chairs and Table
Lazy Camping Chairs Extra-Comfort
Standard Folding Chairs with Beer Holder

TELESCOPIC LADDER
Sometimes you might need to access the roof of your van: clean the solar panels, remove snow from the fan, do maintenance, take a picture, have a beer etc.
It’s not always easy if your truck is 3 meters/10 feet tall! A telescopic ladder always comes in handy for these eventualities.
Nestling Telescopic Ladder (2,6m)
Nestling Telescopic Ladder (3.2m)

PARKING WEDGES
One of those things you don’t think about until you realize you need it.
Parking wedges are plastic pieces (very sturdy!) that are used to level the RV when parking on sloping terrain.
In fact, the chocks can help both the handbrake hold the weight of your van better and tilt your vehicle the right way to help the water from the shower and faucet drain properly.
Best Motorhome Wedges
Pair of Parking Wedges – Brunner
Pair of Parking Wedges – Thule

SMART TV / MONITORS
A TV is one of those things that makes you feel at home just about anywhere.
If you’re thinking of installing one on your campervan, keep in mind that there are models that work both 220V (like the ones at home, they require an inverter) and 12V (a bit more modest in size/image quality, but they also consume much less).
If you already have an inverter installed, I recommend going for 220V, otherwise a 12V TV is the quickest and easiest choice.
Best TV for Camper
TV Camper 12V with Antenna 24” input
Samsung M5 SmartTV+Monitor Hybrid 27”
Best Support
Extractable and Rotatable 360° Wall Mount TV Support

SMARTRADIO
Car radios in recent years have evolved and modernized a lot. Modern SmartRadios have become sort of android tablets and can offer all the conveniences
Benefits of a SmartRadio include: reverse camera screen, bluetooth with phone, Playstore, Netflix, YouTube, Whatsapp, built-in GPS, weather forecast, photo gallery… you name it!
The DIY installation requires a bit of work, but all in all, after doing it myself, I think it’s within everyone’s reach.
When choosing a SmartRadio, make sure it’s right for your vehicle (model/year).
Best SmartRadio for a Camper Van
SmartRadio for Mercedes Sprinter / VW Crafter
SmartRadio Fiat Ducato / Jumper / Boxer

AWNING
Dulcis in Fundo: the awning! Creating a shady space next to your vehicle in the summer is convenient for eating outside and enjoying the view without straying too far from your van.
There are many types and models of awnings, both low-cost and extra-premium, automatic and manual, permanent and removable.
Personally, if you’re looking for quality products for a permanent installation, I would recommend you to look on the sites of Fiamma or Thule, (the leaders in the industry), while for more budget solutions, even the many low-cost awnings found on Amazon should do the job 🙂

17. INTERNET AND CONNECTIVITY
- Starlink (Coming Soon 😉 )

PHONE HOTSPOT 4G/5G

Internet is now a primary necessity in today’s world, for many on par with a bed or a hot shower.
Connecting to the Internet on the go has become a luxury we can hardly do without connectivity, maps, GPS, and apps… really, our smartphones and PCs have become our toolboxes, our working offices in a pocket, and also our means of entertainment.
So, the main question coming to mind now is: How can you get internet on your van wherever you are? 🙂
Normally, for the vast majority of vanlifers and RV enthusiasts, creating a 4G/5G phone hotspot is enough to connect the various devices in a van (PC, SmartTv, SmartRadio, etc.) to the internet.
The European continent and North America are almost totally covered by 4G networks (and 5G in cities), and these signals are powerful enough to allow us to use the internet nicely: cheap and effective.
USE A MOBILE ROUTER
If you use the internet for work and need a super-fast connection with more coverage, or if you are more than two people using the internet at once, you might consider upgrading from your cell phone hotspot, to a mobile router.
Mobile routers are nothing more than apparatuses that work through SIM card: receive the signal better than a phone and amplify it to all connected devices. Installing a mobile router, allows all the “Smart” components of your camper van to function, even in the absence of your phone.
If you’re interested in getting into the details of mobile routers and understand in depth their features and functioning, I suggest you to read the deepening: Internet in Camper – The Complete Guide – coming soon –
THE BEST MOBILE ROUTERS FOR CAMPERS


INSTALL A BOOSTER ANTENNA TO IMPROVE THE SIGNAL
You may have already noticed: inside your van, your cell phone gets worse reception than outside .
This happens because the “metal shell” that is the van chassis, shields part of the mobile signal. Moving the phone closer to the windows will make the internet work normally again.
Having said that, it is possible to get to places (usually remote) where the cell phone signal is anyway so weak that it does not allow normal internet access.
To boost the low signal, and get back to having decent internet, in these cases you can use a “booster” antenna mounted on the roof of the van.
A“booster” antenna is nothing more than an antenna that boosts the low internet signal and brings it to an acceptable level for working or enjoying mobile entertainment. For example, a booster antenna can turn one notch of signal into three notches, or two notches of signal into a full signal. Obviously, if the signal is completely zero, the antenna will have nothing to amplify and therefore it will be useless to have it anyway.
Personally, I’d recommend installing a booster antenna if you’re planning long trips outside of Europe, to more remote locations (I’m planning to install one before heading off on a round-the-world van trip).


SATELLITE ANTENNA
However, if you decide to travel in remote areas (eg. very remote areas e.g. deserts, mountain ranges, forests etc.), 4G signal may not be present.
In these cases, where neither the cell phone, nor the mobile router, nor the booster antenna can connect, the last chance to receive internet signal is to install a satellite antenna on the roof of your vehicle.
Satellite internet is generally slow and expensive, but obviously better than nothing! This is a solution recommended only for those who really plan to tour the most hidden corners of the earth.
When choosing a satellite antenna, it is important to take a good look at the coverage guaranteed by the antenna manufacturer and obviously the data agreement that will be contracted. The most performing antenna for vans and RV at the moment on the market is Starlink (with the highest improving potential too, although it remains very expensive at the moment).
If you are interested in learning more about satellite internet, I suggest you to read the in-depth study Internet in Camper – The Complete Guide – coming soon -.
18. USEFUL ACCESSORIES AND TOOLS FOR DIY VAN CONVERSION TO CAMPERVAN

THREE USEFUL TIPS BEFORE BUYING TOOLS
In this section, I want to show you the essential tools that you’ll need during your van conversion.
Before we begin though, I want to give you two pieces of advice from my own experience:
1) Before buying tools, check around the house to see what you already have: if you’ve never carried out big DIY projects, you probably don’t have a lot of tools, but anything you have can be useful and can help reduce the cost of tools.
2) Before you buy, try to see if someone you know has the tools you need and can lend them to you: it doesn’t cost anything to ask, and there is a good chance that someone you know has the tools you need locked away in a dark closet somewhere. Before buying tools then, make sure there’s no chance of borrowing them from someone (especially the specific tools you use the least!).
3) If you have come to the conclusion of buying an instrument, my advice is to get quality products. There is a saying that goes “the more you spend, the less you spend”. Never wiser words than in this case! Personally, at the beginning of my van conversion I tried to save money on some tools and it was a bad idea: bad tools slow down your work, are inaccurate and break. During my van conversion I had to change both sander, drill, and jigsaw. At the second purchase I spent a little more (the difference between a good and a great product are a few tens of euro in most cases), but the ease of doing the job with good tools is not even comparable!

WORKING TOOLS FOR CUTTING
When converting a van, you’ll find yourself cutting all the time (wood, but also plastics and metal!). Below are the essential tools you will surely need:
- Percussion Drill
- Jigsaw
- Circular Saw
- Sander
- Cutter
- Cup saws
- Grinding Machine
- Manual File
- Scissors for Metal Sheet
FIXING TOOLS
In addition to cutting of course, you also need to build, join and secure. To do this, you need another set of tools including:
ELECTRICITY TOOLS
Wiring the electrical system of a camper van, requires some special tools, including:
SAFETY DEVICES
Accidents can happen and the best thing you can do to avoid serious trouble is to prevent them.
ESSENTIAL MULTI-PURPOSE TOOLS
Below, you’ll find accessories that don’t fall into any of the previous categories but are still essential to camper a van properly:
These were the essential tools you’ll find yourself using over and over again in most phases of your van’s campering.
Of course, there are many more, much more specific ones that maybe will only be required for small jobs. In the in-depth articles at the end of each chapter, you’ll find detailed guides on how I assembled the various components of my van, and in each you’ll find information on specific tools for that particular step.
19. PRODUCTS FOR CAMPER VANS
READ: DEEPENING 17

PRODUCTS WE USED FOR OUR VAN CONVERSION AND USEFUL ONLINE SHOP LINKS
Tools, materials, optionals? What do you need to convert your van? Which shops offer the best quality for price?
In this article we tell in details everything we used!
From my experience, I can confirm what they say: 80% of the time it takes to carry out a van conversion is spent planning the layout and researching all the necessary products, while only 20% of the time is spent getting your hands dirty and physically carrying out the project.
With this in-depth,I want to save you the “dirty work” of research (which I already did!) and show you the best Italian sites to buy items for campers/van/RVs, and all the products I used in my van-to-campervan conversion, in case you are interested in making similar choices.
Article Index
1. Online Stores: The Best Sites for Van Conversion Products in Italy
2. Converting a Van: When Brick-n-Mortar Stores are Better
20. USEFUL RESOURCES AND LINKS

ITALIAN YOUTUBE CHANNELS ABOUT CAMPER VANS
Below I leave you some Italian Youtube channels of various guys who talk about camper van DIY and Vanlife, which I personally find interesting, informative or funny. By the way I leave you the main topic of the channel (of course it can change with time! 😉 ).
LostOnTheRoute
– our channel, includes video guides DIY Van Conversion, informative vlogs, travel and beer 😉
StepsOver
– Around the World in a 4×4 Military Truck
Pato&Pata
– Converting a Fridge Van
InViaggioConErmanno
– Van Conversion, Practical Videos and Innovative Ideas
VanSweetFun
– DIY Van Conversion, Practical Vanlife and Removable Setups
TheNirvan
– DIY Van Conversion and Informative Travel Vlogs
OTHER ITALIAN BLOGS ABOUT CAMPER VANS
In this blog, I hope you have found a wealth of useful information to bring your dream home on wheels to life, I personally have tried to write this and all other guides as complete, informative and detailed as possible. That said, taking inspiration from multiple sources can only be beneficial to your project, which is why I want to leave you with links below to other (Italian) sites and blogs that talk about Van Conversion into Campervan DIY.
CamperOnline
– The site number 1 in Italy on the world of RVs
Yescapa
– Motorhome Van Rental Site with Great Community
InViaggioConErmanno
– Courses of Van Conversion, Vanlife and Lithium Batteries
VanSweetFun
– Vanlife Stories, Furniture Fitting Guides and Practical Tips
JustMolla
– DIY Camper Guides
READ: DEEPENING 18
VAN CONVERSION: 10 THINGS TO KNOW BEFORE STARTING
Converting a Van for many is a Dream. It’s freedom, it’s creativity and it’s life. Said that, converting a van into campervan is full fo hurdles. In this article you find 10 Thing you Need to Know before starting your project 🙂
21. HOW MUCH DOES IT COST TO CAMPER A VAN?
READ: DEEPENING 19

VAN CONVERSION: HOW MUCH DOES IT COST?
How much does it cost to convert a van? This is the queen of all questions… In this article, I show you all the detailed costs of building my van until the last cent, to give you an example of how much it MIGHT cost you 🙂
You can convert a van on a super tight budget, or invest a mountain on money into it. In the end, it all depends on your possibilities, your needs and how much you want to invest.
For this, there is no precise cost to convert van!
That being said, in this in-depth article, I’ll detail my experience and show you all my van conversion expenses, super-transparently and down to the last penny!
Below instead, you will find a video in which I tell you about it 😉
22. CONCLUSIONS AND USEFUL TIPS
And here we are finally at the end of this long guide, born from the frustration I felt during my own van conversion in having to look for information scattered everywhere on the internet ;D
I really hope you found above the useful information you were looking for, and that this will help you in transforming your van into your little big dream on wheels.
As in all articles, and even more so this time, I ask you to let me know in the comments below if you find any errors, inaccuracies or broken links. Likewise, let me know if you have any doubts about any topic, any question or any suggestion to improve this article.
My idea, is to keep this Maxi-Guide updated to help anyone in the future who wants to carry out a van to campervan conversion : if iI did it, I am sure you can do it too! 😀
For the very last thing, I want to dedicate a thought to you who are still undecided, or to you who are remotely thinking about the idea of converting a van, but still full of thousand doubts:
“If you’re clinging to the idea of trying, but it seems impossible, trust me it’s not! Self-converting a van sounds like a crazy, complicated, difficult idea at first.. Maybe it also is…but reassure yourself that if I made it, you can too! Grab a pen and paper, write it down, plan it out and think about how to make it happen! Dreams are meant to come out of the drawer, and the day to get them out might just be today! 😉 “
Thank you all for reading!
See you on the road, or in the next article 🙂
1 Comment
Trackbacks/Pingbacks
- DIY Van Conversion: Electrical System + Scheme | EASY GUIDE - […] VAN DIY […]
“Your home,
Is where you decide to park it.”
– a Vanlifer
Dani, con tutti questi argomenti e pubblicità dovresti avere le aziende che ti corrono appresso per pubblicizzarle.