
How much water do you need in your motorhome?
Which Tanks to Choose? How to install them?
Pipes, Pump, Joints… Find out everything you need to know about creating your RV’s water system!
VAN CONVERSION: THE WATER/HYDRAULIC SYSTEM
Installing a water system on your vehicle is one of the basic steps in turning a simple van into a true DIY camper van.
In fact, having access to running water is one of those things that really makes you feel at home: whether we are talking about a simple sink, a bathroom, or even a shower, turning on a faucet and seeing water flowing is really no small comfort that we often take for granted until we don’t have it.
In this article, I will explain in detail how the various components of the water system of a motorhome work and how to install them in the correct way in your van. We’ll talk about tanks, pumps, hoses, fittings, seals, useful tools, and anything else you may need to create awater system that suits your needs .
Happy Reading 🙂
TABLE OF CONTENTS
Converting a Van:
Complete Guide to a DIY Camper Van Water System
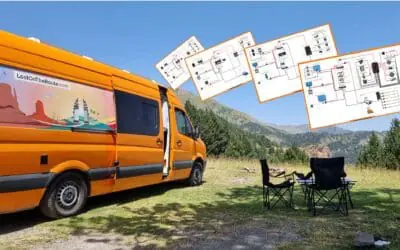
1. Simplified Diagram of a Water System in a Motorhome
2. Understand your Daily Water Needs: how much water do you need?
3. Choosing and Buying the Right Tanks for Your Van
4. Choosing a Hydraulic Pump, Filter and Expansion Tank
5. Installing the Water System: What Pipes to Use?
6. How to connect all parts: Fittings, Valves, and Detailed Diagram
7. Install a Probe to keep an eye on your Tanks
8. How to Heat Water in Your Camper
9. Faucets and shower: useful tips
10. Tools Needed to Install Your Water System
11. Practical Tips for Connecting Your System without any Losses

Do you want to support LostOnTheRoute?
All of the Guides I publish on this blog are free and usable by anyone because I personally am a firm believer that information should always be a public good and accessible by anyone and not a commodity to be purchased. Sharing is caring 😉
That said, maintaining a great blog full of detailed articles takes a lot of time, a lot of beer (of inspiration ahah) and most importantly implies economic costs sometimes not so obvious too.
If you would be interested in helping with the costs of the blog, you can consider purchasing any of the recommended products through the links on the page or in the Amazon storefront. LostOnTheRoute in fact participates in the AmazonAffiliate program, and for every product purchased through the links, I receive a small commission, obviously at no extra cost to you🙂
Happy reading and have fun with your project!:) 😀
Dani

Check Out All DIY Van/RV Products of tested quality, in one place.
1. Simplified Diagram of a Water System in a Van / RV
Before we begin to analyze each component of a camper van’s water system from top to bottom, let’s start with a simplified diagram of the complete system:

Compared to a electrical system, the water system of a camper van is relatively simple to understand and to build entirely do-it-yourself.
In this section, I want to briefly show you the path that water must take inside your van. Then in the next paragraphs I will explain in detail the peculiarities of each element and the criteria for deciding which one to choose.
At the end of the article, you will also find details on how to connect the various parts of the system together (gaskets, pipes, quick couplings, etc.).
Ban on chatter, and let’s look at the whole path the water will need to take inside your future van!
1.1 VAN CONVERSION: ALL THE COMPONENTS OF THE WATER SYSTEM
FRESH WATER RESERVE
1) Freshwater tank: Is your clean water supply. The bigger it is, the more water you can take with you, the more time you can be in nature (and the more weight you will probably carry).
PUMPING AND HEATING SYSTEM
2) Pump: Draws water from the freshwater tank and gives it enough pressure to travel up the pipes and reach your faucets.
3) Accumulator (optional):the accumulator (also called expansion tank) is a tiny tank that stores water at high pressure and releases it at a constant pressure when required (when a faucet is opened)
4) Boiler (optional): the boiler (or water heater) is an apparatus that heats the water coming from the pump (normally runs on gas or diesel, but can also be electrical)
UTILITIES
5) Faucets, Shower and Toilet: From the accumulator and the boiler, the hot and cold water pipes reach your utilities, i.e. the places where you normally want to consume your water
RECOVERY
6) Grey water tank: In the gray water tank, ends the water “dirtied” by chemicals (e.g. soap, detergents etc.) and human activity (e.g. shower, brushing teeth). This tank, on the other hand, contains no pee, feces or sewage.
7) Black Water Tank (optional): If you choose to install a chemical toilet (I don’t recommend it, although most RVs use it), you’ll need a tank to hold your pee and poop, as well as the sanitary products that are normally used to help the sewage decompose and mitigate the odor.
2. Understand your Daily Water Needs:
how much water do you need?

Before you start looking and possibly buying tanks, hoses and other components, stop and think .
As with all “projects” you’ll face when converting your van to an RV, if you plan well from the beginning, the assembly and mounting of your system will surely be easier, cheaper and more functional.
That’s why, before you start assembling anything, we should try to find an answer to the question you’re surely asking yourself: how much water do you use in an RV?
2.1 HOW MUCH WATER DO YOU CONSUME IN YOUR VAN? LET’S ESTIMATE
Let’s get this straight: there is no such thing as a standard water consumption quota that fits everyone.
We all have different needs, different habits and of course, we all use our vehicles for different trips/things.
That said, from personal experience and from what I have read and heard from other vanlifers and campers, I leave you below some indicative consumption of an average consumption.
Only for Drinking: approx. 2-3 Liters per day / person
Washing Dishes/Pots: approx. 6-10 Liters / lunch of 2 people
“Military” or fast shower: 4-8 Liters /person
Personal hygiene (hands, teeth etc.): 1-2 Liters/Person
So, to give an example:
- 2 people,
- Who make 2 lunches a day,
- with an “average” attention to their water use
can consume on average between the:
25 – 45 Liters per day (in 2)
15 – 30 Liters (without shower, in 2)

Questions to ask yourself to better guide you on YOUR water usage are:
- Do you plan to travel alone, or with someone? With two people, consumption usually doubles 😉
- Planning to install a shower in your Van? If yes, how often do you plan to use it? Remember to be realistic !
- Planning to install a chemical toilet with flushing water? Be aware that it will consume a minimum of 1-2 liters of water with each rinse.
- Can you reduce your regular water usage? Normally when you travel by RV/van, you have to give up the idea of using water as if you were at home.
Answering these questions will help you identify a reasonable estimate of the daily water needs of your converted van, and figure out how to structure the system accordingly: what tanks to choose, what pump, what hoses, what fittings etc.
From the next chapter, we begin to look in detail at the various components of an RV’s water system.
3. Choosing the Right Tanks for Your Van – Practical Advice
In this chapterI’ll show you the various types of tanks on the market, I’ll recommend specialized sites where to find them and I’ll give you practical advice from my experience not to make a mistake in your choice.
3.1 CHOOSING THE FRESHWATER TANK
The freshwater tank is your “water bank”. All the water for your faucet, shower, or bath starts here.
Selecting one of the right capacity is therefore essential to making the most of your campervan adventures and supporting your travel style (or lifestyle 😉 ).
A large tank, allows you to carry more water and be independent for longer; however, an excessively large tank can be an unnecessary burden to carry around that unnecessarily increases your consumption and costs.
The good news is that fresh water tanks come in all shapes and sizes, so once you know approximately how much water you need, it shouldn’t be difficult to find a tank that suits your needs.
Below I show you three types of tanks, different in shape. Next, I’ll leave you with all the tips for choosing the one that’s right for you.

Classic Rectangular Jerrycans
These are the most common tanks.
By searching, you can find all sizes (cubic, elongated, narrow etc.) and for any volume of water (liters).
Since they don’t have elaborate or special shapes, they are also the canisters that normally cost the least.

Shaped Tanks for covering the Wheelarches
These tanks are designed specifically for certain van models, and help utilize all the space around the wheel covers.
Difficult to find in Italy (easier in USA and UK), they cost more than classic jerry cans and can be found with a capacity of up to 90-100L.

Underfloor Water Tank Kit
Installing tanks outside of your van brings the undoubted advantage of saving a lot of space in your van.
If you don’t plan to travel in the winter in sub-zero temperatures (where your tanks might freeze), van-specific custom kits are definitely worth considering. The price is higher than classic tanks.
3.2 Tips for choosing the right fresh water tank for your DIY Campervan
- White or Black Tank? If the tank is not totally hidden in a locker (but is also partially exposed to the light), I recommend a black tank that protects more from unwanted growth of algae and bacteria. If the canister is entirely in the dark, the color will not change (I would prefer white here, easier to monitor with the naked eye and detect dirt).
- Indoor or Outdoor Installation? Installing an external tank under the motorhome certainly saves space, but precludes the possibility of using the water in winter or at any rate with temperatures below zero (the water can freeze and ruin pipes and fittings). Personally, in my project I preferred to keep my clear water tank inside my camper van, and install the gray water one outside, much easier and faster to drain in the winter).
- Pre-Threaded Blind Holes. Do you need them? Some tanks are produced with prethreaded “blind holes”, which are holes that can be opened if necessary by cutting a plastic part inside. If in the right size, they are extremely convenient for installing fill, drain and vent fittings with greater ease. What you need to pay attention , is that they are in the right places where you need them for YOUR conversion. (If they’re not, don’t worry, there’s always a way to make another hole 😉
- Inspection cap / manhole Why have one? The inspection cap (also called “manhole”) is nothing more than a hole large enough (15-20cm in diameter) to be able to look inside your tank and if necessary insert an arm (to clean, to tighten the fittings, to solve any problem that may arise …). Personally, I believe that having the inspection cap on the tanks is an essential feature for a project that aims to last over time: without it, it is impossible to do good maintenance).
- What are your needs? Try to figure out how long you would like to be able to go without recharging water, what your average daily water consumption might be, and that of the people you plan to travel with. Then think about the space in your van that you can and want to dedicate to the water tank and make a decision accordingly. For small RV projects (e.g., a single sink) you can also consider not installing fixed tanks, but simply using a small, manually emptying, refillable jerrycan.
Once you understand your needs, with a little research you won’t have a hard time finding the perfect size tank for your DIY RV.
Personally, I bought my fresh water tank from CampingLife, a very good Italian site specialized in camping and campers that offers a good offer and competitive prices especially for the useful materials for the water system. I bought a 130Liter tank to keep inside my van. I considered installing the canister under the van to save space, but planning to travel in the winter as well, I didn’t find it worth it.
Other sites I could recommend for looking for tanks are Amazon (half of my van comes from there aha), CakTanks(UK site, for special tanks/kits for mounting under the van) andAccessoriCamperOnline (Italian).
3.3 CHOOSING THE GREY WATER TANK
The gray water drainage tank is where the water from your sink and, if you plan to install one, your shower ends up.
As with clear water tanks, gray water tanks can be found in a myriad of shapes and sizes.
Normally, these tanks are emptied frequently (so as not to bring unnecessary weight on board your van!), whenever possible.
For this reason, when choosing a grey water tank for your motorhome, you will not need a tank as large as the clear water one, but only one sufficient to hold the water used in one to two days of use (until you find a suitable drainage area).

3.4 Tips for choosing a grey water tank for your motorhome van
- White or Black Tank? If installed external, black. If internal and hidden, indifferent.
- Indoor or Outdoor Installation? Since you can easily empty the tank (normally through a faucet), the problem of ice in the winter does not arise this time. Install the graywater tank on the outside of your vehicle (if space permits), It may cost a bit more than a simple internal tank, but it brings undoubted benefits. including saving space inside your van, ease of flushing, and a natural location for wastewater to flow (especially in the case of a shower, water is convenient to run down).
- Pre-Threaded Blind Holes. Do they need them? Blind holes definitely help with graywater tanks as well. My personal advice though, is to make sure that not only are they positioned well, but they are also wide enough to collect your water flow without creating a clog (something can always fall out of a sink or drain). In the tank I bought ,the hole was too small and I had to enlarge it and install a special fitting. (If you’re interested, I explain how to install new fittings in the Section 6: How to Connect All the Parts Together: Fittings, Valves, and Detailed Diagram
- Inspection cap. Need? An inspection cap is also a must-have in a gray water tank. In fact, from time to time it is important to be able to wash the inside of the tank and remove any residue that might have arrived from the sinks.
- What capacity should a grey water tank have? I recommend looking for a tank that holds about 50% of the water contained in the fresh water tank: a good compromise between weight and capacity, which will be enough until you find a suitable drainage area.
Personally, I bought my grey water tank (70L) with mounting kit (pictured above) from CakTanks, and installed it under my van, alongside the spare tire. Relatively easy to install, I found it to be a practical and convenient solution to save space inside my camper van.
3.5 CHOOSING THE BLACK WATER TANK
The black water tank (also called the “waste tank”) is the place where toilet water (with pee and poo) is collected, and to which chemical disruptive liquids are added to liquefy the feces and mitigate the unpleasant odor.
You’ll need this type of tank if you plan to install a chemical toilet.
Personally, on my van I preferred not to install a chemical toilet and a black water tank, preferring to build entirely DIY a composting toilet (which I discuss in the article DIY Camper Toilet: How to Self-Build a Toilet. ).
For this reason, I can’t give you personal advice on choosing a black water tank, but I can recommend you this article for a smattering on the subject.

4. Choosing a Hydraulic Pump, Filter and Accumulator
Now that we have seen together how to choose the various tanks that you will need for the water system of your camper van, let’s see the other essential parts of a water system: Hydraulic Pump, Filter and Accumulator.
4.1 CHOOSE A HYDRAULIC PUMP FOR YOUR VAN
A pump is that accessory that “sucks” the water from your freshwater tank and pumps it into the pipes until it reaches your faucets.
Water System Diagram of a Motorhome – STEP 1: The Water Pump

The water pumps that can be used on a camper or converted van are essentially divided into 2 types:
- Foot pedals (which are operated by foot pressure when needed, great for small projects)
- electric (automatic, normally those on RVs run at 12V, ideal for projects with higher water demands).
Below, I leave you with three pump options you could use for your RV, with pros and cons of each:

Foot Pump Budget Option
Foot pumps are inexpensive and get the job done.
They are ideal for smaller camper projects, with only one sink and perhaps mobile jerrycans.
Because their operation is entirely manual, these pumps help to keep water waste to a minimum.

The Right Half
Shurflo Trailking 7
Shurflo has been the number one brand for this type of product for years, thanks to its high reliability and longevity.
The Trailking 7 pump is a electrical pump capable of pumping 7 liters per minute.
It can feed multiple utilities at the same time without any problems, keeping water consumption under control.

Like at Home – Shurflo Trailking 10
The Trailking 10 is an electrical pump that can pump up to 10 liters per minute.
Ideal for those who want to feel like at home, it can power multiple utilities at the same time with a more than satisfactory water jet.
If you plan to install a large pump though, be sure to install a sufficiently large clear water tank.
Personally, since I have several utilities (a sink, an indoor and an outdoor shower), I decided to install a pump in my van. Shurflo Trailking 7.
On the one hand, I like the convenience of water coming out by itself as soon as you open the faucet (it makes you feel at home), while at the other, installing a “medium” flow pump helps me to Prevent excessive water consumption (In fact, I know that more than 7 liters per minute I cannot consume, no matter what I am doing).
4.2. THE EXPANSION TANK: WHAT IT IS AND UNDERSTAND IF YOU REALLY NEED IT
Water pumps do not pump steadily, but push water through pipes “in hiccups.”
That’s why, if you connect a faucet directly with a water pump, when you turn on the water you’ll notice that the water with a constant jet as when you’re at home, but will come out in intermittent sprays more or less powerful. This happens because the pump works more or less like a piston, and pushes water through the pipes in “hiccups”.
If, as I wanted to do, you want to eliminate the annoying intermittence of the water jet (which in the long run can also cause damage to the system) and have a continuous stream from all your utilities, what you need is an expansion tank.
An expansion tank (also called “accumulator”) is nothing more than a hydraulic component that stores water under pressure, and releases it at a constant flow, eliminating in fact the sudden pressure variations caused by the pump.
The expansion tank is installed between the pump and the water utilities (see photo below).
Schematic Diagram of the Water System of DIY CamperVan – STEP 2: The Expansion Vessel (in Yellow)

On my camper van, I installed a Fiamma accumulator and have been very happy with it – easy to install in minutes and goodbye to “hiccups” in the water flow.
Alternative to Fiamma, another industry-leading brand of expansion tanks that I can recommend is Seaflo.
Personally, I believe that on certain products such as the pump and accumulator, it is worthwhile to invest some extra money for quality products: in the end, we need to consider they’ll likely need to last many years! The last thing you want to do once on the road, dismounting half of your van to replace the heart of your water system! 😉

4.3 INSERTING A FILTER BETWEEN THE FRESHWATER TANK AND THE PUMP: WHY IT IS A GOOD IDEA
If the pump is the “heart” of your water system, installing a filter to protect it is the best way to take care of your entire system.
Although theoretically only clean water reaches the pump, “clean” water can often contain traces of debris and dirt particles that in the long run could ruin the pump and compromise its efficiency and longevity.
That’s why installing a filter is an extra measure that helps you protect your pump and your water system from all the surprises the future may throw at it.
Personally, I installed a Shurflo Screw Filter created specifically for the type of pump I chose (Shurflo Trailking 7) and I empty it regularly every couple of months.
Below, you can see the location of the filter in an RV’s water system.
RV Water System Diagram – STEP 3: Insert a Filter before the Pump.

5. Install the water system in your motorhome van:
What Pipes to Use for Water?
Choosing the right hoses for your van and being consistent with their use is the basis for speeding up the installation of your water system and not getting crazy.
If you choose a particular section, use it throughout your installation: that way all the gaskets and fittings (which we’ll talk about in the next chapter) will be the same size and it will be much easier to assemble everything.
Since there are pipes of all materials, types and sections and listing them all, besides being very laborious, would be a great waste of time, I decided to leave you only the pipes that I used in my water system (chosen after several research sessions!)
5.1 ALL PIPES YOU NEED TO USE IN YOUR CAMPER VAN
Below you will find the three types of pipes I used for my camper with their characteristics.
Note: For almost all of the pipes, fittings and various pieces that I used for my water system, I ordered them from the site CampingLife (a very serious site with, huge catalog, extremely competitive prices, and fast delivery). If you’re from US or UK, you won’t have problems finding such pipes in your country, as their use is very widespread.

Polyethylene Pipe 12mm – Blue
Polyethylene pipes are the new technological frontier for DIY Water Systems and Van conversion:
- economical prices,
- extremely flexible,
- chlorine/radiation resistant,
- easy to cut and
- work with quick fittings.
In few words, they are everything you need.
I recommend using the blue hose for cold water and any vents.

Polyethylene Pipe
12mm – Red
Polyethylene pipe the same as the blue one, only the color changes.
I used it to differentiate between hot and cold water pipes.

PVC Spiral Hose – 40mm
Large-section (40mm diameter) filler pipes speed up water refilling.
Large section (40mm) drain pipes ensure that water flows into the gray water tank (and then out of the van) without clogging.
Personally, I don’t think rigid pipes are even worth considering for a conversion project.
The 12mm polyethylene pipes, besides being flexible and economical, also have the advantage of working perfectly with the quick couplings (which as we will see below, are all you should use for quick, easy, and drip-proof work!).
The diameter of 12mm is the standard of most of the quick couplings on the market and I suggest you to choose it for all the pipes you are going to install in your van, except for the loading pipe (connected to your fresh water tank) and the discharge pipes (from the utilities to the grey water tank) where can benefit you by having a larger cross section (40mm diameter).
6. How to connect all the parts together:
Fittings, Valves and Detailed Drawing
Installing the water system of a motorhome is certainly more intuitive than installing the electrical system, but to be on the safe side and avoid leaks, it is good to keep the theory in mind.
In this chapter, let’s take a look at everything you need to know to connect your RV’s “water” system without error.
6.1 ALL TYPES OF FITTINGS YOU MAY NEED
Various types of fittings are used to join the various parts of your water system (tanks, water heater, faucets, pump, etc.) via pipes. Choosing the right fitting, depends mainly on the type of “attachment” (hole, protuberance, thread) of the components you are trying to install.
Below, I show you all the types of fittings/connections you may need:
Connect a hose to a Tank:
Fittings with Pre-threaded Tanks

If your tank already has pre-threaded holes (and they are in the right locations), then the most convenient option is definitely to use them.
WHAT YOU NEED?
- A threaded fitting for tanks (obviously the right size for your pre-threaded hole and for your pipe)
- Teflon:Put it on the thread of the fitting before screwing it in (a couple of turns).
- one (or two) Gaskets to be placed between the tank and the fitting (to hermetically seal the edges around the fitting)
- one Metal Hose Clamp (unless you use a quick fitting)
HOW TO CONNECT IT?
- First, open the pre-threaded hole with a screwdriver or hole saw to the right size (be careful not to ruin the plastic thread!).
- Then, wrap the thread of the fitting with Teflon. Teflon is a very flexible and elastic material that helps the thread to adhere perfectly and not to let the water pass (TIP: Teflon is to be used on any thread, of any accessory through which water passes)!
- Insert the gasket into the threaded part of the fitting, and then screw it firmly into the prethreaded hole (help yourself with a pipe plier, and make sure the fitting is pulled tight!). If one gasket feels like it doesn’t seal the hole sufficiently, I recommend using two (I did).
- Once the fitting is secured, insert it into your pipe by pushing firmly. (TIP: Some tubes go in easier than others. If you can’t push a PIPE because it’s too hard, heat it with a hair dryer for about thirty seconds: when it’s hot it will go in more easily).
- When the hose is fully inserted into the fitting, tighten the hose clamp with a screwdriver so that the hose is firmly anchored to the fitting (be careful not to overtighten it, though: you could damage or cut the hose).
NOTE: To see all of the accessories/tools you will need to install your water system, go to the 10. Tools Needed to Connect Your Water System Without Leakage
Connecting a hose to a Tank:
Fittings with Tanks WITHOUT Pre-threaded holes

If your tank doesn’t have pre-threaded holes, you will necessarily have to create new holes. The good news, is that making new holes and inserting fittings into them is really easy.
WHAT YOU NEED?
- One Fitting for tanks with ring nut (with threaded hose barb the right size for the hose you will be installing)
- Teflon, to put on the thread of the fitting before screwing it in (a couple of turns).
- one (or two) Gaskets to be placed between the tank and the fitting
- one Metal Hose Clamp (unless, the fitting is a quick disconnect)
HOW TO CONNECT IT?
- Once you have located the point on the tank where you want to install the fitting, dig a new hole using a screwdriver, a hole saw or (very carefully) with a jigsaw. Once you’ve dug the hole, file the edges with a manual file.
- Wrap the thread of the fitting with Teflon. (see above for what teflon is and why you need to use it)
- Insert the fitting into the hole you just made. From the inside, insert the gasket (or two) and tighten the ferrule firmly (help yourself with a plier if needed). Note: It is very important to pull the ring nut tight, as once the tank is mounted, it will be difficult to access it.
- Once the fitting is secured, insert it into your pipe by pushing firmly. (TIP: Some tubes go in easier than others. If you can’t push a tube because it’s too hard, heat it with a hair dryer for about thirty seconds: when it’s hot it will go in more easily).
- When the hose is fully inserted into the fitting, tighten the hose clamp with a screwdriver so that the hose is firmly anchored to the fitting (be careful not to overtighten it, though: you could damage or cut the hose).
Connect a hose to a Tank:
“Tap Connector” Fittings

Some tanks already come with pre-made “tap” fittings, which are nothing more than plastic protrusions that can be opened and connected directly with a hose. It is without a doubt the easiest connection to make.
WHAT YOU NEED?
- one Metal Hose Clamp (unless, the fitting is a quick fitting)
HOW TO CONNECT?
- Insert the pipe into the “tap” fitting already present on the tank
- When the hose is fully inserted into the fitting, tighten the hose clamp with a screwdriver so that the hose is firmly anchored to the fitting (be careful not to overtighten it, though: you could damage or cut the hose).
Connect two (or more) hoses together with Quick Fitting

Quick fittings are the latest technology for joining two (or more) pipes together. As you will see below, the connection takes only a few seconds. The only downside, is that the quick fitting only exist for pipes with certain diameter sizes. The most common (and most used for DIY campering), are those for 12mm tubing, which is why, again, I recommend you use this type of tubing.
WHAT YOU NEED?
- A Quick Fitting (there are various shapes, suitable for different connections)
- One Locking Clip for each terminal (connection between pipe and fitting)
HOW TO CONNECT IT?
- Insert the tubes into the holes of the connector, and push firmly to get them all the way in (a couple of cm)
- Pull the tube (which will now not come off) and insert a Locking Clip at each end of the connector. The clip will hold the connector taut and removing the tube will be impossible. If you wanted to remove a tube, you’d have to remove the clip, push the tube toward the connector and pull it while keeping the fitting compressed (trust me, that’s still easier to do than trying to explain it).
The quick connect fittings are incredibly convenient, easy to install, fast and drip-proof.
Personally, I recommend using them wherever you can! Below, I’ll show you the various most common forms in which you can find quick fittings (of course there are many more!):

Connect the pipes with the pump and the expansion tank.

If you have bought a 12v pump and an expansion tankyou will have noticed that these already include in their package some specific fittings to screw in (2 for the pump, and 2 for the expansion tank).
To join the components together, the only thing left for you to do will be to insert the pipes and secure them with hose clamps (attention: make sure that the fittings included in the package are suitable for the diameter of your pipes, if not you can also order them separately).
WHAT YOU NEED?
- Pump/Expansion Tank Fittings (2 for pump, 2 for tank) or Pump Quick Fittings
- Hose clamps
HOW TO CONNECT?
- Screw the Pump Fittings into the pre-threaded holes on the pump and expansion tank.
- Insert the pipes into the fittings and use cable ties where necessary to secure them firmly.
6.2 USEFUL VALVES FOR THE WATER SYSTEM OF YOUR CAMPER VAN
In addition to fittings, there is another type of important items you should consider installing in your water system (depending, of course, on how elaborate you plan to create it): valves.
Below, I want to show you two types of valves that I believe you can use to create a functional and safe water system.
Faucet Valve

The“tap” valve (readily available with or without quick fittings) is simply a valve that can be closed or opened as needed by turning a handle.
Installing this type of valve is useful for blocking the flow of water to certain parts of the water system, while perhaps even leaving others on.
Personally, (as I will also show you in the detailed scheme in paragraph 6.3 ) if you are thinking of installing a system with fixed tanks (not manually removable tanks)I advise you to install a minimum of four tap valves: :
- one between the clear water tank and the pump (to block the flow of water to the pump)
- two at the tank discharge connection (both fresh water and grey water)
- one after the expansion tank (to block the water flow from the pump onwards)
This way, you’ll be able to empty the tanks when needed and you can always stop the flow of water when you’ll ever need to work on your pump, expansion tank, pipes, or the system more generally in the future.
Having the ability to shut off your system with these simple valves can help you fix any leaks without risking flooding half of your van.
Non-Return Valve

Non-return valves (also called “one-way valves”), are valves through which water can only flow in one direction.
A no-return valve (as you will see in the detailed diagram in section 6.3) is especially recommended:
- in case you want to install a hot water boiler, the valve is installed before the boiler so that the opening of the taps does not “suck” the water from the wrong side of the boiler and does not let it come out of the cold water taps
Exhaust Valve

The drain valve is another useful valve in case you decide to install a hot water boiler, and it is installed in the following way (diagram at 6.3):
- is installed between the non-return valve and the boiler, by pulling the upper lever the valve opens and allows to discharge the water in the boiler (useful in winter). In addition, in the event of excessive pressure in the hot water boiler, the valve automatically opens and discharges the excess water directly underneath the vehicle.
Now that we have seen both the fittings and the valves that you will need to properly connect all parts of your water system, let’s see the diagram of the entire system and the various precautions to be taken in installing everything.
6.3 DETAILED SCHEME FOR INSTALLING THE WATER SYSTEM IN A DIY VAN CONVERSION
In this section, I summarize all of the previous chapters and combine them to create a detailed and comprehensive diagram of an RV’s water system.
Depending on your project, you may need all or part of the scheme. As I show you the various connections, I’ll also tell you which components are optional and which are essential.
STEP 1. Properly connect the Freshwater tank

If you have decided to install a fixed fresh water tank in your camper van, these are the essential connections to make:
1) The fresh water tank shall have a hole through which to load fresh water. This hole should normally be connected to a pipe with an inlet that is higher (h) than the maximum height of the tank. The end of the hose can be connected to an external water refill port (see Service Entrance Guidefor how to install it) or to an accessible point where water can be poured in. I recommend a diameter of 40mm.
2) A hole in the bottom of the tank must be connected to the water pump (recommended diameter 12mm)
3) A hole in the lowest possible part of the tank, can be connected directly to a tap outside the van (useful in case you want to empty the tank completely – recommended diameter 12mm)
4) The clear water tank needs a vent (at the top) through which air can enter when water is being used, and through which air can exit during water loading. Without a vent, your tanks would be at risk of rupturing due to pressure changes. Some external ports for loading water include an outlet to which the vent can be connected (if you connect a pipe, any diameter it’s ok for a vent)
5) Inspection hole: the inspection hole is essential for servicing your tank (rinsing, cleaning, adding sanitizing products, anti-bacteria, etc.) and for this reason it is a good idea, during the design phase, to install the tank in such a way that the hole remains easily accessible.
Note: If your project does not involve a fixed tank but portable tanks (to be filled manually), the only thing you will need is a hose that draws the water from your jerrycans and takes it directly to your pump.
STEP 2. Connect Filter, Pump and Accumulator

Once the clear water tank is connected, it will be important to connect in the right order:
1) Faucet fitting (useful to close the tank in case you want to work on any of the parts that come after)
2) Filter (installed before the pump, removes impurities and bits of dirt and in doing so, protects your pump)
3) Water pump: the heart of your water system
4) Accumulator (gives the water a continuous pressure and eliminates the hiccup created by the pump)
5) Faucet fitting (another one!) (useful for shutting off the water flow from the pump if you have to work on some faucets)
NOTE: If you chose to install a foot pump or an immersion pump, your project is probably small to medium sized and you should have no problem operating it without a filter or expansion tank (water pressure from the tap is created through the foot, and manually filling the canister allows you to clean it often and thus obviate the need for a filter).
NOTE 2: if you want to know how to correctly connect the electrical wires of your hydraulic pump, I suggest you to see the Complete Electrical Schematic of a Van Electric System.
STEP 3. Complete diagram of the water system of a motorhome: Connecting Boilers, Utilities and Waste Tanks

The most important part of your campervan’s water system is done. Now it’s time to connect the utilities and waste tanks. Let’s see how step by step:
1) Boiler: if you want hot water in your van in all seasons you’ll need to install a boiler (which as we’ll cover in detail in Chapter 8, will probably need to be diesel or gas powered). From the point of view of the pipes, installing it is very simple: a cold water pipe goes in, and a hot water pipe comes out. Before the boiler, however, as I explained before, I recommend that you install a non-return valve and a drain valve (see diagram).
2) Utilities: depending on the faucets you choose, you may only need pipe clamps, quick fittings, or you may need custom fittings to connect the pipes. In any case, connecting a hose to a faucet is nothing complicated and all the parts you may need are usually available at your nearest plumbing supply store.
3) Wastewater Tanks (Gray Water and Black Water): From the sink and shower drain, water should flow to the gray water tank. That’s why it’s important that the tank is located lower (in the case of the shower, under the van is the ideal place). In the case of a chemical toilet, the water from the toilet shall flow into the black water tank. Both tanks require a vent and a drain valve to be opened as needed.
NOTE: By having one pump for several utilities, the various faucets “compete” for the same water. Therefore, opening more than one at the same time will result in a drop of water pressure to both. The same thing happens with hot water.
NOTE 2: This is a complete scheme, obviously you can choose which parts are important for your system and which parts are not needed for your project. The essential parts of a system are clear water tank, pump, faucet, and gray water tank. Everything else (boiler, valves, filter, expansion tank, bath, shower, black water, etc.) is optional and to implement it or not, depends on the idea of the camper project you have in mind.
7. Installing a Probe to keep an eye on your Water Levels
Knowing the water level in your tanks is essential when planning your trips.
By knowing the level of clearnwater, you can plan your next stop to fill the tank of your camper van. The same thing, applies to emptying your RV’s gray water tank or black water tank.
Many vanlifers keep an eye on their tank levels by simply observing the water level in their tanks “by eye”. This of course, is feasible when the tanks are white and easily accessible.
In larger and more modern RVs, and equally, in many converted vans, water tanks are often hidden in cramped and hardly accessible places.
When you can’t observe the water level by eye, the most common (and not too expensive either) solution is to install water probes.
7.1 WHAT ARE WATER PROBES AND HOW DO THEY WORK?
A probe is nothing more than an instrument that “reads” the level of water in your tanks. There are many different types and models, but essentially they all fall into two types:

Mechanical Indicators
Mechanical gauges are small, inexpensive accessories that can be installed on top of tanks.
They’re not overly accurate gauges, but they get the job done. They may be fine if you have free space above your tank (for the reader).

Electric Probes
Electric probes are the standard for regular RVs. They cost more than mechanical gauges, but they are certainly more convenient and accurate.
They must be connected to the electrical system to operate.
In my camper van, having installed my tanks in inaccessible places, I decided to install electric probes on both the fresh water and grey water tanks.
On CampingLife.it I found this Probe kits for Tanks Which includes a probe for each tank and a small screen/reader. Below, I show you how I installed/connected my probe, and explain how it works.
7.2 HOW I INSTALLED THE WATER PROBES ON MY CAMPER VAN
These are the components contained in the Kit that I purchased:
Clear Water Probe
(4 Levels)
The clear water probe is an accessory consisting of 4 metal poles of different lengths.
When the poles are submerged, a micro-current is created between them, signaling the water level. For each submerged pole (which creates current depending on the water level) a light comes on the control screen.

Grey Water Probe
(1 Level)
The graywater probes are simply two metal screws that attach into two holes in the top of the graywater tank.
When the water reaches the point where the two screws are positioned, a small current is created between the two and this is the signal that the tank is full and should be emptied.

Two Tanks Control Screen
A simple screen that indicates the water level of the two tanks (clear and grey water).
Pressing the button creates the small current in the tanks. On the left, you can read the level of clear water; while on the right, when the red light comes on, it means that the gray water tank is full and needs to be emptied.
Below, I’ll leave you with a diagram of how I installed/connected my probes and some tips for doing it right.
Scheme for Connecting Water Probes to the Tanks of an Converted Van

Useful tips for assembly:
1. Clear Water Probe: depending on the tank you decided to install, the metal poles may be too long for your needs (in my case, with a 28cm high tank, they were). Fortunately, to adapt them to your needs, you can simply cut the sticks to the appropriate size using a hand saw or a simple jigsaw. Two sticks should be a few inches from the bottom of the tank, one about halfway up the tank, and one a few inches from the top
2. Gray Water Probe: the mechanism to install the two screws to the wall of the tank will automatically waterproof the holes you are going to create. If, like me, you’ve decided to install the gray water tank under your RV, note that you’ll need a hole in the floor of your van to run the probe connection cable through. In addition, I recommend that you cover the entire outside of the screws and the electrical connection with insulating glue (e.g. Sikaflex 521) so that they will not be affected by external agents in the long run.
3. Control Screen –Install the screen in an easy-to-access location. Consider the length of the supplied cables to best plan your connections.
8. How to heat the water in your Camper
If you have a large van conversion project in mind, you’re probably entertaining the idea of not only installing a cold water plumbing system, but installing a system for hot water as well.
To have hot water available in your RV, what you need is a boiler (water heater). There are several types on the market, but they are normally divided into gas water heaters, diesel water heaters, and hybrid air/water heaters. Below, I show you some great water heater models on the market with the various pros and cons.
8.1 CHOOSING A WATER HEATER FOR YOUR CAMPER VAN

Gas Boiler
(Butane or Propane)
If you’ve decided to adopt gas as the main propellant in your RV (for cooking and heating), installing a gas water heater is probably the most logical choice.
Gas water heaters are normally storage/reservoirless, taking up little space and quickly heating the water you need.
Among RV water heaters, gas water heaters are also, among other things, the cheapest, easiest and quickest to install.

Truma Combi, JP Heater, NewHigh and Similar Hybrids
Hybrid heaters (Truma, Webasto, etc.) are devices that not only function as boilers, but also heat the air in your van in addition to the water.
The prices of the major brands are very high and the assembly more complicated than a normal boiler. If price is not an issue, from my point of view they are the most comfortable devices.
Personally, I’ve installed a JP-Heater combi (a “Made-in-China” copy of a Truma Combi) on my camper van and it works just like the original, for a third of the price. Hybrids might run on gas, diesel (like mine that draws directly from the tank) or electricity.
If you’re interested in seeing how I put it together, read the article DIY Van Heating: Gas, Diesel or Electric?

Truma Boiler
Elektro and Similar
Not many water heaters run solely on electricity, but some exist.
The Truma Boiler Elektro is one example.
With no gas or diesel consumption, electric water heaters are some of the cleanest and safest you can install.
Despite this, the prices are still decidedly high and the high current consumption limits its use to only RVs/van with a large battery bank (300Ah+).
Depending on the type and model of water heater you choose, you’ll need to make different connections (connect the gas line, connect the diesel pump to the tank, or the electrical wires to the batteries).
As for the water path though (the one we’re talking about in this article) the assembly in all cases is relatively simple: a cold water pipe goes in, and a hot water pipe comes out.
8.2 LOW-COST ALTERNATIVE TO HEAT WATER IN YOUR VAN
If you’re thinking of a more modest RVing project, perhaps to travel only in warm weather, you might be interested to know that there is an inexpensive and natural way to heat water: solar showers.
A SOLAR SHOWER, is nothing more than a thermal bag that exposed to the sun, heats the water inside. With no installation required (it sits on the roof of the van or hangs from a branch), inexpensive, and with a hand shower included, solar showers are a good alternative for getting hot water without including a water heater in the electrical system.
An average sun shower can bring 20 liters of water to a temperature of 40-45° in about three hours of direct exposure to sunlight.
Obviously, this type of water heating is heavily dependent on weather conditions, but for what it costs, it’s definitely an easy option to consider, especially for small projects.

9. Faucets and Showers: Useful Tips
Faucets are the icing on the cake of your plumbing system, the easiest part to install and the only part you are likely to see once the project is complete .
There are faucets on the market of all types, all shapes, all sizes and for all needs. Despite the fact that the aesthetics may change entirely from one model to another, all types of faucets work the same way, and they are divided into:

One Way Taps
Taps with access for a single hose.
One-way faucets (both sink and shower) work exactly like the faucet valves we saw earlier (open and closed).
They are used for utilities that use only cold water.

Two-Way Taps
Two-way faucets have access for two pipes, and are installed for those water users that require both hot and cold water.
Two-way faucets can be with a mixer, or with two separate knobs (hot water and cold water).
Their operation is always the same: open and close the two pipes (hot – cold) according to your needs.
Personally, I can tell you that when choosing faucets, the best thing to do is to following your taste and the van design you have in mind (there are really all kinds!).
The only advice I can give you in buying them is to pay attention to check out the size of their fittings (if you get a tap with the right fittings now, you will not have to juggle to find adapters, reducers, etc.. Nevertheless, if you have already purchased a model with different fittings, fear not: a solution with fittings can always be found 🙂
In my camper van, having installed a water heater, I decided to install all two-way faucets.
These are the models I installed: outdoor shower faucet, sink faucet, indoor shower faucet. If you are interested in learning more about the specific installation of these models, I recommend reading the article How to Build a Shower on Your Camper Van.).
10. Tools Needed to Install Your Water System
Below you will find all the products and tools that you will presumably need to create and install the water system on your Do-It-Yourself Camper (all products that I used for my camper van).
For your convenience, clicking the image of any product will directly open the Amazon page should you also be interested in buying it or just interested in understanding the qualities of the products you need.
For the sake of transparency note: I participate in the Amazon Associate program and for any purchase made through the links on this site, I receive a small commission that I use to support the costs of this blog, obviously at no extra cost to you 🙂 ) All products that I recommend are the ones I personally used too 🙂
Pipe in
Blue Polyethylene
Hose with a diameter of 12mm, ideal for distributing cold water.
Pipe in
Red Polyethylene
Flexible hose with a diameter of 12mm, ideal for distributing hot water.
Shurflo pump
Trailking 7
Self-priming RV pump with a capacity of 7/Liters per minute.
Expansion Vessel
Flame
An accumulator to remove “hiccup” water from taps.

Filter Pump
Shurflo
A Filter to capture dirt particles and protect the pump.

Water Entrance for Camper
Inlet for refilling the tank from the outside of your camper van.

Valve
Discharge
To empty the boiler in winter and protect the water system.

Multi-Socket Clamp (pipe plier)
Essential for tightening fittings and faucets effectively.

Faucet
Two-way
A tape to fill and seal cracks making them waterproof.

Set
of Hose Clamps
Set of hose clamps of various sizes, suitable for any type of pipe.

Pipe Clips
Plastic
Plastic accessories to securely fasten water pipes in place.

“John Guest” Quick Fittings
Quick couplings for fast and safe fixing of Polyethylene pipes.
11. Practical Tips for Connecting Your System without Dripping

Now that we have seen all the components of the water system of a motorhome and the various diagrams to connect them together, before ending I want to leave you some practical advice that I learned from my experience installing my water system totally by myself:
1) Wherever possible, use quick couplers: quick couplers are really quick to install, are drop-proof and relatively inexpensive. During my van conversion journey, I had several problems installing faucets with traditional fittings (and they require a lot more time and work: Teflon, bitch, gaskets, etc.), while the quick couplers never missed a drop.
2) Never forget the Teflon in traditional fittings: when there’s anything water-related to screw in, remember to use Teflon and pull hard and all the way in with a pile plier. Even the slightest invisible crack is enough for water to seep in and start dripping.
3) Use gaskets and never use waterproofing glues/sprays: your pipes, if you have installed a pump, contain water at a higher pressure than atmospheric pressure. No glue, no matter how strong, can waterproof a poorly screwed crack or joint if it is under pressure. Make sure you use the right gaskets and pull them firmly all the way through.
4) When you are unsure, ask for advice before improvising: before this project, I had never tried my hand at creating a water system. Fortunately, everything can be learned. When there’s a problem with the hoses, or when you’re unsure of what fitting you might need to connect two components together, the wise thing to do is to ask those who know more about it: a plumbing/hydro store, a plumber, this blog… 😉 Some leaks on the first try will probably always be there (it’s normal!), however, the important thing is to have the theory in your head from the beginning.
12. DIY Water System for Van Conversion
Conclusions and Next Steps
This was my complete guide to the water system in a camper/converted van. I really hope this helps you.
If you are interested in specific parts of the water system (e.g., shower, toilet, boiler, etc.), you will find in-depth articles in the general summary of the Guide to Heating a Van.
In addition to the insights, there you will find other Maxi-Guides including the one for the ‘electrical system, the one for theapproval and much more.
For now we say goodbye, if you have any further questions or comments don’t hesitate to write me in the comments below.
Even if you find inaccuracies let me know, so I can improve this guide for those who will read it in the future.
See you in the next article! 🙂
BEFORE YOU GO, CAN I ASK YOU FOR SOME FEEDBACK?
Writing detailed articles like this takes a lot of time and effort..
If you liked it, can I ask you to leave me a feedback message in the comments at the bottom of the page?
For a content-creator, knowing that you are being read and that your efforts are useful to someone is the best motivation to keep writing and doing better 🙂
Let me know what you liked or what you think could be added.
If you’d like, you can also share the article to help other people find it!
Thanks for the help 🙂

Read the Van Conversion Guides

How to Calculate the Right Section of 12V Cables | EASY GUIDE
An undersized cable does not carry enough current. A cable that is too undersized can lead to a fire. An oversized cable, on the other hand, simply costs more and is a waste of money. Are you wondering what is the logicfor choosing one section of cable over...

Bluetti vs Ecoflow | Which is the Best Portable Power Station for RV/Vanlife?
The Portable Power Station is an increasingly used accessory on camper vans and RVs, but when does it really make sense to purchase and own or install one? In this article we try to shed some light on how these systems work, the best options on the market, and the...

Van Conversion DIY: How Much Does It Costs? | My Experience
How much does it cost an entirely DIY van to campervan conversion? The queen of all questions... In this article, I want to show you all the costs of my conversion from start to finish, so that you too can get an idea of what it might cost! ...
Van Electrical Diagrams for your DIY Project – Ready to Install
The Electrical System is often one of the most complicated steps in a DIY van conversion. How much energy is needed? What apparatus/devices to purchase? How to connect them? How much would it cost? These are all doubts and questions that normally everyone finds...

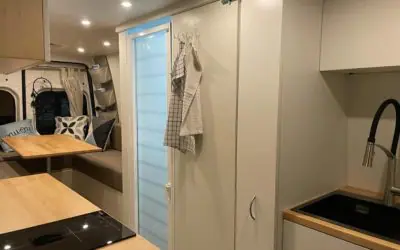
Van Interior Conversion: Best DIY Ideas for your Project!
The Interior Outfitting of a DIY converted van is both an aesthetic and structural choice. In this article, you will find useful information and inspiration ideas for customizing the Walls, the Ceiling, and the Floor of your Van! DIY CAMPERVAN SET-UP:...

Kitchen for Camper | Best DIY Ideas for your Van Conversion
Cooking in Camper is one of those things, that makes you feel at home wherever you are! Gas, Diesel or Electric Stove? What equipment and accessories you need on the Road? How much space do you need? How to assemble the kitchen in your Camper? In this article you will...

The Best Fridge for Your Campervan – Which One to Choose?
Buying a trivalent or compressor RV refrigerator? Horizontal or vertical? 12V or 110/220V? In this article you will find all the information you need to choose the best fridge for Your Van, tailored to your Needs! 🙂 THE REFRIGERATOR IN THE VAN:...

Van Conversion: How to Build a DIY Bed for your Camper Van
A Camper is not a Camper if it does not have a bed. Where to Sleep and... Dream! In this Guide you can find the inspiration you need for creating a DIY Bed in Your Campervan, And I'll show you step by step how I built a Complete Bed/Dinette on my VW Crafter....
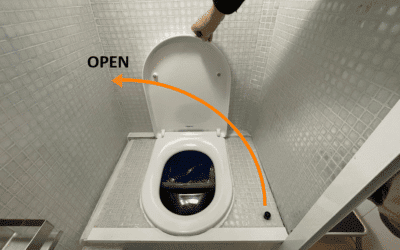
DIY Camper Bathroom: How to Self-Build a Toilet
If you are Campering a Van you surely must have wondered: How does the Bathroom in a Motorhome work? In this Guide I show you the various types of Bathrooms on the market, I explain how they work, and I show you how you can Build yourself an entirely...
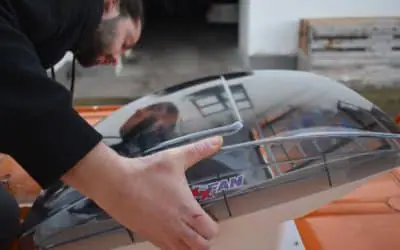
Best 12V Fan for RV | DIY Installation Guide | Van Conversion
A Roof Fan helps keep your Vehicle's humidity under control and change stale air. In this guide you will find everything you need to know about mounting a Maxxfan Deluxe fan on the roof of YOUR van. ROOF FAN: WHAT IS IT FOR? Keeping an RV's...
How to Build a Shower in a Do-It-Yourself Camper
A Shower in the RV for some people is not necessary, for others it is a real necessity to be totally independent! In this guide I'll tell you how I built the shower of my converted van entirely Do-It-Yourself! INSTALLING A SHOWER IN A...
Complete Guide and Electrical Scheme for your D-I-Y Van Conversion
You dream of transforming your Campervan DIY and have never touched an electrical cable before? Or do you want to implement some changes to your Factory RV? In this guide you will find EVERYTHING (absolutely EVERYTHING!) you need to know to create the perfect DIY...


Really helpful guide, thanks so much!