
A cosa serve l’isolamento in un Furgone Camperizzato?
Come funziona la trasmissione di calore?
Quali materiali si possono usare per coibentare il tuo Camper e quali sono i loro vantaggi e svantaggi?
In questa Guida,
troverai tutte le risposte a queste domande, ed a molte altre 🙂
CAMPERIZZARE UN FURGONE: PERCHE’ INSTALLARE L’ISOLAMENTO TERMICO?
Se sei mai entrato in un auto parcheggiata durante una torrida giornata d’estate o dopo una fredda notte d’inverno, probabilmente già ti sarai reso conto di quanto un veicolo in metallo conduca il calore.
Se stai pensando di camperizzare un furgone più o meno grande, quello che devi sapere è che senza le dovute modifiche per il controllo termico, il tuo veicolo si comporterà esattamente come quell’auto parcheggiata: diventerà un potenziale forno al sole d’estate, ed un frigo nei giorni freddi d’inverno.
Visto che un camper, inclusi i furgoni camperizzati Fai-da-Te, mira ad essere essenzialmente una piccola casetta su ruote, è perciò importante pensare a come renderla il più confortevole possibile, anche in termini di temperatura.
Per controllare la temperatura interna di un van, ovviamente si possono utilizzare una ventola da soffitto per il ricambio d’aria, un sistema di riscaldamento per mantenere la temperatura confortevole d’inverno, ed in alcuni casi pure un climatizzatore.
Detto questo, tutti questi apparati ovviamente consumano più o meno energia, ed è uno spreco (oltre che un gran costo!), tenerli accesi tutto il tempo perchè il calore penetra o si disperde all’esterno attraverso le pareti metalliche del tuo van.
E qui entra in gioco l’isolamento termico! L’isolamento termico, altro non è che un processo di “imbottitura” delle pareti/pavimento/soffitto del tuo furgone, che aiuta il tuo veicolo a mantenere il calore al suo interno d’inverno, ed all’esterno in estate. Con un buon isolamento termico, il tuo camper sarà più piacevole e godibile da vivere in tutte le stagioni.
In questa guida, ti spiegherò tutto sull’isolamento termico di un van: come si trasmette il calore, i materiali coibentanti presenti sul mercato, le loro caratteristiche, la mia esperienza ed i miei consigli per fare un lavoro ancora migliore di quello che ho fatto io 😉
Buona Lettura!
TABLE OF CONTENTS
Van Conversion DIY: Complete Guide to Thermal Insulation
1. The Theory: Understanding How Heat Is Transmitted
2. Characteristics to consider when choosing the insulation material
3. Summary of the most common Insulating Materials on the Market
4. My Choice: How I Insulated My Van – Step by Step
5. How to Protect yourself from the cold – Extra Tips
6. How to Protect yourself from the heat – Extra Tips

1. The Theory: Understanding How Heat Is Transmitted

Before we start talking about insulation for your van, it’s important to understand the ways in which you can move heat around.
In fact, in the case of an RV, heat can “move” (meaning enter, leave and move within) in three different ways: by radiation, by conduction and by convention.
In the next few paragraphs, I’ll briefly explain each of these terms and why they are important to understand in order to insulate your camper van in the most effective manner.
1.1 RADIATION: HEAT PASSING THROUGH AIR OR VACUUM
Radiation is the natural phenomenon whereby heat is transmitted through air or an empty body.
When you are in the sun and you feel warmed by its rays, that is solar radiation: the rays that without touching anything else first, bring heat where they touch.
In the case of your van, the sun’s rays can pass through the windows. Therefore, in addition to obviously heating the outer frame of your vehicle, solar radiation can also heat the interior of your vehicle, passing through the exposed glass of your windows.
While this process can be comfortable and pleasant in the winter (or at least in cold climates), in the summer it can really turn your van into a hot oven (like when you park a car in the sun in the summer).
To stop solar radiation through windows (or any other surface), we normally use reflective surfaces that depending on the direction they are installed, can keep heat out, or inside the vehicle (more on that later).
1.2 CONDUCTION: HEAT PASSING THROUGH CONTACT
Conduction is that thermal process whereby heat passes from a hot surface to a cooler one through contact.
If you’ve ever accidentally drank a coffee that was too hot and burned your tongue, know that you burned it by conduction (heat passed quickly from the hot coffee to your tongue as soon as it touched it).
In the case of your van, heat can pass by conduction through your floor, your walls and your ceiling.
Since most of your van is metal (which conducts just fine), heat can easily pass by conduction from the outside to the inside and back again.
To remedy this problem and to keep the heat out in the summer and in in the winter, you need to reduce the thermal conduction capacity of your van and to do this you use thermal insulation.
1.3 CONVECTION: THE CIRCULATION OF HEAT WITHIN A FLUID (LIQUID OR GAS)
Convection is the movement of heat in a fluid (liquid or gas), where heat rises upward, while cold (heavier) heat falls downward .
In the case of your van, the warmer air will tend to rise toward the ceiling, while the cooler air will tend to fall toward the floor.
Understanding convection is important to understanding Where to focus more with thermal insulation: in fact, insulating your van’s roof more will help you preserve heat more in the winter (since in RVing, every inch counts, it is important to know where to “invest” a few extra inches in insulation, and where you can avoid it).
That said, before we continue with the next chapters of the article, let’s see together what we mean by thermal insulation.
1.4 UNDERSTAND WHAT IS THERMAL INSULATION AND THE “THREE PREMISES” OF THE ARTICLE
If you’ve already surfed the internet a bit, you’ll have noticed that the topic of “thermal insulation” for a camper van is a bit of a mix between religion and science: everyone has a different opinion on what’s best to use and there are a thousand myths about all materials.
The purpose of this article is not to confuse you further, but simply to help you understand the theory of thermal insulation and to make the right choice for YOUR project.
For this reason, before I continue I want to make three key points clear to keep in mind:
- Heat insulation in a van is about keeping the heat where it is: if it’s out, keep it out (in the summer), and if it’s in, keep it in (in the winter). To do this, you need to use a heat-insulating material that acts as a heat barrier (so it doesn’t transfer heat well and struggles to get warm).
- Insulation material options there are many, and there is not one that is better than the others in all cases. It all depends on YOUR preferences and YOUR project. I will, in the next few chapters, show you all the insulation options with their advantages and disadvantages, so that you can make an informed and useful choice to meet your needs.
- In this article I will NOT go into the technicalities of how heat is transmitted or how thermal resistance is measured, but just make it as easy as possible for you to make your informed decision. This article is designed to make your life easier, explain everything you need to know in a simple way, and arrive at the end of the article with a solution in your pocket.
Made clear these premises, we’re ready to launch into the search for the perfect insulation for your converted camper. In the next few chapters, in order, I’ll explain what characteristics of the insulating materials you need to keep in mind, what materials exist on the market, and their properties and finally I’ll explain to you how I insulated my van.
2. Characteristics to consider when choosing the insulation material

Before I show you the various insulation options available on the market, I think it’s important to briefly explain the main characteristics in which the different materials differ.
In this way, you’ll have clear categories with which to compare the insulation options we’re going to look at below, and with which you can compare them based on your preferences and needs.
Below, you’ll find the six categories that I recommend you keep in mind when considering which insulation material to choose: insulation coefficient, water resistance, ease of installation, sustainability, toxicity, and of course cost (per square meter).
If you don’t care to learn the theory or you already know it, you can skip the following chapter and go directly to the Comparative Table of Insulation Materials.

2.1 INSULATION COEFFICIENT
The ability of a material to insulate (block heat transfer) is commonly measured by an insulation coefficient called the R-Value .
R measures the heat trapping capacity (thermal resistance) of a 1Inch (2.54cm) thick material.
The higher the R, the more insulating is the material. If 1-Inch of a material has R-value=6, it will insulate twice as much as a material with R-value=3, and half as much as 2-Inches of the same material (R=6+6=12).

2.2 WATERPROOFING
Steam and condensation can be problems in an enclosed, confined space like the interior of a camper van.
In fact, the hot vapor that tends to hover upward in the air, when it comes into contact with cooler materials can condense into water droplets (as happens on the windows of a parked car with someone inside) that could seep into your insulation.
Water near the sheet metal, in the long run means rust. Insulation that is not waterproof, could give mold a fertile place to grow. For this reason, it is good to understand all the moisture control techniques (heating, windows, fans, etc.) and to evaluate the installation of a vapor barrier and the use of waterproof insulation materials.

2.3 EASE OF INSTALLATION
If you want to throw the value of your time and sanity into the equation of your insulation choice, you’ll probably be happy to weigh ease of installation into your choice as well.
In fact, some insulation materials are extremely quick and easy to install: you take them, place them, and you’re done (we’ll see which ones next).
Others, however, need to be cut and processed. Still others stick, others make a lot of dirt, others are potentially toxic and must be installed with gloves and a mask… in short, each material must be installed differently and involves different work.

2.4 SUSTAINABILITY
Nowadays, more and more people are looking to increase the sustainability of their lifestyles in various areas of their lives.
If it’s important to you to know how insulation materials are produced and what impact their life cycle has on the surrounding environment, you’ll probably be interested in keeping this judgment criterion in mind.
In fact, different materials have diametrically opposed impacts: some are simple natural products, while others are products of more or less polluting chemical reactions.

2.5 TOXICITY
Some of the insulation materials in the ones I’ll show you below can be potentially toxic to your health.
Obviously, if installed well and with proper precautions, none of them will give you any problems (otherwise I wouldn’t even mention them!).
That said, I think it’s important to be informed of the hazards of different materials and the precautions needed both in installing them and sterilizing them once installed.

2.6 COST PER SQUARE METER
Dulcis in Fundo, but not less important: the cost!
In fact, as much as you may want everything (e.g. a sustainable, non-toxic, super-insulating, waterproof, easy-to-install product), if you’re on a tight budget unfortunately you have to make choices and compromises.
The cost of a material, undoubtedly will guide your choice, which is why it is included in this list. I decided to include it as a “cost per square foot” to help you compare different materials that are often sold in very different packages and sizes.
Now that we’ve seen the important parameters for judging and choosing an insulating material for your camper van, let’s get into the details of each insulating material on the market.
3. Summary of the most common Insulating Materials on the Market

Below, I leave you with a Comparative Table of the most commonly used Insulation Materials for DIY Conversions. I have created this table so that you can easily click on the material characteristic you are most interested in and sort the materials according to it.
NOTE: The values expressed in the table are indicative of an average product and are not accurate to the decimal point. Some producers may be more sustainable than others, and obviously prices can fluctuate over time. The table was created with the purpose of giving you a general picture of the available materials and their properties: then of course, to choose the best for your project, you will always have to evaluate the characteristics and convenience of the products you will find around you.
Table of Insulating Materials to insulate a Camper Do-It-Yourself
| Materiale Isolante | Valore-R | Impermeabile | Installazione | Sostenibilita | Tossicita | Prezzo m/2 (R=6) |
|---|---|---|---|---|---|---|
| Lana di Vetro | 3,5 | NO | Con Maschera/Guanti | Media (Produzione Inquinante) | Alta | 2,5 |
| Lana di Roccia | 3 | SI (al vapore) | Con Maschera/Guanti | Media (Materiale Riciclato) | Media | 4 |
| Lana di Pecora | 3,5 | NO | Facile | Alta (Prodotto Naturale) | Nulla | 10 |
| Pannelli XPS | 5 | SI | Medio | Scarsa (Produzione/Post-Uso Inquinante) | Bassa | 5 |
| Pannelli EPS | 3,8 | NO | Medio | Media (Smaltimento Inquinante) | Bassa | 8 |
| Pannelli Polyiso | 6,5 | SI | Medio | Media (Materiale Riciclato) | Bassa | 8 |
| Sughero | 3,8 | SI (trattato) | Facile | Alta (Prodotto Naturale) | Nulla | 20 |
| Schiuma Poliuretanica | 6,5 | SI | Medio (cola e appiccica) | Scarsa (Gas CFC Inquinanti) | Media | 18 |
| Reflectix | 1 | SI | Facile | Media (Riciclabile) | Nulla | 10 |
| Thinsulate | 3,3 | SI | Facile | Alta (Materiali 100% riciclati) | Nulla | 28 |
| Denim | 3,5 | NO | Facile | Alta (Fibre di Cotone Riciclate) | Nulla | 5 |
| Armaflex | 4,2 | SI | Facil(issima) | Media (Produzione Inquinante) | Nulla | 32 |
Now that you have the table to compare the characteristics of the various materials, I want to briefly tell you a little more about each of them and their properties.
Below, I leave you with a brief description of each thermal insulation material, each with its most relevant advantages and disadvantages.
Once I show you the different materials in detail, I’ll show you what I used to thermally insulate my VW Crafter and, with photos and videos, I’ll show you my entire step-by-step installation process.
3.1 OPTIONS OF HEAT-INSULATING MATERIALS FOR INSULATING A DO-IT-YOURSELF VAN

GLASS WOOL
Soft and versatile product chemically created through glass processing. It is a thermal and electrical insulator that is easy to fit into cavities and tight places because of its great flexibility.
In recent years it has been little used in the insulation of Do-It-Yourself vehicles because of its potential toxicity: with movement, glass fibers can be released into the air and are potentially carcinogenic if inhaled.
To be properly installed,the use of the mask is required. In order to be sterilized and made harmless, you need to be sure to seal it properly behind the walls of your setup.
+ Ultra Low Cost
+ Easy to insert into cavities
– Toxic/Carcinogenic Potential, must be sealed
– Not Waterproof

LANA DI ROCCIA
Materiale creato dalla lavorazione di roccie e minerali. . Relativamente poco costoso e molto flessibile, è un materiale termo-isolante e fortemente ignifugo, normalmente usato per l’isolamento termico nelle case.
La lana di roccia, come la lana di vetro, deve esser installata con guanti e mascherina. Infatti, anche in questo caso c’è il rischio che piccole schegge di materiale si stacchino e vengano inalate.
Sul mercato si trovano tipologie di lana di roccia impermeabili, però mai al 100%. Per questo motivo, se non ben sigillata, la lana di roccia può essere un terreno fertile per l’umidità ed i problemi che ciò può comportare.
+ Costo Basso
+ Facile da Tagliare ed Inserire nelle cavità
– Potenziale Tossico, deve essere sigillata
– Assorbe l’umidità

XPS PANELS (Extruded Polystyrene)
XPS panels (Extruded Polystyrene) are panels made up of closed micro-cells containing micro-quantities of gas. Their insulation coefficient is very high, with an R-value of 5.
XPS panels are extremely water repellent (therefore waterproof) and are very resistant to compression (great for insulating floors).
Their manufacturing process unfortunately makes them one of the least “green” insulation materials from an environmental standpoint. They are easily cut with a knife or box cutter.
+ Cost Content
+ Waterproof and Relatively Easy to Install
+ Very High Insulation Coefficient (R=5)
– The Manufacturing Process is Polluting

EPS (Expanded Polystyrene) Panels
Polystyrene foam panels, often sold coated with a radiation barrier (silver colored).
Among the panels it is the one with the lowest R-value (3.8) but still more than decent.
They have less longevity than other panels instead, as they tend to absorb humidity.
Although EPS panels are slightly less polluting than XPS panels, unless you find some affordable deals, I personally see them as an option dominated by the other panels.
+ Cost Content
+ Easy to Install
– The Manufacturing Process is Polluting
– Absorb humidity

POLY FOAM PANELS
The most sustainable and least toxic panels on the list. Polyiso panels have a very high coefficient of insulation (R=6.5) which allows you to save almost half the inches compared to other options (e.g. various wools).
In addition, polyiso panels are totally waterproof, rigid but still easy to install.
The only negatives I have personally found are that they are not as easy to find and their cost is slightly higher than other panels.
+ Very High Thermal Resistance (R=6,5)
+ Waterproof
+ Easy to Install
– Difficult to Find/Procure in Small Quantities

POLYURETHANE FOAM
Foam with very high thermal insulating power (R=6,5), perfect to fill all the cavities of your van that you cannot reach with other materials.
Polyurethane foam is a perfect insulator, however, it is also often a permanent solution from which there is no turning back once inserted.
The downside, is that in addition to being averagely polluting, applying it well is a fun but averagely complicated process (it expands a lot, sticks, drips, etc.), and covering your entire van only with foam is relatively expensive.
+ Very High Thermal Resistance (R=6,5)
+ Perfect for filling cavities
– Expensive
– Sticky, Messy and Defining

SHEEP WOOL
A natural and sustainable insulator, sheep’s wool is just that material that keeps sheep warm all year round 😉
Its installation is easy, relatively quick, non-toxic and even fun: grab, cut and insert. The price is average, not cheap but not too much either.
The only downside, is that it’s not totally waterproof and absorbs humidity (and needs to be treated to avoid it). Personally, I consider it one of the most interesting isolation options on the list.
Natural + Sustainable + Non-Toxic
+ Good Insulation Coefficient
– Easy and Clean to Install
– Availability, Price and Non-impermeable

THINSULATE
Thinsulate is a synthetic insulation material created by the company 3M of the highest quality, produced entirely from recycled materials.
It strongly dampens sound and has a decent R-value (R=3.8). It’s perfect for corners where neither foam nor panels can reach: thin, flexible and easy to apply.
The only downside (very very downside) is that its cost compared to other materials is absurdly high. Insulating an entire van with Thinsulate is definitely the most wallet-burning option of all.
+ Sustainable, Non-Toxic, 100% Recycled
+ Good Insulation Coefficient
– Easy and Clean to Install
– Very high price

REFLECTIX
Reflectix is nothing more than bubble wrap coated with a silver reflective layer. This material is great as a radiation barrier (reflects heat/radiation) but bad against heat conduction (if in contact with a surface).
Reflectix is normally used to insulate vehicle windows in the summer, but it can also be used turned inside out to keep the heat in during the winter.
Installing it stuck behind walls or on top of other insulating materials, on the other hand, serves virtually no purpose and brings its R-value down to R=1 .Some people use it to create a vapor barrier (which I’ll talk about later), but using reflectix for that purpose it seems to have become more of an internet myth than a scientifically useful thing.
+ Perfect Barrier to Block the Radiation
+ Ideal for Insulating Windows
– Useless for blocking heat conduction without airspace
– Needs 1cm free air to operate

CORK
Cork is another totally sustainable, natural, recyclable and non-toxic insulation option.
Cork panels are relatively easy to cut, break and insert, but only when thin (<2cm). If treated (like most of those sold for insulation), the panels can even be waterproofed.
The thermal resistance of cork is medium-high (3.8), which completes a more than positive picture. Unfortunately, like all good things, there is always a downside: the cost is quite high and insulating the entire van with cork can cost you much more than using other materials.
Natural + Sustainable + Non-Toxic
+ Possibility of being waterproofed
– Relatively high Cost
– Not ideal for curved areas (unless thin)

DENIM
Eco-friendly material created by recycling vegetable fibers (cotton, jeans, etc.).
The insulation coefficient is in average with wools (glass, rock, sheep etc.) and also offers good acoustic insulation.
The biggest problem with this type of insulation is that it absorbs a lot of humidity, so in order to work well without creating mold, it must be well sealed behind a vapor barrier.
+ Ecological
+ Good Price
+ Non-toxic and easy to install
– Absorbs humidity and is not Waterproof

ARMAFLEX
Artificial rubber foam material, manufactured by Armacell.
Armaflex is a highly fire retardant product with a good insulation coefficient, antibacterial, non-toxic and waterproof.
It is one of the most popular materials in DIY campers because of its malleability and ease of use: it follows corners well, curved areas and is easy to apply (like an adhesive).
+ Easy to Apply
+ Good Insulation, Waterproof and Fireproof
+ Non-Toxic and Antibacterial
– Among the most expensive Insulators
4. My Choice: How I Insulated My Van – Step by Step
After reading up on the characteristics of various insulating materials, and after researching the availability and prices around me, I decided to insulate my van in the following way:
- Floor: 2cm thick XPS panels
- Walls: 4cm thick XPS panels
- Ceiling: 4cm thick XPS panels
- In the Cavity: Polyurethane Foam
- Windows: Blackout Blinds/Thermal Insulating Blinds
- Thermal Bridges: Wood
The reasons for my choices were:
- I didn’t want materials that would absorb vapor and humidity, even to a degree. Because of this, I was forced to discard wools, although I have to say that sheep’s wool intrigued me a lot for all its other great qualities (sustainable, easy to install, non-toxic etc.).
- I chose the materials that gave me the most R-value while staying within 4cm of thickness (I wanted to fill the indentations but not overflow, so as not to lose horizontal space inside the van), and XPS panels and foam were among them.
- I wanted to stay within a budget of 200/250 Euros max. I would be covering more thermal bridges with some Thinsulate/Armaflex and maybe do a layer of reflextic where the wall would not touch the walls, but I would have gone too far over budget so I shelved those desires 😉
The downside:
- Unfortunately, the materials are among the least environmentally friendly of all. I plan to use the van full-time for the next few years to get around on my travels, and have been trying to build a “permanent” solution. The products were unfortunately not the most sustainable, but I hope they have a very long life before I have to dispose of them.
Below, I’ll show you step-by-step (with photos) all the steps I used to insulate my VW Crafter and explain in detail the reasons for each step.
4.1 HOW I INSULATED MY CAMPER VAN: STEP BY STEP
4.1.1 HOW TO INSULATE THE FLOOR
1. Before insulating the floor of your van, you must remove the floorboard. In my case, I removed all the installed screws with Torx wrenches.

2. Van floors are normally attached to the floor with Velcro strips and in the case of used vans can be very sticky. Pull very hard.

3. Before proceeding with the insulation, I recommend that you give the floor a good cleaning now that you have a chance, and carefully check for exposed or rusted parts of the floor.

4. If you notice any rusty spots or the sheet metal scratched in places (even small dots), I recommend treating it with a rustproof primer.

5. Once the rust inhibitor has dried, paint with a galvanized sheet metal enamel or rust inhibiting enamel. The paint protects the metal and stops rust from forming.

6. At this point it’s time to start insulating the floor. First, I created a wooden “support” structure, where I would then screw in the floor and furniture. I used planks with measures: height 2cm, thickness 4cm, cut at the time with a jigsaw.

7. To give elasticity to the structure, I first glued the planks using Sikaflex 521 glue, and then screwed them to the metal sheet. I recommend creating a regular “net” so you know where the wooden planks are once you install the floor over your insulation.

8. Before screwing in the wooden floorboards, make sure you have room under the van and that there are no other utilities. Where you’ll see the screws sticking out, you’ll need to treat as before with rust inhibitor and spray paint (more convenient for this task).

9. After obtaining a load-bearing wooden mesh, I filled the spaces between the planks with rectangles of 2 cm thick XPS panels (equal in height to the planks).

10. Once the puzzle was complete, I sealed all the gaps between the boards and the XPS panels using aluminum tape. This way, I got a totally waterproof floor and eliminated the risk of water/moisture seeping onto the sheet metal floor.

NOTE: I decided to use 2cm thick XPS panels because I didn’t want to raise the floor too much and to allow me to stand comfortably inside my van (I’m 1.87 and the inside of my crafter was about 1.94). In addition, because of convection (which we saw in the Chapter 1), heat tends to rise more upward and it is therefore more important to insulate the ceiling well than the floor. In fact, it is upwards that heat will tend to rise and escape in winter, and likewise it is from above that it is most likely to try to enter (where the sun’s rays beat).
Below, I’ll leave you with a photo of the finished insulated floor, on top of which I then installed the wood floor again (which despite being from a used van, was in good condition) and then the vinyl floor.
NOTE2: If you are interested in learning more about how I built the walls/floor/roof, I suggest you read the guide Van Conversion: Internal Roof, Floor and Walls.
Insulated Floor – Finished

4.1.2 HOW TO INSULATE THE WALLS
11. To insulate the walls of my van, I used 4cm thick XPS panels (perfect thickness for the coves of my VW Crafter). To cut them to size, I used a box cutter and a common kitchen knife.

12. NOTE: Before proceeding with wall and roof insulation, make sure you’ve thought through the structure of your electrical system (read guide ) and installed all the pipes and conduit you’ll need in the future. Think that it’s always better to insert a few more empty tubes into the walls while you still can. Once insulated, it will be very difficult or impossible to add more, especially if you’re working on a fixed setup.

13. Once you are sure you have all the necessary pipes, it will be time to play tetris. With a little patience, the goal is to fill as much as possible and firmly all the spaces with our 4cm XPS panels.

14. In my experience, I have been able to fit XPS panel cutouts into both the top and bottom of the walls. In the middle part instead, I glued whole panels using polyurethane foam and using scotch tape and wooden boards to hold them in place until the foam dried.

15. Once the main panels were attached, I made sure all the pipes got to where I calculated to install the various electrical appliances.

16. When everything is in place, what’s left to do is to fill in all remaining holes, cracks and crevices with polyurethane foam.

NOTE: As you can see in the video, polyurethane foam tends to expand a lot. That’s why I recommend you put in a little at a time and if necessary add more later. This foam is pretty darn sticky, so I would also recommend always using some work glovesand have a roll of paper towels handy to clean up any messes (as you can see from the next photos, I messed up a lot too 😉 )
NOTE 2: Foam boards in general (XPS, EPS AND Polyiso) rubbing against each other or with metal walls can create a very distinctive high-pitched sound, like a annoying rubbing between two pieces of polystyrene. To prevent this from happening every time the van moves, the pieces must be perfectly still. Personally, I’ve noticed that by filling all the cracks and holes with polyurethane foam, the rattling disappears. I recommend that you test your van before installing the final walls, so you can be sure that you won’t have to put up with the squeaky panel noise for life.
NOTE 3: Remember that after spraying polyurethane foam into the cavities of your van, there is hardly any turning back. So think carefully 3-4 times before spraying, and make sure you don’t need to access those areas again to mount other services.
NOTE 4: Doors can be insulated in the same manner as walls: make a puzzle of XPS panels and foam the cracks. The important thing, however, is to be careful when putting on the polyurethane foam, that it does not interfere/block the opening and closing mechanisms of the doors.
17. Once foamed, it was time to take care of the thermal bridges (metal parts that if resting directly against my walls, would transmit heat/cold by conduction/contact). To cover them, I screwed in boards 4 cm wide and 2 cm thick.

18. Wooden planks are a natural thermal insulator, also useful for fixing wooden walls with screws, and then the various components of the set-up (furniture, bed etc.). That’s why it’s important to place boards strategically with your project in mind.

NOTE: To screw the wooden boards to the sheet metal of the van (cladding) I used some self-tapping countersunk head screws (size 4×40). If they have trouble getting in, I suggest you prepare the hole by drilling it with a metal drill bit with a diameter slightly smaller than that of the screw.
19. Once the wood cladding was finished, I skimmed the remaining loopholes and covered the remaining sheet metal with aluminum tape so that nothing was left exposed.

20. To finish off the walls, I covered them with a layer of waterproof insulation underlayment to seal it all in (technically my sister covered them, pictured 😉 ).

4.1.3 HOW TO INSULATE THE CEILING
21. Before installing the insulation on the roof of my van, I recreated wooden copies of the “ribs” of my roof (slightly curved, 4x4cm), so that I could screw the roof on once the insulation was done (and thus losing only a few millimeters of roof thickness).

22. I screwed these wood pieces to the metal ribs on my roof. To do this, I used clamps, metal drill bits, and 5x60mm self-tapping screws. I installed one per rib, more than enough to support the weight of the ceiling.

23. At this point, I began installing the actual insulation. For the ceiling, as for the walls, I decided to use XPS panels with a thickness of 4cm (the height of the ribs). I glued them using Sikaflex 521.

22. As with the walls, the important thing right now is to be able to do a “tetris” of pieces to be able to cover as much area as possible with panel pieces. The glue takes about an hour to set.

23. To help me hold the panels until the glue had set, I helped myself with some wooden sticks. Doing this job in 2 people certainly simplifies and speeds up the process by no small margin.

24. Once attached to the roof, I hollowed out channels inside the XPS panels to run utility cables (i.e., tubes for the lights spotlights, fan, etc.), which I glued with Sikaflex 521 and secured with aluminum tape.

25. At this point, I took care of the metal “ribs” on the roof of my van. First,I filled them with polyurethane foam (I recommend covering the floor with something, it expands and drips a lot).

26. Once the foam was dry, I covered the metal thermal bridges (which would have otherwise touched my ceiling directly) using self-adhesive rubber insulation tape, which I can say does its dirty work.

27. At this point, as with the floor, I covered all the gaps between the wood and the panels using aluminum tape; so as to waterproof the entire roof as much as possible. Remember that heat and steam go up, which is why the roof is the most important part of your van to insulate.

24. At this point, with the floor, roof and walls well thermally insulated, you can install the cladding most congenial to your tastes. If you’re interested in what I installed, I’ll leave you with the article on How to Reupholster a Van.

5. Protecting Yourself from the Cold in Van – Extra Tips

Winter certainly is not the favorite season by most campervans.
The cold, the rain and especially the snow, require twice as much preparation as in summer and much more cumbersome equipment: coats, jackets, warm blankets, boots, snow chains etc.
Below I want to give you some tips and food for thought to plan how to protect you and your camper van in the best way from the cold of winter:
- Install an Air Heater: no matter how well the thermal insulation may have been installed, somehow you’ll have to create heat inside your vehicle when it’s cold outside (insulation slows down the transmission of heat to the outside, but it doesn’t stop it!). To do so and to not say goodbye to winter travel, the best solution is definitely to install an air heater. There are various types on the market and for all budgets! If you’re interested in learning more, I recommend my article: How to Heat a Van: The Complete Guide).
- Cover windows with a reflective material (e.g. Reflectix) facing inward: Windows, being virtually uninsulated, are one of the most obvious heat escape points inside a van. Installing an aluminum covered thermal window shade to the inside, will reflect heat and allow you to lose less of it through the glass.
- Alternatively, install a Thermal Blind: to black out the windows at night, I built myself entirely DIY custom-made window cover curtains. In doing so, I used a thermal blackout curtain that helps mitigate heat loss to the outside. In addition, I also used the same material to separate the interior of my vehicle (which cools quickly, having so many windows and not being insulated) with the living area.
- Think about protecting your water system: if temperatures go below freezing, there’s a real risk that the water in your water system could freeze. This can be very problematic (as it freezes, the water increases in volume!) and could cause damage to the components of your water system. Think carefully about where to install your water tanks (if you plan a fixed setup) so that they stay warm enough, or alternatively install a drain valve that allows you to empty your system in critical temperature situations. If you are interested in knowing how I installed my water system, I suggest you to read the article Do-It-Yourself Camper: A Guide to the Water System.
- Get a carpet (or two): The floor (normally being the least insulated area of a camper van) is likely to be freezing cold on winter mornings (unless you sleep with the heat on, but that depends a lot on the type of heating you plan to install). The easiest solution to get around this problem is to use some soft and warm mats 😉
- If you sleep with no heat on, be prepared with the right gear! A sleeping bag, a down jacket or even a 12V heated blanket, the options for staying warm at night are varied. The important thing to enjoying a winter trip is to be prepared for eventualities and what the road (and the weather!) may bring you.
- Keep an eye on the weather when planning a trip! We live in the future, predictions are at our fingertips, use them! Knowing whether you’ll face snow, rain, cold or find some nice weather days will definitely help you prepare your van the right way and not be found unprepared!
To conclude, thermal insulation is essential to be able to live more comfortably in your van even in the cold season, however equally important is your preparation for the trip you are going to do and the accessories you choose to install/take with you.
6. Protecting Yourself from the Heat in Van – Extra Tips

As in the case of cold weather, well-made insulation is essential to always find the inside of your motorhome pleasant and avoid the “oven” effect on hot summer days.
Despite this, in addition to thermal insulation, there are other tricks and behaviors that can certainly help you maintain a more enjoyable temperature inside your vehicle. Below, I list a few of them:
- If you don’t already have one, I recommend installing a ceiling fan that can expel stale air and suck in fresh air whenever possible. In fact, ceiling fans are the #1 tool for keeping your van’s humidity under control, as well as temperature and odors. Here is a Complete guide of how I installed my Maxxfan fan entirely Do-It-Yourself.
- Using a ceiling fan, you can create a pleasant draft by opening a window in your camper van.
- On warmer days, you can cover the windows of your van with thermal shades (you can find them already made for various vehicle models, or you can buy the materialand make them DIY)
- Think about installing a thermal blackout curtain between the interior of the vehicle (which normally heats up very quickly) and the living area (in this article – coming soon – I show you how I created and mounted my custom blackout blind)
- As obvious as it may be (and often difficult), parking in the shade is still one of the best ideas for staying cool in the summer.
- In extreme heat situations, you can think about using a small generator to run a portable air conditioner
Personally, with my insulation I’ ve never yet found myself with too unbearable a temperature inside my VW Crafter.
Nevertheless, some measures can certainly improve the livability of our little house on wheels. Understanding the behavior of heat (chapter 1) is certainly the basis for being able to protect yourself from extremes of temperature.
7. DIY Van Insulation Guide for Beginners: Conclusion

In this article we have seen how heat is transmitted, what is thermal insulation and what are the materials on the market most used to insulate the Do-it-yourself campers.
Next, after looking at the characteristics of each of the insulation materials, I showed you how I installed insulation on my VW Crafter using XPS panels, polyurethane foam, wood and related accessories.
Of course, I would like to remind you that is just one of the many ways in which you can insulate a camper van.
The truth is that there is no single perfect method to isolate a van, but many solutions that can work together, and it is up to you to choose and combine to meet the needs of YOUR project in your head.
Personally, I can advise you to don’t stress yourself any more than you have to for thermal insulation: it’s something that you don’t see at the end of the project and is therefore aesthetically irrelevant, it’s not one of those projects where small details change night-and-day the outcome, and on first experience it’s normal to mess around a bit. 😉
The important thing to do a good job instead, is to understand well how heat is transmitted and analyze with critical eyes your vehicle to identify possible thermal bridges, areas to be treated and critical issues.
I hope this guide has been helpful in clearing your head on the topic of insulation and helping you choose the right materials for your van!
If you have any questions about the topics covered in the article, think you need more information on certain details, find inaccuracies, or just want to help make it more complete for those who will read it after you, let me know in the comments below and I’ll get back to you as soon as I can 🙂
Thanks for reading, and as always, see you in the next guide! 😀
BEFORE YOU GO, CAN I ASK YOU FOR SOME FEEDBACK?
Writing detailed articles like this takes a lot of time and effort..
If you liked it, can I ask you to leave me a feedback message in the comments at the bottom of the page?
For a content-creator, knowing that you are being read and that your efforts are useful to someone is the best motivation to keep writing and doing better 🙂
Let me know what you liked or what you think could be added.
If you’d like, you can also share the article to help other people find it!
Thanks for the help 🙂

Read the Van Conversion Guides
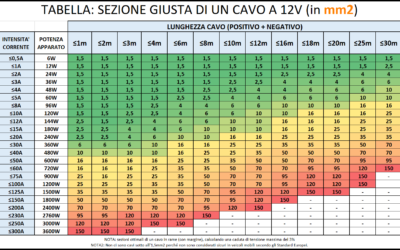
How to Calculate the Right Section of 12V Cables | EASY GUIDE
An undersized cable does not carry enough current. A cable that is too undersized can lead to a fire. An oversized cable, on the other hand, simply costs more and is a waste of money. Are you wondering what is the logicfor choosing one section of cable over...

Bluetti vs Ecoflow | Which is the Best Portable Power Station for RV/Vanlife?
The Portable Power Station is an increasingly used accessory on camper vans and RVs, but when does it really make sense to purchase and own or install one? In this article we try to shed some light on how these systems work, the best options on the market, and the...

Van Conversion DIY: How Much Does It Costs? | My Experience
How much does it cost an entirely DIY van to campervan conversion? The queen of all questions... In this article, I want to show you all the costs of my conversion from start to finish, so that you too can get an idea of what it might cost! ...
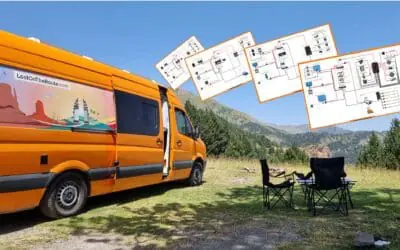
Van Electrical Diagrams for your DIY Project – Ready to Install
The Electrical System is often one of the most complicated steps in a DIY van conversion. How much energy is needed? What apparatus/devices to purchase? How to connect them? How much would it cost? These are all doubts and questions that normally everyone finds...

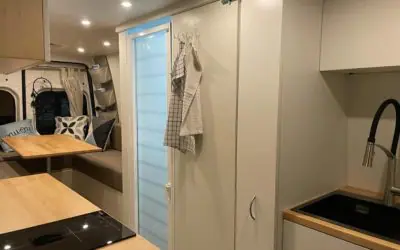
Van Interior Conversion: Best DIY Ideas for your Project!
The Interior Outfitting of a DIY converted van is both an aesthetic and structural choice. In this article, you will find useful information and inspiration ideas for customizing the Walls, the Ceiling, and the Floor of your Van! DIY CAMPERVAN SET-UP:...
Kitchen for Camper | Best DIY Ideas for your Van Conversion
Cooking in Camper is one of those things, that makes you feel at home wherever you are! Gas, Diesel or Electric Stove? What equipment and accessories you need on the Road? How much space do you need? How to assemble the kitchen in your Camper? In this article you will...
The Best Fridge for Your Campervan – Which One to Choose?
Buying a trivalent or compressor RV refrigerator? Horizontal or vertical? 12V or 110/220V? In this article you will find all the information you need to choose the best fridge for Your Van, tailored to your Needs! 🙂 THE REFRIGERATOR IN THE VAN:...
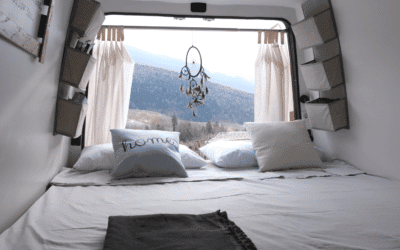
Van Conversion: How to Build a DIY Bed for your Camper Van
A Camper is not a Camper if it does not have a bed. Where to Sleep and... Dream! In this Guide you can find the inspiration you need for creating a DIY Bed in Your Campervan, And I'll show you step by step how I built a Complete Bed/Dinette on my VW Crafter....
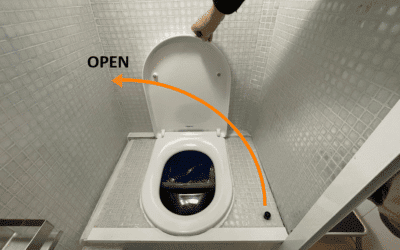
DIY Camper Bathroom: How to Self-Build a Toilet
If you are Campering a Van you surely must have wondered: How does the Bathroom in a Motorhome work? In this Guide I show you the various types of Bathrooms on the market, I explain how they work, and I show you how you can Build yourself an entirely...
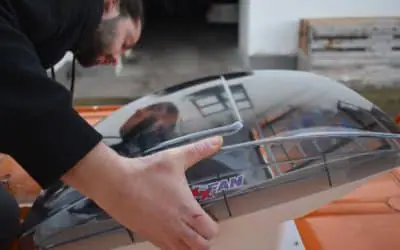
Best 12V Fan for RV | DIY Installation Guide | Van Conversion
A Roof Fan helps keep your Vehicle's humidity under control and change stale air. In this guide you will find everything you need to know about mounting a Maxxfan Deluxe fan on the roof of YOUR van. ROOF FAN: WHAT IS IT FOR? Keeping an RV's...
How to Build a Shower in a Do-It-Yourself Camper
A Shower in the RV for some people is not necessary, for others it is a real necessity to be totally independent! In this guide I'll tell you how I built the shower of my converted van entirely Do-It-Yourself! INSTALLING A SHOWER IN A...
Complete Guide and Electrical Scheme for your D-I-Y Van Conversion
You dream of transforming your Campervan DIY and have never touched an electrical cable before? Or do you want to implement some changes to your Factory RV? In this guide you will find EVERYTHING (absolutely EVERYTHING!) you need to know to create the perfect DIY...


0 Comments