
A Shower in the RV for some people is not necessary,
for others it is a real necessity
to be totally independent!
In this guide I’ll tell you how I built the shower of my converted van entirely Do-It-Yourself!
INSTALLING A SHOWER IN A DO-IT-YOURSELF CAMPER: IS IT REALLY NECESSARY?
In camper van, installing a shower is definitely an ambitious choice and project.
On the one hand, a shower brings great benefits in terms of the livability of the camper: you can wash when you want and where you want simply by using the water that carries your camper. If you plan long trips, a shower will definitely help you take care of your personal hygiene without having to depend on outside facilities and services.
On the other hand, installing a shower means sacrificing valuable space in your van (which could be used for something else), a more or less substantial cost (depending on the type of shower you are going to install), and of course, good hours of planning and work.
Personally, in my case, the benefits outweighed the cons, which is why I decided to build a wet-shower in my van. Planning to live there full-time in fact, the shower was essential in my design. In addition to the indoor shower, I also installed an outdoor shower to use in the summer!
In this guide, I want to show you several DIY shower ideas for your van and, step-by-step, all the steps of my installations, the materials I used, and the costs I incurred.
In this way, I hope to give you an idea of what work is involved in installing a shower in your own converted van and a lead on where to start and get inspiration for YOUR project!
Happy reading!! 😀
TABLE OF CONTENTS
How to Build a Shower in a DIY Camper Van
1. Shower in the Camper: Is it necessary or not?
2. Ideas for a DIY Shower in your Camper Van
3. How I Created a Shower on my Van
4. How to Install the Shower Pan
5. How to Build DIY Shower Walls
6. How to Waterproof the Shower
6.B Bonus Update: Roll-up Door and Enamel.
7. Materials, Tools and Accessories I Used

Do you want to support LostOnTheRoute?
All of the Guides I publish on this blog are free and usable by anyone because I personally am a firm believer that information should always be a public good and accessible by anyone and not a commodity to be purchased. Sharing is caring 😉
That said, maintaining a great blog full of detailed articles takes a lot of time, a lot of beer (of inspiration ahah) and most importantly implies economic costs sometimes not so obvious too.
If you would be interested in helping with the costs of the blog, you can consider purchasing any of the recommended products through the links on the page or in the Amazon storefront. LostOnTheRoute in fact participates in the AmazonAffiliate program, and for every product purchased through the links, I receive a small commission, obviously at no extra cost to you🙂
Happy reading and have fun with your project!:) 😀
Dani

Check Out All DIY Van/RV Products of tested quality, in one place.
1. DIY Shower in your Van: Do You Need It Or Not?

It’s a fact that we all need to wash .
Some every day, some once every three, and some maybe can wait a few more days. That said, personal hygiene is very important these days, and I don’t think anyone likes to smell like a mountain goat for long periods of time, even when traveling! 🙂
Having established the need to shower from time to time, the question is: do you need to have a shower in your DIY camper?
The answer is: it depends!
Each convertion project is a world unto itself. Your needs, priorities and the tradeoffs of space, money, time and work you are willing to make, You know them better than anyone else 🙂
If you plan to use your RV for very long trips, in remote areas, mostly free camping and maybe live in it full-time, a shower can certainly come in very handy.
On the other hand, if you are converting a small to medium-sized vehicle (in which space management is even more important!), if you plan to use it for shorter periods of time or otherwise plan to rely on campgrounds often, you can probably avoid carrying your own shower and take advantage of the facilities in your path.
If you have decided that you want to install a shower in your van, later in this article, I will show you various types of DIY Shower Ideas built by various vanlifers and show you step by step how I built my own shower (go to section).
If you don’t think you want a DIY shower in your project, here are some ideas to help you shower during your travels and avoid the famous mountain goat smell 😉
1.1 VANLIFE WITHOUT A SHOWER – WHERE TO SHOWER ON THE ROAD?

Below, you will find some ideas for showering on the go even without having a shower on your RV:
- Campings: most campings provide their own showers, for a few euros, even for passengers of vehicles in transit.
- Showers on the Beach: If you’re traveling near beach resorts, with a little research it’s easy to find free showers on the beach.
- Friends’ Houses: we often use the motorhome for long trips and maybe even to visit distant friends. If they really are friends, they will have no problem letting you use their shower 😉
- Lidos,Spas and Pools: visiting a pool, spa or lido, can be a relaxing experience and at the same time an opportunity to take advantage of the comfortable hot showers. Depending on the location, they may cost a little more or less, but generally nothing prohibitive.
- Rivers and Lakes: if you’re a bit on the wild-style, you might even consider using the water from the rivers or lakes you find on your path to give yourself a good wash. Of course, make sure the area is safe, the water clean, and use an eco-friendly soap to avoid polluting the environment! In winter, the thrill is guaranteed!
- Truck Parking Areas: all over Europe there are truck parking areas with showers. Often these rest areas are also used by campers and travelers who, for a few euros, can take advantage of a nice hot shower. Through the website Truck Parking Europe you can see all the parking areas and those that are equipped with showers.
- Sports Clubs and Gyms: where there is sport, there is normally a shower. By politely asking to be able to take a shower for a small fee, hardly anyone will say no.
- AirBnB/Hotels/Ostelli: if after many days of walking with your camper you have not found any shower and you realize that it is time, the last resort could be to reserve a night at an AirBnB/hotel/cheap hostel and finally take a shower to get rid of the mountain goat smell ;D
- Buy a Solar Shower: a solar shower is nothing more than a water bag that can be filled if necessary and put to warm in the sun. Once the water warms up (in a couple of hours) you can take a hot (outdoor) shower anywhere you want.
There is no shortage of options for showering on the road, as you can see; I’ve listed a few but there are certainly many more!
Despite all of these options, none of course in my opinion beats the comfort and convenience of having a shower in your own camper van that you can use whenever and wherever you want without having to go looking for it.
If you’re also thinking about building one in your van like I did, read on. In the next chapter, I’ll show you several Do-It-Yourself shower ideas, and later I’ll show you step-by-step how I built mine.
2. Ideas for a DIY Shower in your Campervan to enjoy Vanlife
Before launching into the conversion of my van, I spent several hours researching the solutions that various vanlifers before me had to invent to create a Do-It-Yourself shower, and they certainly inspired the shower that I later decided to build on my van.
In this chapter, I’d like to show you too the most curious and interesting ideas I’ve found digging into the world of van conversions and Do-It-Yourself campers, so that you can draw inspiration from them and figure out which shower model best suits your needs.
Once you’ve seen the various shower ideas, I’ll show you the one I built and explain in detail how I made it (materials, measurements, steps etc.).
Let’s stop talking and start seeing the most creative and ingenious DIY showers for RVs that the web world has been able to offer us!
2.1 WHOLE PERMANENT SHOWER WITH MOBILE COMPOSTABLE TOILET
What can make you feel more at home than a shower like home?
A permanent shower definitely requires more space and more work than other solutions, but once created it’s really convenient!
Whole showers can be easily transformed into a wet bathroom by adding a compostable toilet (mobile or fixed) or a chemical toilet, and can come in handy for hanging wet clothes when not in use.
(Check out the article: DIY Bathroom in Camper: Complete Guide if you’re interested in learning more about the types of amenities that can be installed in a converted van).


2.2 UNDER FLOOR SHOWER
If you’re looking for a permanent solution, but one that takes up as little space as possible, a hidden shower under the floor might be the right solution for you.
What you need is to install a shower tray below the floor level (ideally as high as the thickness of the insulation-if you don’t know how to insulate your floor, I recommend reading the Guide to Thermal Insulation), a hand shower on the ceiling above the tray, and shower curtains to hang and use temporarily during shower time.
An underfloor shower is a perfect space-saving solution for those who don’t want to sacrifice precious square footage to install an entire shower: easier to install, not at all bulky, and still very functional.


2.3 SHOWER IN A DRAWER
Another very creative DIY solution for adding a lockable shower in a camper van is undoubtedly the shower in a drawer .
The idea, in this case, is towaterproof a drawer (or install a real shower tray inside), attach the drain (it can be fixed or mobile) and use it as a shower tray if necessary. Movable shower curtains (which can be stored in the drawer when not in use) and a pull-out hand shower complete the work.
A relatively simple and functional space-saving solution. It doesn’t offer the comfort and convenience of a full shower, but it serves its function well.


2.4 SHOWER IN A BUCKET (ECONOMICAL OPTION)
Without installing an actual shower tray, and therefore without the need to install all the plumbing associated with it, some vanlifers have come up with the cheapest and simplest solution possible: a shower in a BUCKET.
At the end of the day, let’s face it, water in an RV is precious and at least unless you’re staying at a campsite, showering in an RV is always a pretty quick and hurried experience.
Without investing a lot of money: a large bin, a tent, a hoola-hop and the hand shower. A shower in a bin is an economical solution for showering in your van without the need for any special installation. Be careful, though, not to tip the bin inside 😉


2.5 SOLAR SHOWER (OUTDOOR ECONOMIC OPTION)
If you can comply with an outdoor shower, a solar shower is a product that for a few euros allows you to wash almost anywhere as long as the weather is nice.
A solar shower is nothing more than a bag of water that once filled you leave in the sun for a few hours to warm up. Once hot you can hang it up and use it to take a shower. Once the shower is over, it folds up and puts away: minimal cost, minimal clutter.
Normally the capacity of a solar shower is 20L. The more advanced (but still very inexpensive, like this) also have a screen that reports the temperature of the water inside.


2.6 OUTDOOR SHOWER
Still conforming to an outdoor shower, installing a hand shower that receives water directly from your freshwater tank can be a space-saving idea that gives you the ability to shower wherever you are (even with cloudy skies).
An outdoor shower receives pressurized water from the water pump. Installing a boiler, you can connect both cold and hot water to it. This way, the outdoor shower can be used even on colder days.
Having an outdoor shower can also be handy for getting rid of sand, washing shoes and camping equipment. Personally, on my VW Crafter I installed both an indoor shower and an outdoor shower (pictured left).


3. How I Created a Shower in My Van
Once inspiration was sought, it was time to get to work.
In my van, planning to travel full-time, I was determined to install both an indoor shower and an outdoor shower.
In addition to the shower, I decided to have a Composting Toilet on board. After seeing the absurd prices of the best models on the market, however, I abandoned the idea of buying one (1000 euros for a toilet sincerely seemed exaggerated!) and I opted instead to build a DIY WC, integrating it with the shower.
Because of this, my shower is actually designed as a wet-shower.
In this article I will focus on explaining in detail how I built the shower, but if you are also interested in knowing in detail how I built the bathroom part, I suggest you read the guide DIY Camper Bathroom: Complete Guide.
In the next few lines, I’ll give you a few details to give you an idea of the shower I built (then I’ll show you in detail step by step).
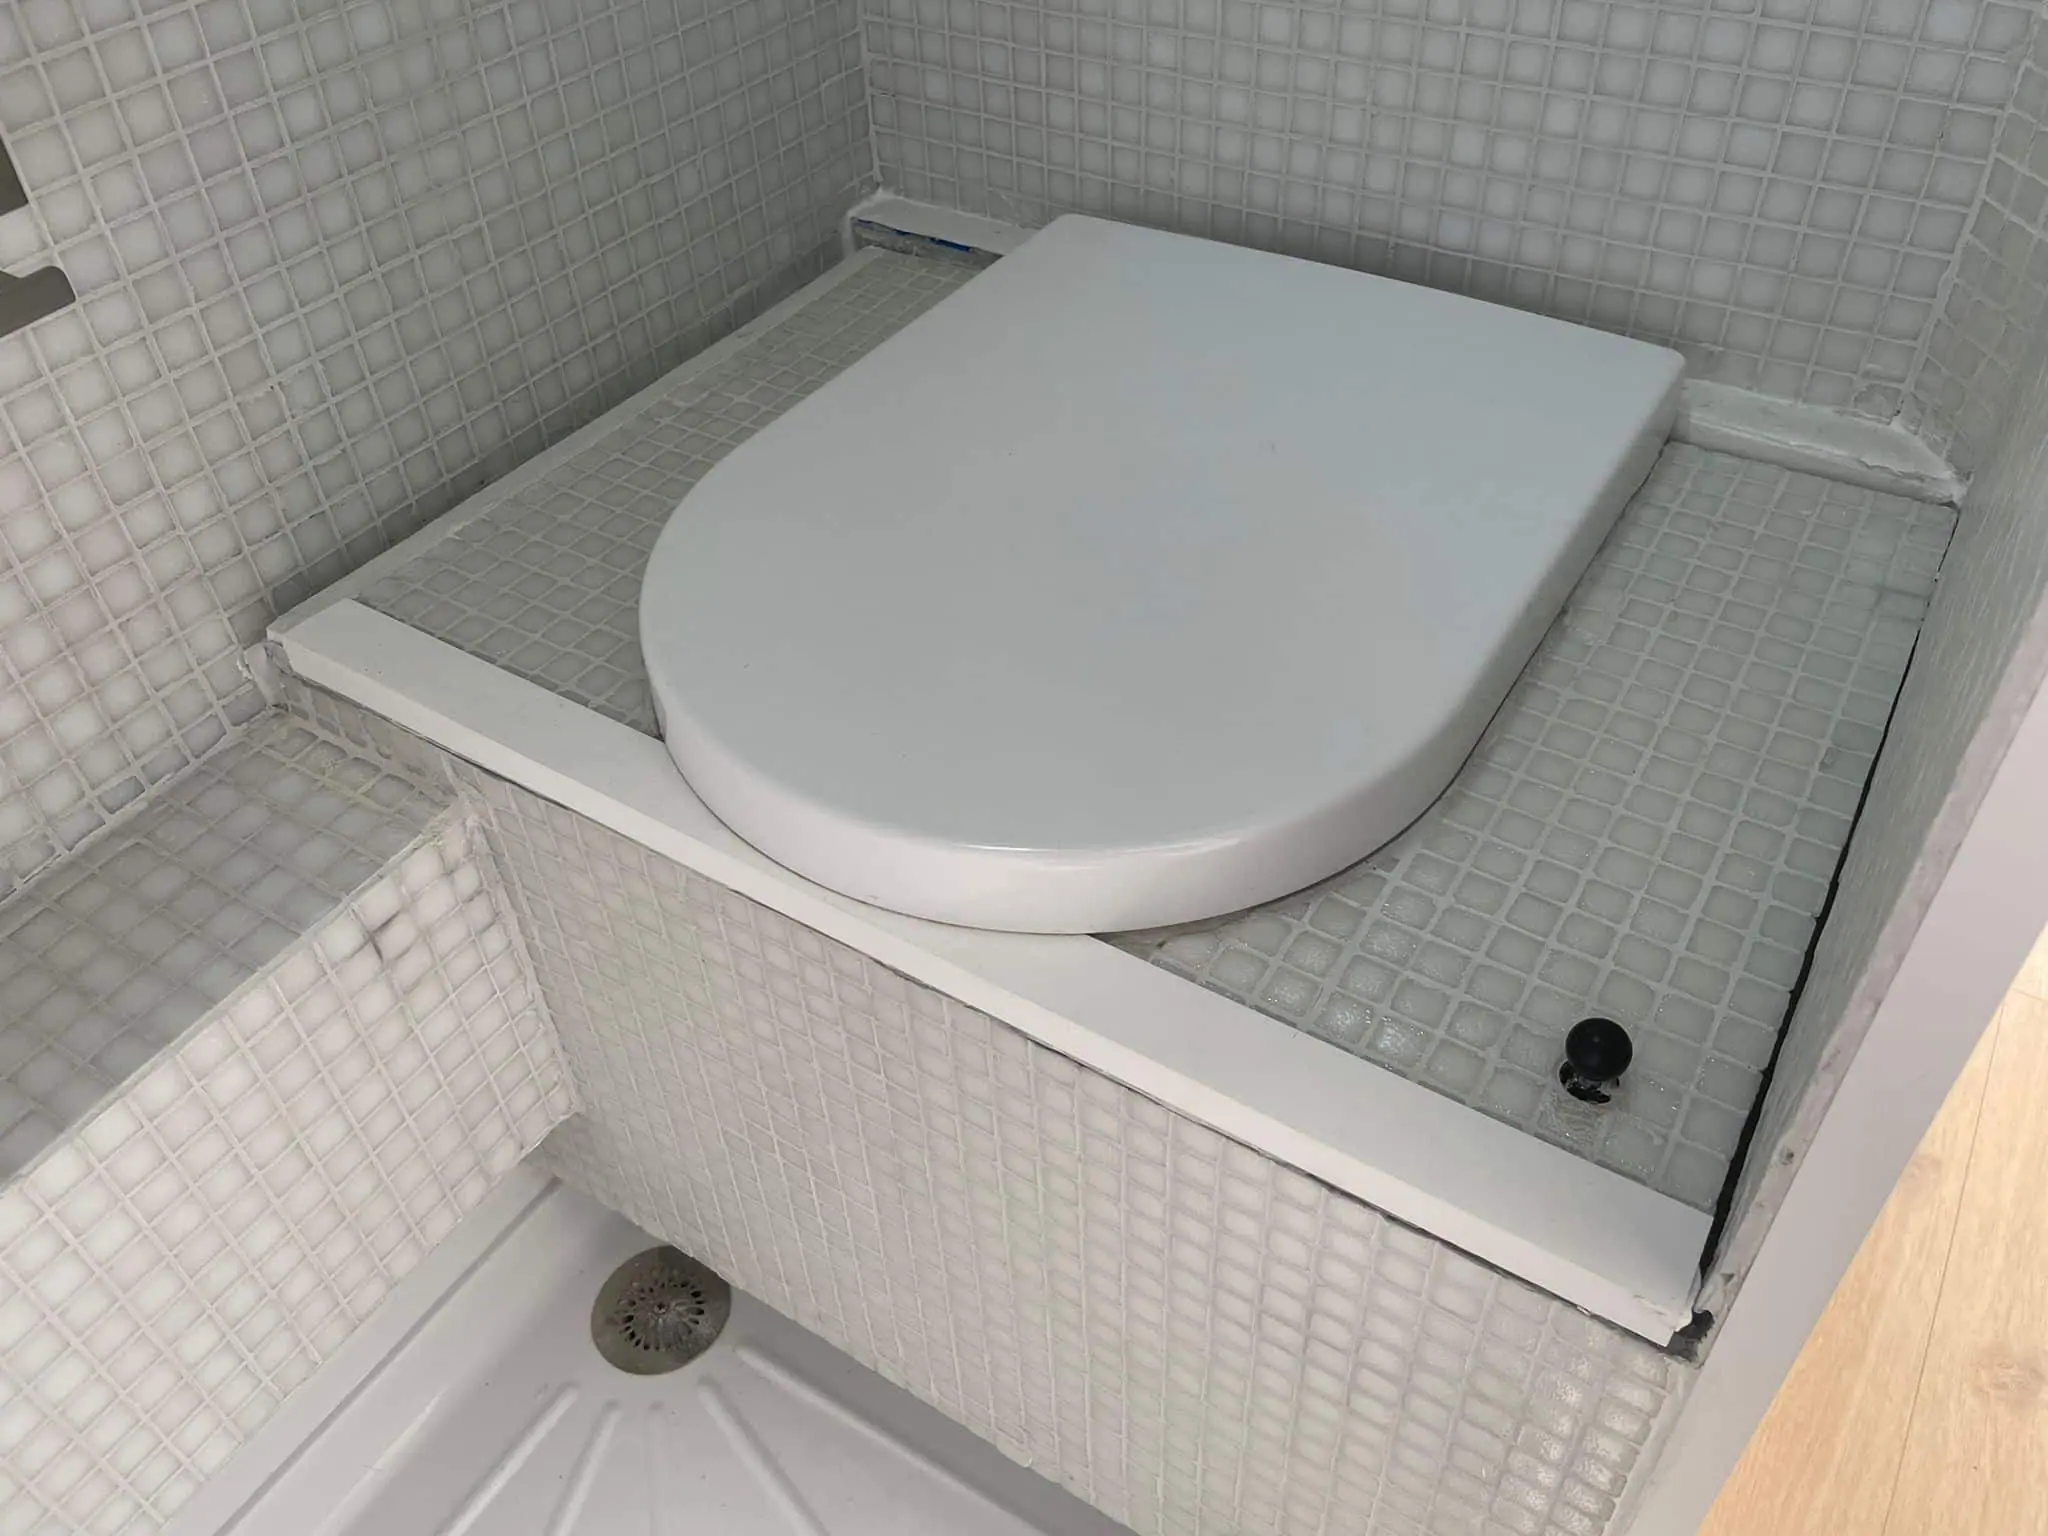
SIZE OF MY SHOWER
The total measurements of my shower tray are 110cm (length) x 62 (width).
The compostable toilet occupies (50cm x 62cm), is 53cm high and positioned above the shower tray.
At one side of the shower is a parallelepiped that protrudes (10cm), (20cm) high, through which heating pipes and some electrical cables run.
PLUMBING
The shower has hot water (heated by a heater JP Heater) and cold water (directly from the fresh water tank).
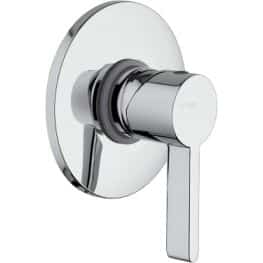
I installed this recessed faucet inside the wall (I had originally installed another model that turned out to be a fiasco)
The drain goes directly underneath the van, where there is a siphon. Once down, the water is directed into the grey water tank also mounted under the floor of my vehicle.
COATING AND WATERPROOFING
The walls of the shower are 1.8cm thick plywood.
As you will see in the following photos, I used impregnating agent, a rubber membrane (Mapegum WPS) and a mosaic tile coating (+ white final glaze) to waterproof them.
Given this brief information, let’s get started with the assembly!

4. Do-it-Yourself Camper: How to Install the Shower Tray
4.1 CHOOSE A SUITABLE SHOWER TRAY
The first part of installing an indoor shower in an RV is to solidly and securely install a shower pan.
As I’ll explain step-by-step, the risk of water seepage in a Do-It-Yourself shower is really everywhere: where there’s a small crack, you can be sure that water will get into it!
The basis of a good fixed shower is therefore the installation of a good shower tray. There are various sizes and materials on the market: hard plastic, ceramic, resin, acrylic and steel. Below I will briefly explain their characteristics:
- Hard PVC Plastic: The vast majority of factory RV showers have a hard plastic shower pan. Not too fancy, but impact and stress resistant, mold and mildew resistant.
- Ceramics: Elegant with classic style, but at the same time heavy and relatively fragile, difficult to find to measure or to work DIY . Having to mount it on a mobile vehicle subject to many vibrations, I personally not recommend it .
- Acrylic: lighter and more affordable than ceramic, it is one of the cheapest materials available. Acrylic plates can be cut to size Do-It-Yourself with a circular saw. Not too fancy, but functional.
- Resin: in my opinion the best material for a shower tray: modern, thin, light, durable, strong and elegant. All of these features, combined with the ease of do-it-yourself cutting make resin shower trays great options for building a shower room. Theonly downside, is the price, definitely much higher than many other options here on the list.
- Steel: It is an unusual and modern material, easy to clean and very hygienic. Although it can be glazed in various colors, it does not contribute to a “warm” atmosphere. Definitely very customizable, but hardly Do-It-Yourself. For a custom shower tray, you will almost certainly have to rely on a professional craftsman, and for this the price could rise a lot.
In addition to the material, when choosing a shower tray, it is important to think about the size and edges of the shower tray, of course. The one that best suits your project, of course it depends on your idea of the bathroom and your preferences 🙂
In my case for example, I was interested in having a shower tray with high edges (to make sure there were no water leaks from the base) and an (almost obligatory) size of around 60x60cm.
Searching online I soon realized that finding the perfect shower tray for me wasn’t as easy as I had hoped: shower tray sizes always seemed to start at a minimum of 70x70cm, resin shower trays (which I loved!) cost an arm and a leg, and most modern shower trays have no outer edges but are flush with the floor.
After much searching, I found a shower pan that, although from the ad on Amazon didn’t blow me away, managed to meet most of my needs and I ordered it:

This is the shower pan you’ll see me assemble in the step-by-step guide below.
It’s a hard plastic shower tray, with the inside measuring 59x59cm and the outside (counting the raised frame) 62x62cm.
Once we received the shower pan, it was time to start the Do-It-Yourself assembly.
4.2 HOW TO PREPARE THE HOLE AND THE SHOWER TRAY
1. First, I laid the chosen shower pan on the floor of my van to determine where to drill the drain hole. With painter’s tape, I marked the edges of the shower pan and with a pencil marked the hole to be cut.

2. After double-checking 10 times that the place was right, I used a drill/driver and a 40mm diameter hole saw to drill through the entire floor of my van: vinyl, plywood floor, insulation, and sheet metal floor.

NOTE: Before drilling into the floor of your van, check to make sure that no other services are running underneath the floorboard , with which the plumbing system could interfere.
NOTE 2: Calculate that the waste water from the shower, will then need to flow into the gray water tank. If you don’t plan to use a drain pump (not necessary in my opinion), calculate that after the shower trap the drain pipe will need to have a slight slope until it reaches the gray water tank. With that in mind, plan well for the location of the drain plug and the route the pipes will need to take.
4. Once the hole was cut, I checked to make sure that the shower drain I planned to use would fit perfectly: fortunately, everything went according to plan 🙂

3. At that point, I treated the cut sheet metal with rust inhibitor and some sheet metal spray paint from under the van. In the meantime, a mysterious presence was watching me 😉

5. At this point, I decided to reinforce the empty edges of the shower pan. To do this, I used a plywood frame with planks 9cm high and 1.8cm wide each. In this way, the hard plastic shower tray is much more solid, durable and even drillable from the outside.

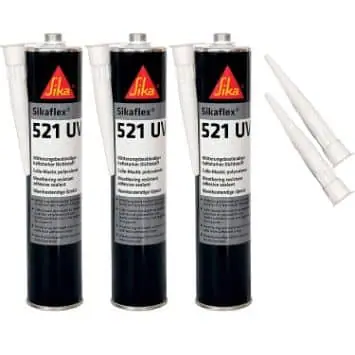
6. Using the hole saw used earlier, I enlarged the hole in the shower pan to the size needed to fit my drain. At this point, I used Sikaflex 521 glue to securely attach the drain to the shower pan.

7. Once the drain was glued under the shower pan, I taped it in place and let it sit for 24 hours. In this step, it’s best to abound with glue and it’s super-important to make sure you don’ t leave any gaps where water could seep in.

8. Once the glue dried, the drain was perfectly glued to the shower pan, and from above it looked as it does in the photo. Now all that was left to do was to secure the plate in place.

9. To attach the shower pan to the floor, I first used the same Sikaflex 521 glue all over the bottom of the pan. Once the glue was put all over the floor, I inserted the drain inside the previously prepared hole, and glued the shower pan to the floor.

10. Next, I used right angle metal brackets by screwing them to both the floor of my van and the wooden frame inserted inside the shower pan. In this way, the shower tray is completely immovable.

5. How to Build DIY Shower Walls
11. Once the shower tray is secured, it will be time to build the entire shower structure around it. In my design, I custom shaped 1.8cm thick multi-layer wood panels for the structure.

12. To give a first layer of waterproofing, before installing them, I treated all the wooden components with clear impregnating agent. In this way the wood obtains an initial protection against humidity.

13. For the faucet, I decided to install a in-wall one. For this, I hid all the water pipes from the shower (as well as the electric cables from the dinette) inside an 8cm wide space between the bathroom and the living room.

14. On the dinette side, I cut a little control window from which I can access the shower faucet and hoses (both to install them and to repair them if there are any problems in the future). When not in use, I cover it with a white junction box cover.


15. NOTE: I won’t go into detail in this article about how I connected each hose to my shower faucet (I simply used quick fittings and Teflon). If you are interested in knowing in detail how to make the water connections I leave you here the article Do-It-Yourself Camper: Complete Guide to the Water System.

16. To the shower drain instead, under the van, I connected a simple hard plastic siphon (it serves to insulate the shower from odors) to which I then connected a 40mm drain pipe that flows, with that of the sink, into the gray water tank. To secure the tubes to the bottom of the van, I used screws and perforated tape.

NOTE: When attaching the drainage pipes under the van, it is important to check that they do not get in the way of other services while driving. Also, it is important to try to create a minimum of slope to help the water reach the gray water tank.
NOTE 2: The siphon is a mechanism that prevents odors from passing through the pipe and back up into the shower. The way it does it is very simple: in its lowest part with a “U” shape it blocks some water that obstructs the pipe and therefore the passage of air. Personally, I recommend installing a siphon that can be unscrewed if the outside temperature goes well below zero, bringing with it a risk of frost. As the water in the pipes freezes, it expands and over time this can cause damage to your water system.
17. After the little aside about plumbing and fittings, let’s get back to our shower. Once you have installed and impregnated all the shower walls, you need to seal all the gaps between them properly (since the walls of my van are curved, it was impossible to shape the walls perfect to the millimeter – although we came very close).
18. To seal cracks, I recommend using the usual and very faithful Sikaflex 521, a glue/sealer that really works for almost anything. I used it to seal all the edges inside my shower room (to get even edges, I recommend spreading the glue with a finger).
Once all the walls are sealed together, it’s now time for waterproofing!

6. How to Waterproof your Van DIY Shower
To waterproof a shower in a DIY Camper Van, there are several methods.
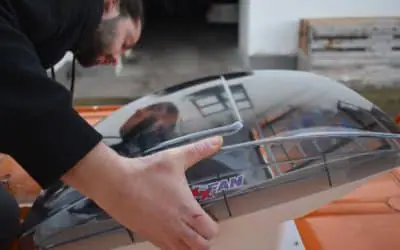
The simplest, most elegant, and easiest to install is definitely using FRP (fiberglass reinforced hard plastic) panels. FRP panels are thin, light, easy to attach, and cut to specific sizes (see demonstration video), and for this reason they are often chosen to waterproof do-it-yourself showers in campers.
Initially, I had considered installing FRP panels on my van too. Then, partly because of the high online cost, partly because no store around me handled this material, and partly because I was busy fixing other parts of my van, I put off the project for a few weeks.
On a beautiful sunny day, while I was intent on converting my van, I met a young tiler who had come to install some new bathrooms for my neighbor. Talking with him a bit, he showed interest in my project and I showed him my van and bathroom “work in progress”.
At that point, he gave me the idea of waterproofing and covering the shower-bath with mosaic tiles. After thinking about it for an afternoon, it didn’t seem like a bad idea at all, so I got to work!
Below, I show you the key steps to tiling a DIY shower on a mobile vehicle.
6.1 WATERPROOFING THE SHOWER WITH MAPEGUM WPS
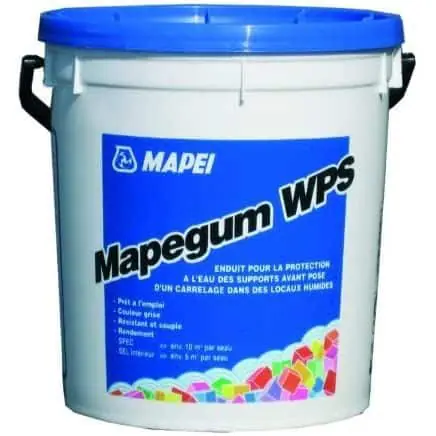
19. To waterproof the bathroom, protect the wood from water, and create a base on which to apply the mosaic tiles, we used a product called Mapegum WPS (by Mapei), which is nothing more than a liquid waterproofing and anti-humidity membrane.

20. Mapegum is a fairly simple product to spread on wood walls, just use roller brushes. For my bath/shower room I used about 8kg of product. I leave you here the complete video for its use (in English): Video Use Mapei Mapegum.

21. To spread the Mapegum, first I spread a layer all over the interior wood of the shower (including the edges and corners).
Once the first coat is dry, the wall becomes a very blue color.

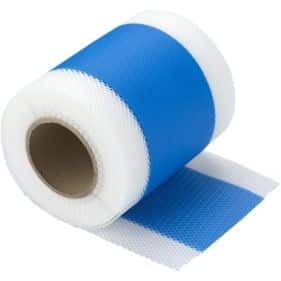
22. At this point I used Mapei Mapeband to ensuretotal waterproofing of the edges.
To apply it, you first put on a coat of Mapegum WPS, then lay down the tape and coat it again with Mapegum.

23. The tape must be completely covered with Mapei Mapegum. To make the corners, I recommend the use of a brush. Once it’s set and dried in place, it’s time to give the entire shower-bath a second coat of Mapei Mapegum WPS.

24. Once the second coat of Mapegum has dried (it takes about 6 hours), the color of the walls should be a very dark blue.
With this step, we have finished the waterproofing process and are ready to begin the mosaic covering.

6.2 COVER THE SHOWER WALLS WITH MOSAIC TILES
25. We used white H40 mortar to attach the tiles to the walls.

20. To prepare it by mixing it with water, we used an electric mortar whisk.

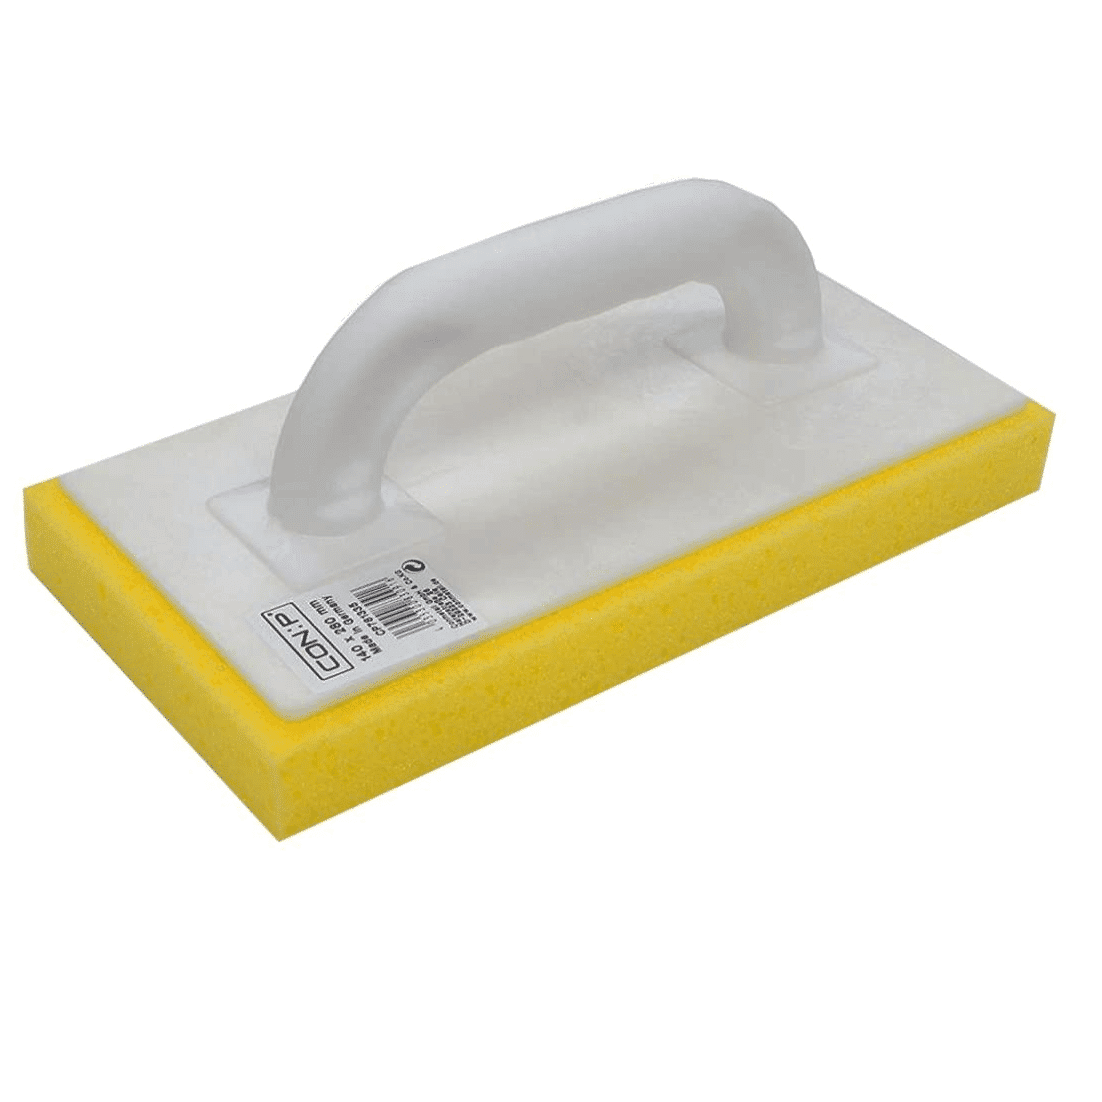
26. To fix the tiles, you must first pull a layer of mortar well using a notched trowel, then apply the tiles (which come already in 30x30cm squares) and press them firmly using a foam trowel.

We used a combination of white glass tiles Casamood e Bisazza, which was practically given to us by a tiler in our country who had leftover from other projects and needed to get rid of it. Perhaps given the choice we would have chosen another color, but for the price it was a bargain and saved us quite a bit.
Often tilers have a few boxes of tile left over from their jobs. Normally it’s a few square feet that serve little purpose, but given the small square footage of a bathroom-shower in an RV, it can sometimes be enough for camper projects. If you also plan to build a shower with real tiles, I suggest you try to ask if you have any tilers nearby 🙂
27. Covering all the walls takes a bit of patience (especially if it’s your first time doing such a job). Nevertheless, if you take your time (and it takes a lot of time 😉 ) it is a job for everyone.

28. To cut the sheets of tile to the correct size, I recommend using a cutter. In case you really need to cut a single tile (for example to follow the curvature of the van) I recommend you to use a angle grinder with a glass blade.

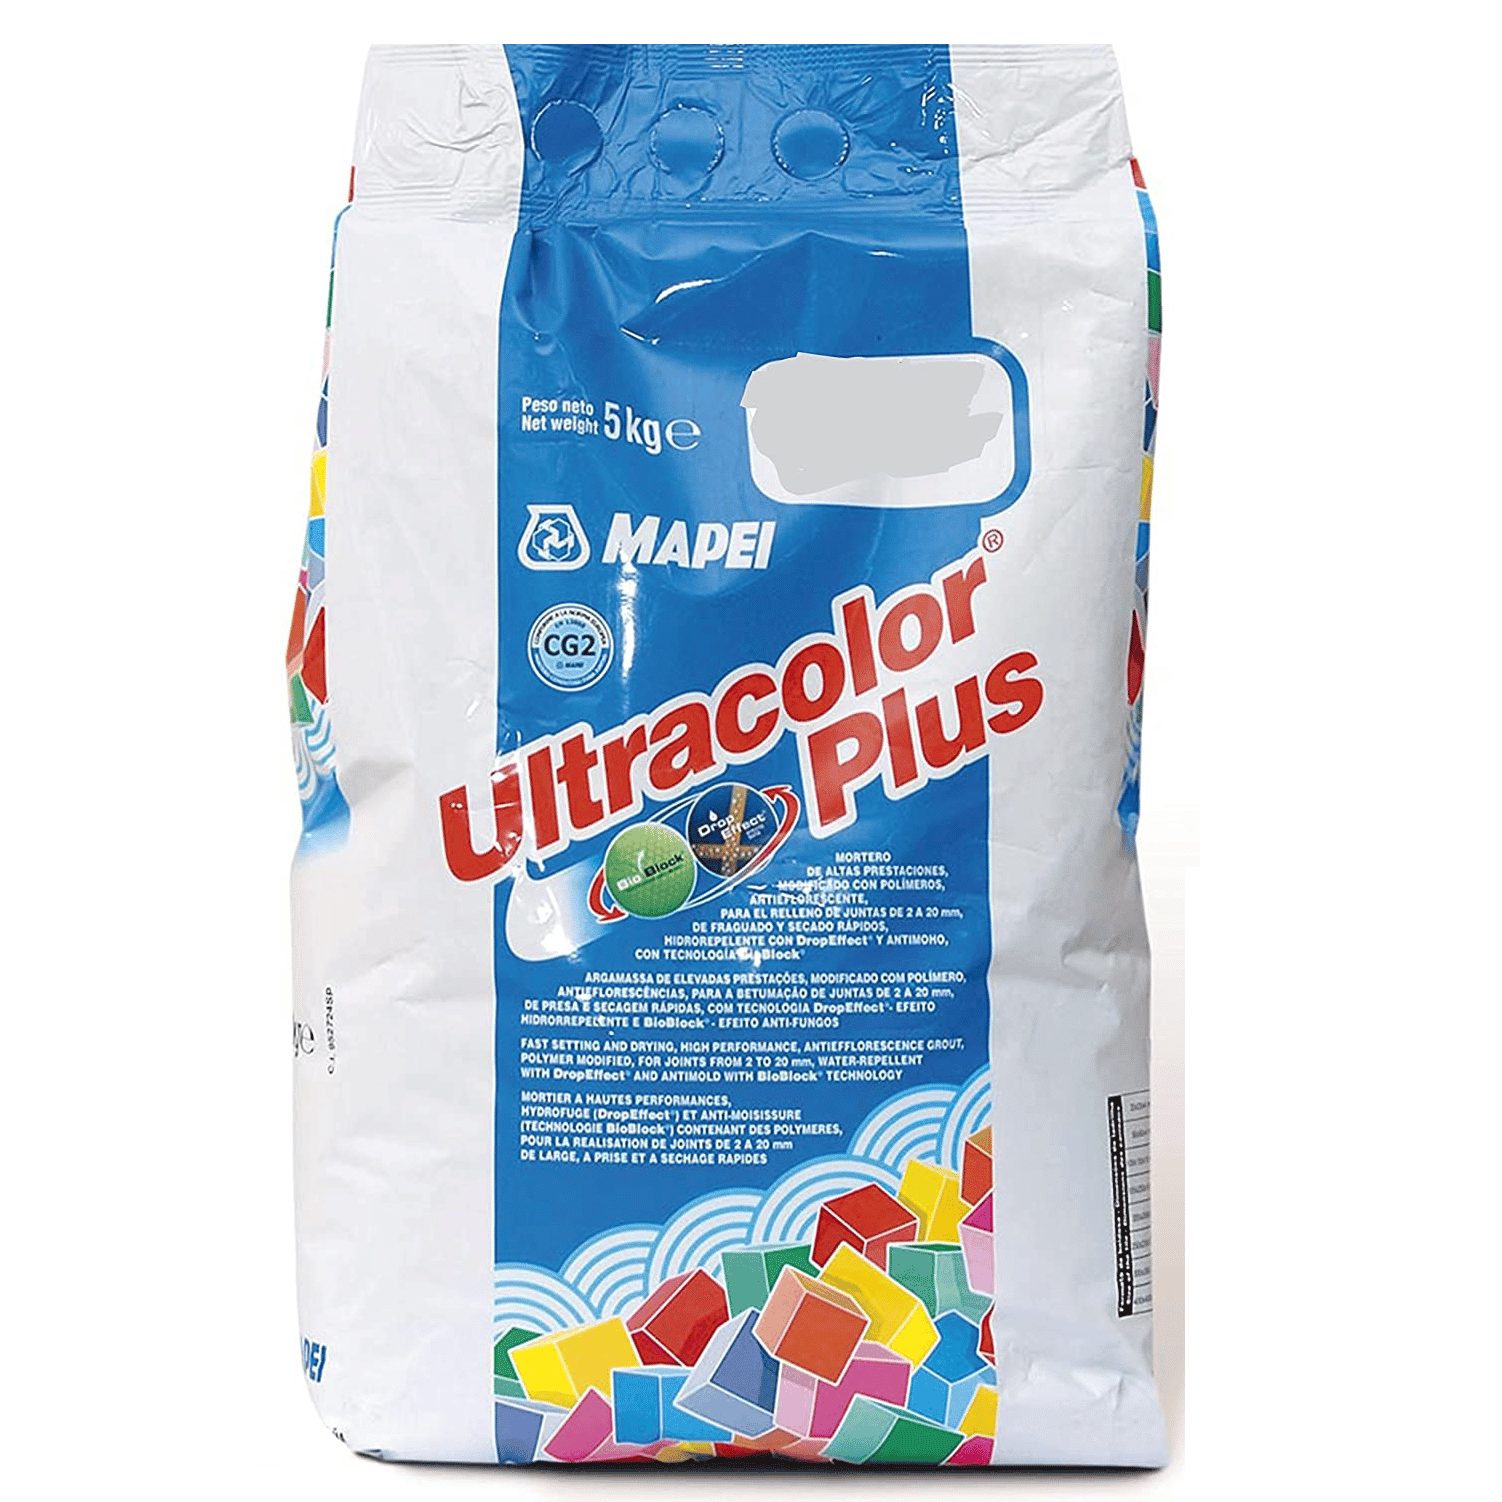
29. Once the entire bath-shower was covered with tiles, we used Mapei Ultracolor Plus White to grout the joints (this is also a powder that needs to be mixed with water). When applied, the product is dark; while once the water dries, the product regains its original color.

30. Grout should be applied over all the tiles (you can use a serrated trowel) and then rinsed with a damp foam pad (that way, you wash the tiles and the grout remains only to evenly fill the joints).

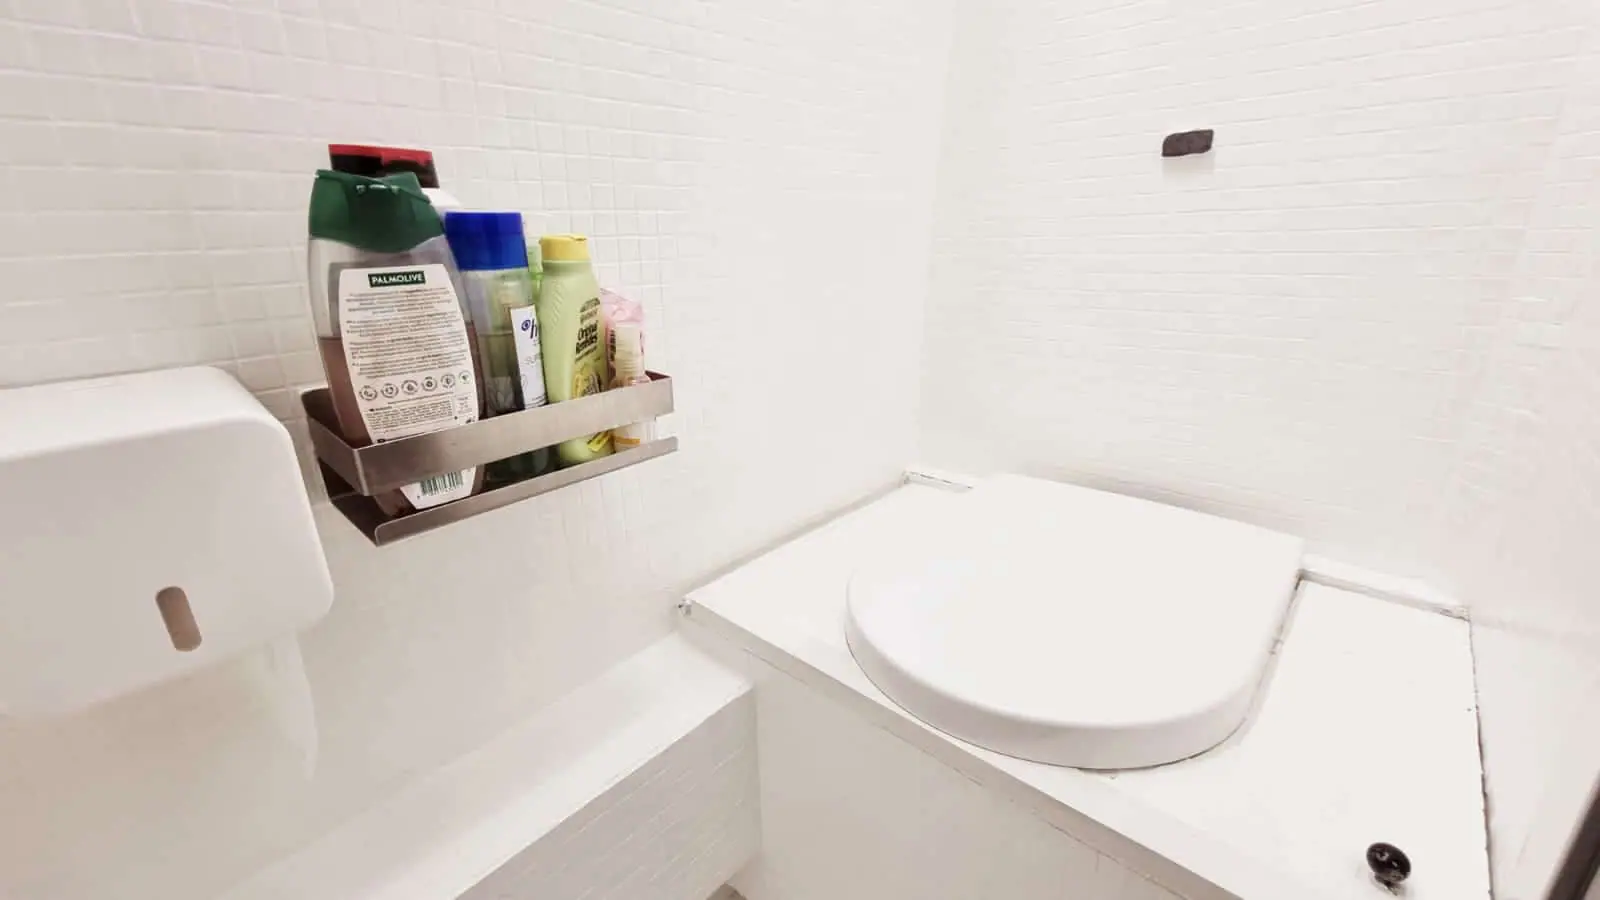
6.3 DIY SHOWER IN OUR CAMPERVAN: THE FINAL RESULT
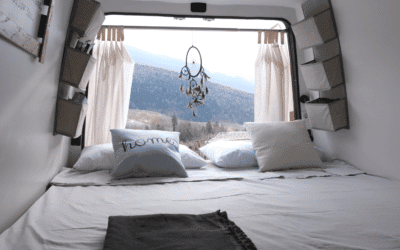
Once the grout has dried, the shower is finally ready to be decorated as desired, accessorized and used 🙂
Below I leave you a couple of photos of the finished result 🙂
For being the first time we’ve tiled a Do-It-Yourself bathroom, we’re happy with the result. Obviously a tiler would have done it better, but doing it yourself is also the beauty of these types of projects😉


6B. Shower Update: Rolling Door and Enamel
After using our van for a while, we realized that we were going to two-three things we were going to change:
1) The color of the tiles (grayish grout joints never look clean even if they are), also it happened to us that 3-4 would come off
2) The shower head had a fairly weak spray.
3) Using a shower curtain (as we did initially) was inconvenient and there was always the problem of having to dry it
After some reflection, I then decided to put my hands back in the bathroom.
Below I briefly show you the things I changed and the end result 🙂
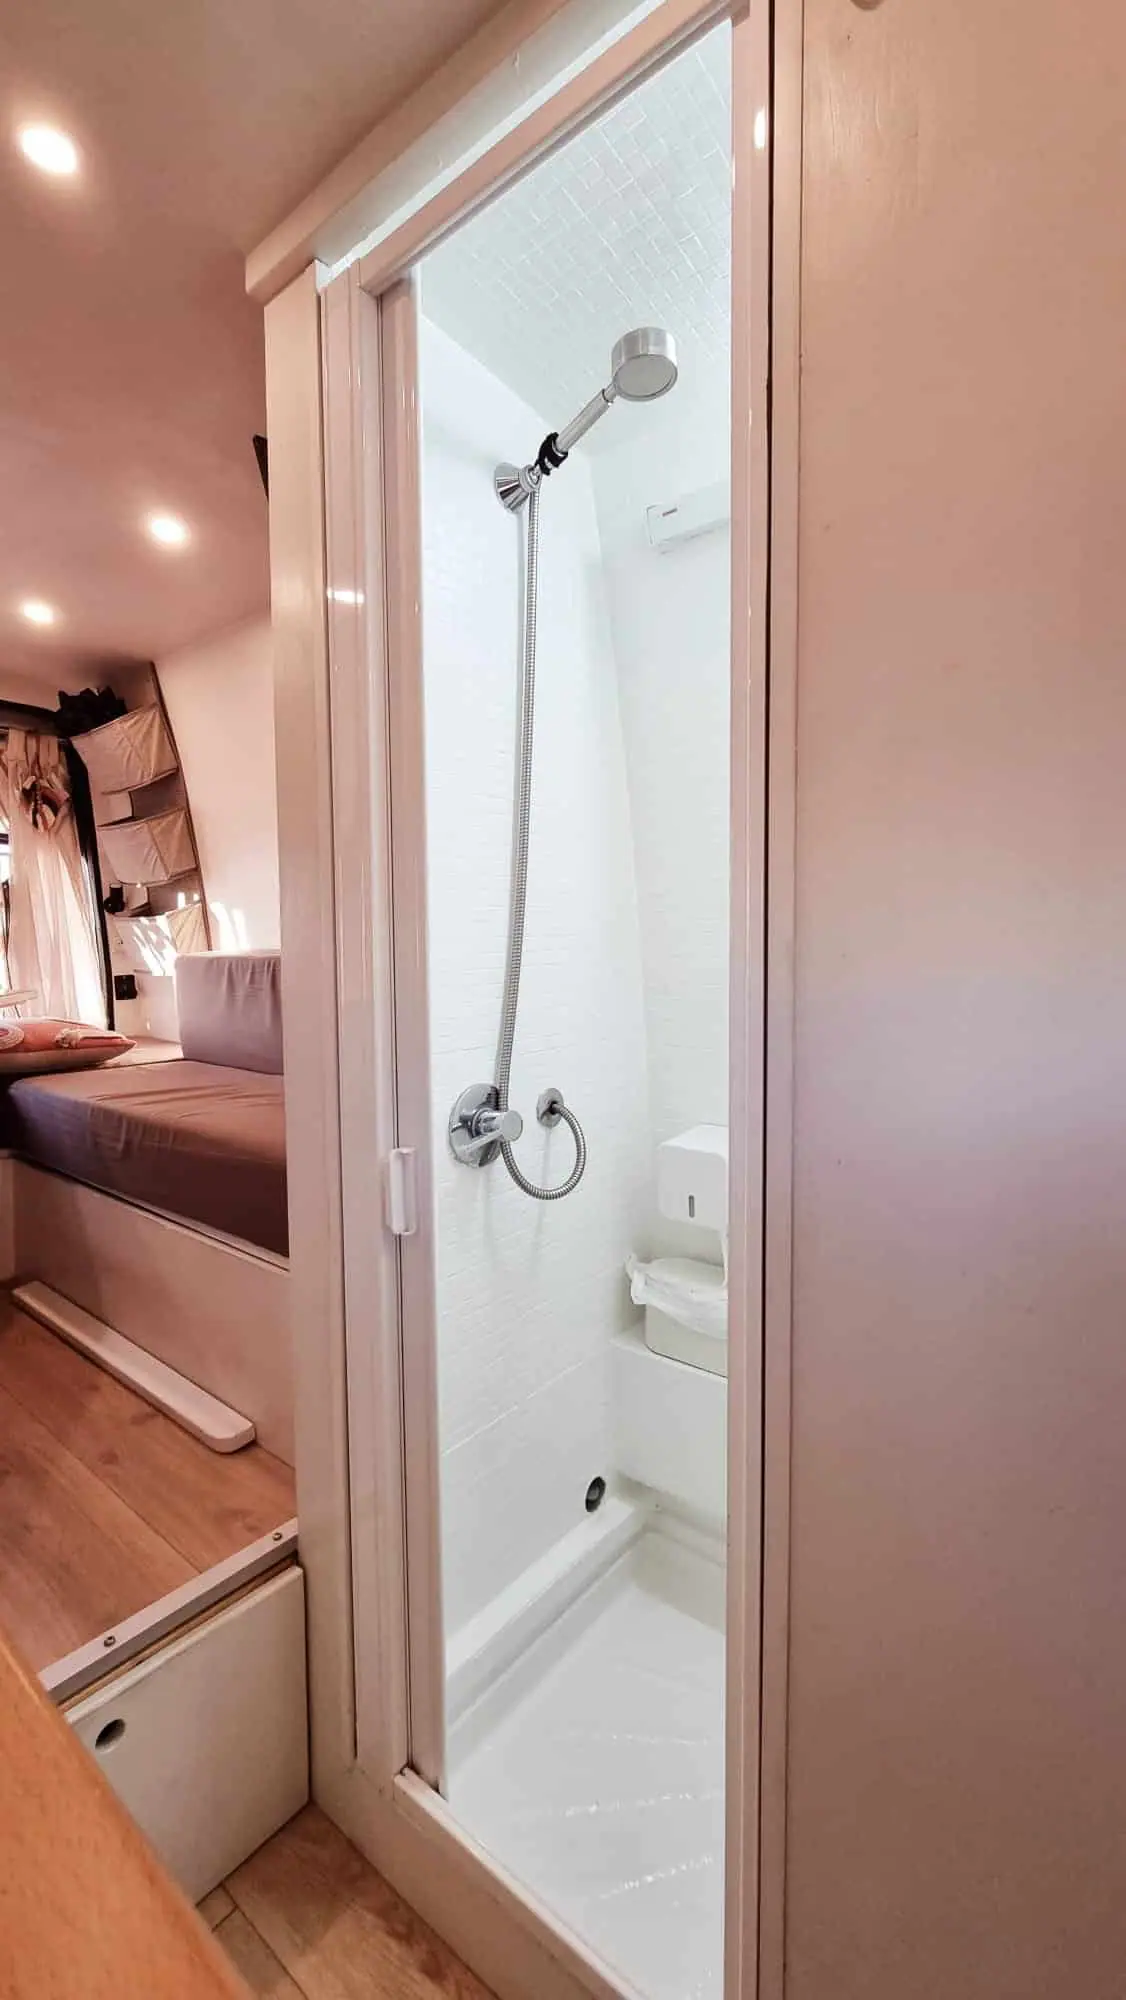
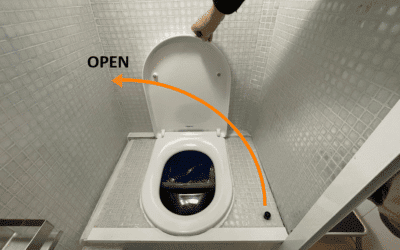
6B1. INSTALL A RETRACTABLE SHOWER DOOR
Instead of a curtain, we then decided to order and install a rollerdoor. Arrived from Spain in about 10 days, assembling it was a snap (it’s all interlocking).
The door can be adapted in width to the size of the hole by cutting the horizontal brackets with a Jigsaw. Personally, I recommend siliconizing all sides of the door (where it sticks to the wall, both horizontally and vertically, to prevent water from leaking out of any cracks.
This is the end result:

Personally, I find this roller door a really genius space-saving accessory for RVs! Easy to install and self-cleaning, it really doesn’t take up anything, but at the same time allows us to have some privacy while we shower or use the bathroom 🙂
6.2 AESTHETIC UPGRADE: WHITE TILE GLAZE
To remedy the gray joints that aesthetically after a while began to give us the idea of “dirty,” we decided to breathe new life into the bath-shower using a tile glaze.
To renovate the bathroom, we therefore chose to use:
- White Satin Glaze for Tiles (vertical surfaces)
- Saratoga Fiberglass Kit (to reinforce the shower pan before applying a similar glaze to the walls)
- White Satin Enamel for Shower Trays (horizontal surface)
After two coats of each product (instructions for using them are on each can), this is the end result (really, it doesn’t even look like the same bathroom!):
Having applied the glaze also helped us to make all the tiles adhere better. In fact, since we have given the glaze coats, we have not had any tiles come off with the vibration of the vehicle.
6.3 HIGH-PRESSURE WATER-SAVING HAND SHOWER
The first hand shower we installed did not produce much water pressure. It worked for washing, but the water came out very quietly, and it was necessary to totally open the faucet to get a decent stream.
After about 6 months of use, it fell on the floor and broke; so I found myself having to replace it.
Searching on Amazon (as per my habit), I discovered this. high-pressure water-saving hand shower, and I decided to try it to see if what the description said was true.
Well, thanks to the tiny holes in this hand shower we now have a high-pressure shower even by only half-opening the faucet (and thus saving precious water that always parking is always good not to waste! 😉 ).

7. Materials, Tools and Accessories I Used
Below I want to leave you with all the products, tools, and accessories I’ve used that you could potentially need if you decide to take on a project similar to mine.
For your convenience, clicking the image of any product will directly open the Amazon page should you also be interested in buying it or simply interested in understanding the qualities of the products I used.
For the sake of transparency note: I participate in the Amazon Associate program and for any purchase made through the links on this site, I receive a small commission that I use to support the costs of this blog, obviously at no extra cost to you 🙂 ) All products that I recommend are the ones I personally used too 🙂
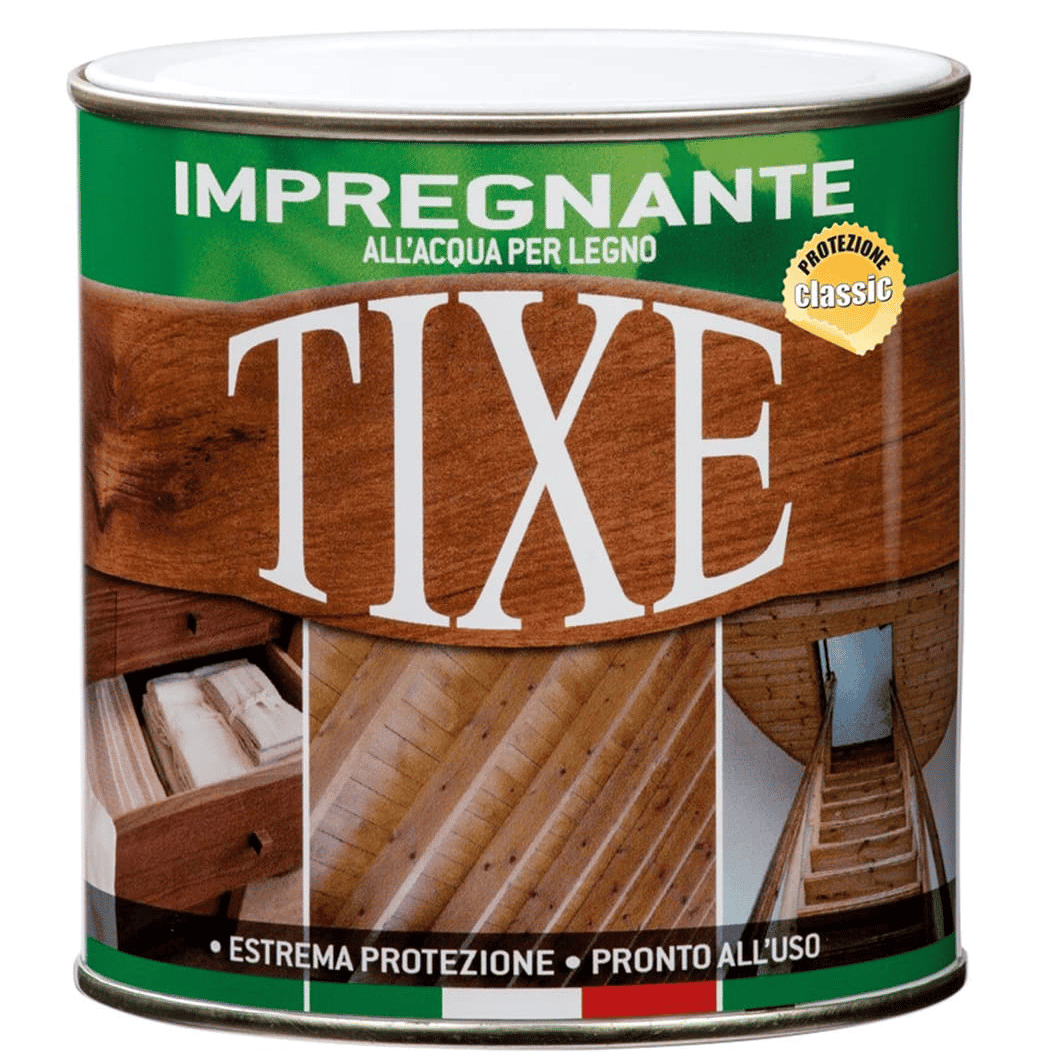
Wood impregnation
2-Way Mixer

Universal Water Cover
Grout for Escapes
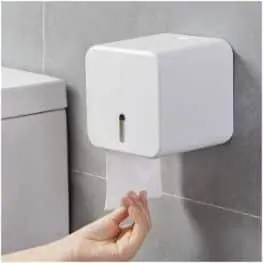
Waterproof Roll Holder
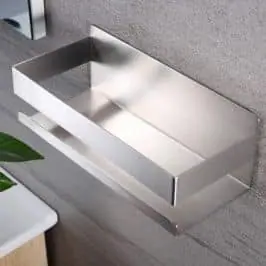
Self-adhesive shelf
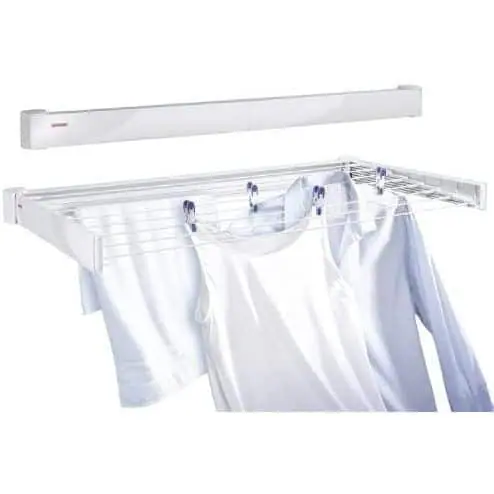
Stretchable Clothesline

Shower tray 60x60cm
Waterproof Membrane
Shower Sealing Tape
Sikaflex Glue Sealant 521
Tile trowel
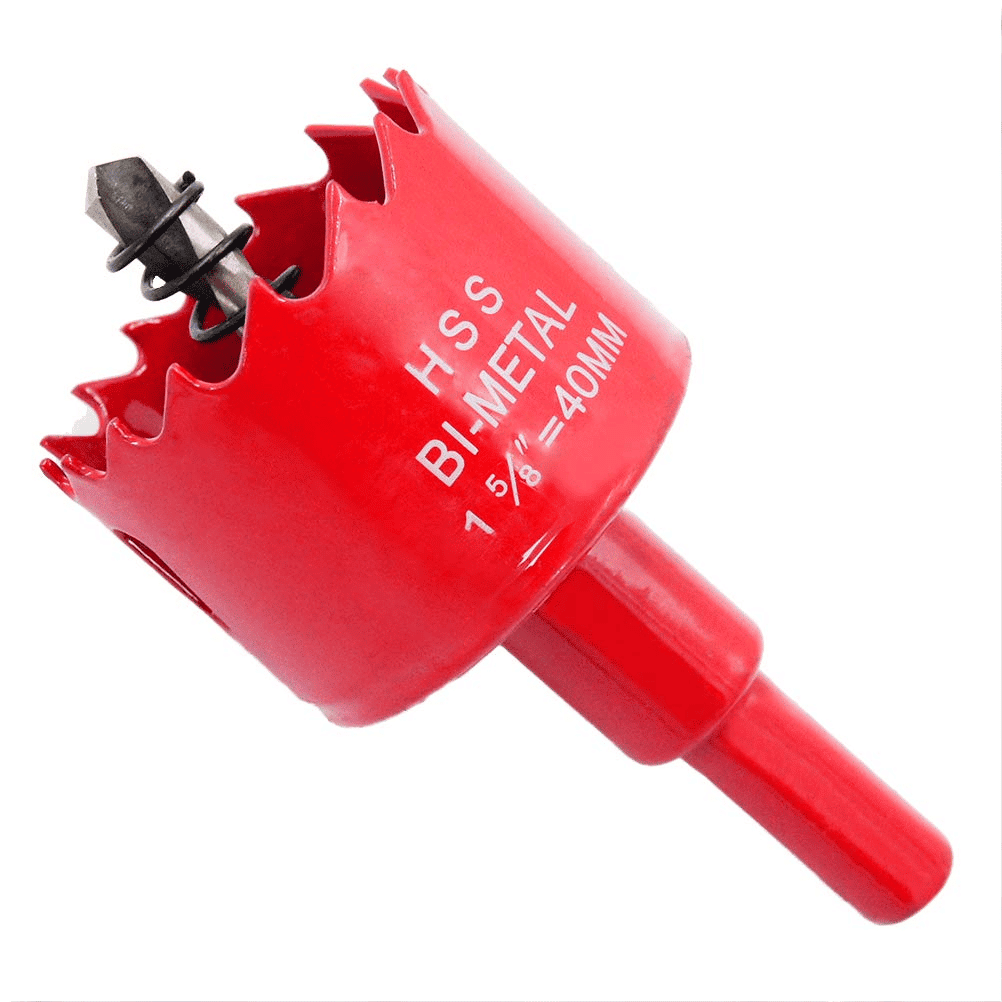
Slot Saw 40mm
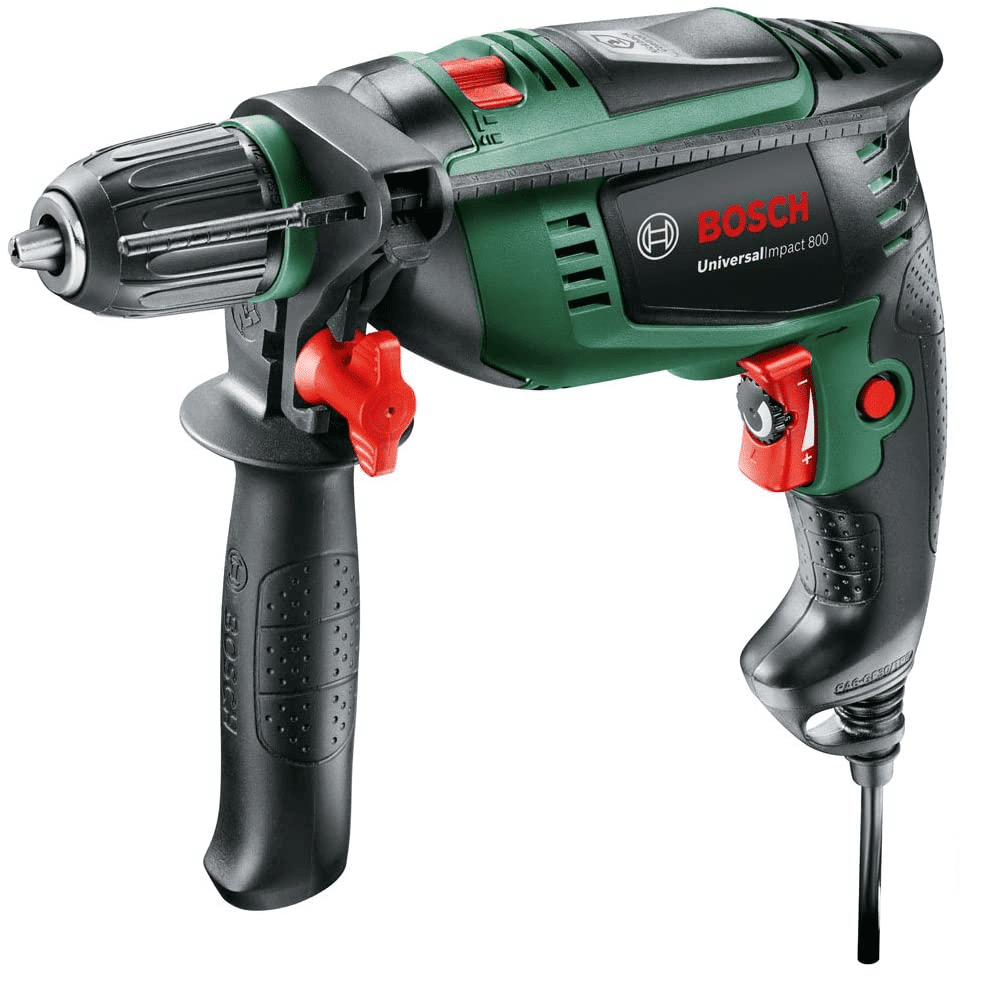
Drill Driver
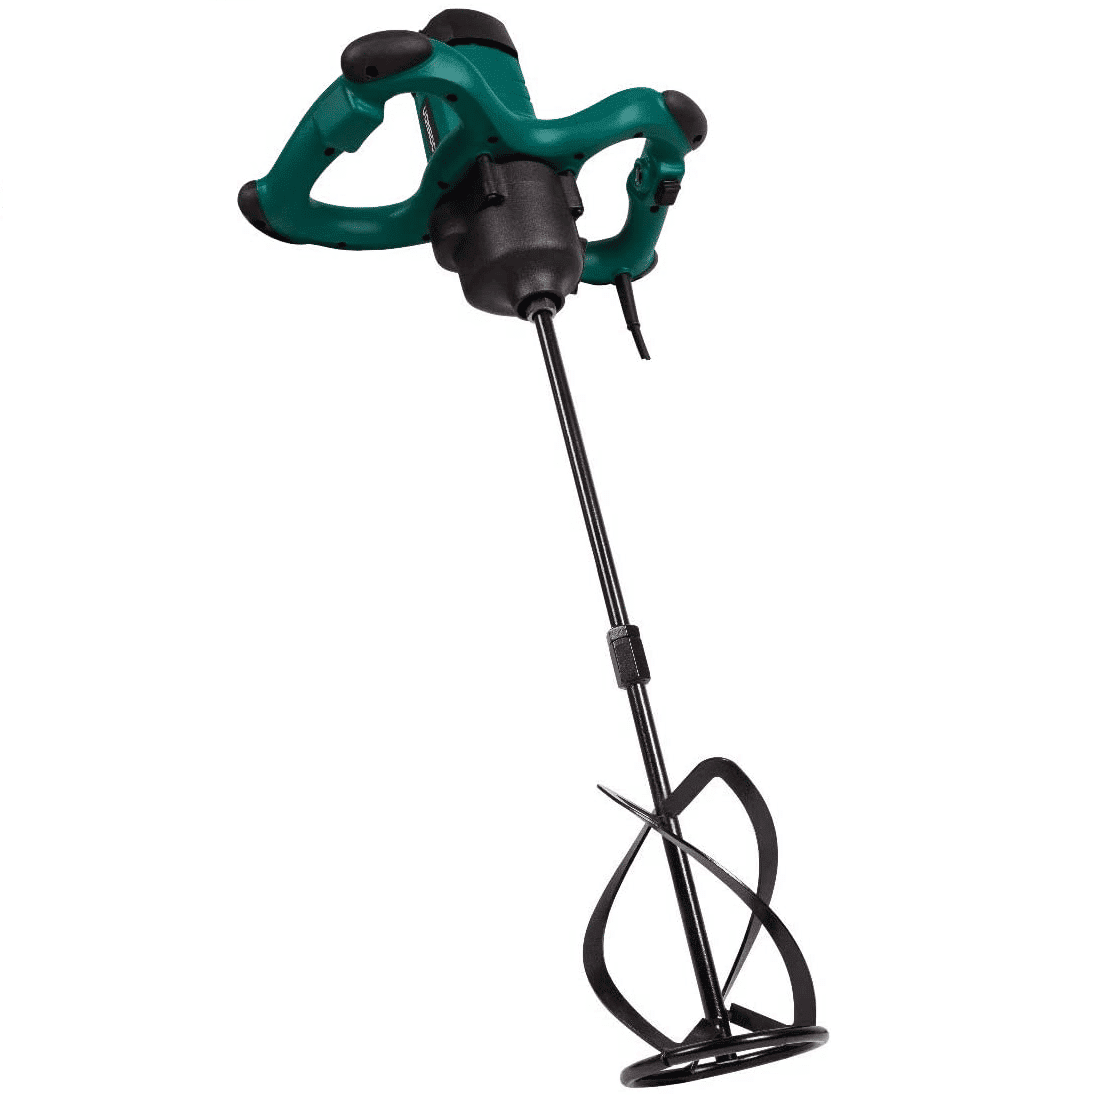
Mixer Malta

Tile Blade
8. Conclusion and Next Steps
A shower on an RV for some is a luxury, for others simply a necessity.
In this article I listed some ideas for showering on the road even without having a shower on your RV, I showed you some ideas from the web for building a DIY shower and finally I showed you step by step how I built my own shower on my converted van.
As you may have noticed from the photos, I actually built a shower-bath. If you are interested in how my DIY composting toilet works, I suggest you read the article DIY Camper Bath: Complete Guide.
At this point, I hope I’ve given you some ideas and a little inspiration to decide which shower option is best for YOUR camper project.
I really hope the information in this article will help you.
As always, I ask you to let me know if there are any inaccuracies in the text (it can always happen 🙂
If you have any doubts or questions about the topics covered Let me know in the comments below. Likewise, if you think there’s something important missing from the article that might help others struggling with similar projects, let me know and I’ll edit the article to make it as complete and informative as possible.
Thanks for reading,
and see you in the upcoming insights! 🙂
BEFORE YOU GO, CAN I ASK YOU FOR SOME FEEDBACK?
Writing detailed articles like this takes a lot of time and effort..
If you liked it, can I ask you to leave me a feedback message in the comments at the bottom of the page?
For a content-creator, knowing that you are being read and that your efforts are useful to someone is the best motivation to keep writing and doing better 🙂
Let me know what you liked or what you think could be added.
If you’d like, you can also share the article to help other people find it!
Thanks for the help 🙂

Read the Van Conversion Guides

How to Calculate the Right Section of 12V Cables | EASY GUIDE
An undersized cable does not carry enough current. A cable that is too undersized can lead to a fire. An oversized cable, on the other hand, simply costs more and is a waste of money. Are you wondering what is the logicfor choosing one section of cable over...

Bluetti vs Ecoflow | Which is the Best Portable Power Station for RV/Vanlife?
The Portable Power Station is an increasingly used accessory on camper vans and RVs, but when does it really make sense to purchase and own or install one? In this article we try to shed some light on how these systems work, the best options on the market, and the...

Van Conversion DIY: How Much Does It Costs? | My Experience
How much does it cost an entirely DIY van to campervan conversion? The queen of all questions... In this article, I want to show you all the costs of my conversion from start to finish, so that you too can get an idea of what it might cost! ...
Van Electrical Diagrams for your DIY Project – Ready to Install
The Electrical System is often one of the most complicated steps in a DIY van conversion. How much energy is needed? What apparatus/devices to purchase? How to connect them? How much would it cost? These are all doubts and questions that normally everyone finds...

Van Interior Conversion: Best DIY Ideas for your Project!
The Interior Outfitting of a DIY converted van is both an aesthetic and structural choice. In this article, you will find useful information and inspiration ideas for customizing the Walls, the Ceiling, and the Floor of your Van! DIY CAMPERVAN SET-UP:...

Kitchen for Camper | Best DIY Ideas for your Van Conversion
Cooking in Camper is one of those things, that makes you feel at home wherever you are! Gas, Diesel or Electric Stove? What equipment and accessories you need on the Road? How much space do you need? How to assemble the kitchen in your Camper? In this article you will...

The Best Fridge for Your Campervan – Which One to Choose?
Buying a trivalent or compressor RV refrigerator? Horizontal or vertical? 12V or 110/220V? In this article you will find all the information you need to choose the best fridge for Your Van, tailored to your Needs! 🙂 THE REFRIGERATOR IN THE VAN:...
Van Conversion: How to Build a DIY Bed for your Camper Van
A Camper is not a Camper if it does not have a bed. Where to Sleep and... Dream! In this Guide you can find the inspiration you need for creating a DIY Bed in Your Campervan, And I'll show you step by step how I built a Complete Bed/Dinette on my VW Crafter....
DIY Camper Bathroom: How to Self-Build a Toilet
If you are Campering a Van you surely must have wondered: How does the Bathroom in a Motorhome work? In this Guide I show you the various types of Bathrooms on the market, I explain how they work, and I show you how you can Build yourself an entirely...
Best 12V Fan for RV | DIY Installation Guide | Van Conversion
A Roof Fan helps keep your Vehicle's humidity under control and change stale air. In this guide you will find everything you need to know about mounting a Maxxfan Deluxe fan on the roof of YOUR van. ROOF FAN: WHAT IS IT FOR? Keeping an RV's...
Complete Guide and Electrical Scheme for your D-I-Y Van Conversion
You dream of transforming your Campervan DIY and have never touched an electrical cable before? Or do you want to implement some changes to your Factory RV? In this guide you will find EVERYTHING (absolutely EVERYTHING!) you need to know to create the perfect DIY...
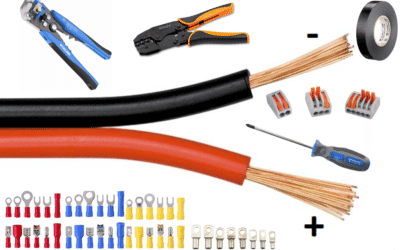
Converting a Van: How to Connect Electric Cables Without Mistaking
Want to know how to "connect" the electric cables in practice in a converted van? Stripping, Crimping, Wire Leads, Clamps, Tubing, Cable Ties and much more... You've come to the right place to learn All That! How to wire your van's electrical...


0 Comments