An undersized cable does not carry enough current.
A cable that is too undersized can lead to a fire.
An oversized cable, on the other hand, simply costs more and is a waste of money.
Are you wondering what is the logicfor choosing one section of cable over another for a particular circuit?
You’ve come to the right place: in this article I explain how to choose the correct cable cross section for all your 12V circuits.
If you already know the theory, you can jump directly to the table.
On the other hand, if you are curious and want to understand how cables work and WHY to choose one over another, I offer a simplified, practical theoretical explanation with pictures and infographics that are neophyte-proof;D
Let’s get started right away!

A Short Foreword:
This article is not a Physics Essay,
But designed to be Practical and Instructional
A SIMPLE LANGUAGE
In this article I purposely decided to use language that is simple and easy-to-understand for everyone.
For this, I use terms that are not always technical, but which I think help to give an idea of how electricity works and what the logic is for calculating the appropriate 12V cable cross section.
I kept it as simple as possible! 😀
With that being said, let’s get started right away!
TABLE OF CONTENTS
Choosing the Section of 12V Cables without Making a Mistake


ARE YOU BUILDING OR UPGRADING YOUR RV’S ELECTRICAL SYSTEM AND STILL DON’T FEEL CONFIDENT?
ASK ME FOR A CONSULTING SESSION!
What’s in it for YOU?
- Consulting to Create a Suitable Electrical System to Meet YOUR Energy Needs.
- Electrical System Diagram Adapted to Your Needs
- Instructions on the order in which to mount the system and safety precautions
- List of Materials/Accessories to Buy, to buy the right and not waste money on wrong components
- All sections of Cables and Fuses to be used
What’s in it for Me?
- A few pennies to support the costs of the blog and fueling arancino 🙂
- The Happiness of having helped someone create a dream

Guarantee: 100% Satisfied or Refunded!
With my consultancy I aim to make it as easy as possible for you to research and design your electrical system, resolve all your doubts, and assist you in Do-It-Yourself installation. In case my work is not as useful to you as you hoped, I offer a full refund with no time limit or questions 🙂
€59,90
Original price was: €114,90.€84,90Current price is: €84,90.
1. What are amperes?
To figure out what cross section to choose for your cables, the first thing to do is to understand how electricity works and how it passes through electrical wires.
So let’s start with the basics: this below is the drawing of copper electrical cable.
COPPER CABLE (STYLIZED)

Yes, I know what you are thinking, it looks little like a real cable.
In fact, copper wires are not rigid copper blocks, but are normally composed of many smaller copper threads, which intertwined create the final copper conductor.
Weaving many smaller strands into one large one allows the cable to be softer, more flexible and easier to handle.
A LARGE WIRE, IT IS COMPOSED OF MANY SMALL THREADS

Whenever you see a cable drawn from here on, remember that it is merely a simplification: in fact, every cable large or small is always composed of multiple threads within it 😉
Of course, when you get a cable in your hands, you will normally never see the copper conductor, but you will always see its outer, usually colored, coating called the insulator.
THE CABLES ARE COVERED WITH A COLORED INSULATION (PVC, RUBBER, OTHER)

In the case of 12V cables that are used in vehicles or RVs, by convention, cables are used with a red insulation for positive cables, and black for negative cables.
NOTE: The cable colors are a convention: red and black are used so that if someone, in the future, needs to get their hands on the system, they know where to put them. That being said, it should be emphasized that the color of a cable does not affect its physical characteristics at all (a copper cable is still a copper cable, only the color changes).
12V RED AND BLACK CABLES ARE USED IN VEHICLES (BY CONVENTION)

Now that we have seen what electrical wires look like, let us now look at how power works.
To keep things simple, imagine electric current as many “electric charges” passing through the cable (like water passes through a pipe!).
Current intensity, that is, the amount of charge passing through the cross-section of the cable at any given time, is measured using a unit of measurement called an ampere (don’t get lost here, I will now explain amps more clearly 😉 ).
CURRENT FLOWS IN THE CABLES

To make it simpler, an electric cable can be crossed by an electric current with different intensity.
It can be passed through with a current of 1Aampere, 2Ampere, 5Ampere, 50Ampere, 100Ampere etc.
The problem, is that based on its cross section (its thickness to be clear!), each copper cable has a maximum limit of amperes it can conduct without overheating.
If that limit is exceeded, the cable can overheat to the point of burning, potentially causing a fire! (very bad!)
EACH ELECTRICAL CABLE HAS A LIMITING AMPERE RATING
WHO CAN LEAD, WITHOUT BURNING

Each cable has a maximum ampere rating, beyond which it is best not to risk it, to avoid a fire.
To carry a higher current, it will simply be sufficient to choose a cable with a larger cross section (thickness)!
THE CABLE SHOULD BE CHOSEN ACCORDING TO THE CURRENT INTENSITY (AMPERES)

In conclusion, what is important to remember at the moment is:
KEY CONCEPT #1
The cross-section of the cable should be chosen according to the intensity of current (amperes) that must pass through it: more amperes = thicker cable, less amperes = thinner cable.
AS THE AMPERES INCREASE, THE CROSS SECTION OF THE ELECTRICAL CABLE INCREASES
 depends on the amperes passing through the cable")
2. What are volts?
Let’s put aside what we have learned so far, and look at another fundamental characteristic of electricity: voltage!
To understand, the voltage, let us imagine a simple situation: we connect a 12V battery to a 12V light bulb, simply using a positive (red) cable and a negative (black) cable.
The moment we close the circuit (i.e., attach the wires to both the battery and the bulb), the battery will power the bulb by creating an electric current (causing the electric charges inside the wires to move).
1.1 A 12V BULB, CONNECTED TO A 12V BATTERY

The 12V (12-volt) battery, allows electricity to “flow” within the cable giving a speed to the electrical charges.
To give you a practical idea, imagine the Volts as the motor moving the Amps inside the cable.
The higher the circuit voltage, the faster the charges move through the electrical wire.
AS THE VOLTAGE (VOLTS) INCREASES,
THE SPEED OF ELECTRICAL CHARGES INCREASES


Conversely, the lower the voltage, the “slower” the electrical charges will pass inside the cable.
Passing through the electric cable slowly, some charges of electricity end up heating the cable and dissipating into heat.
Therefore, when we talk about sectioning cables for 12V circuits, it is important to consider not only the cross section, but also the length of the cables we want to use.
The thicker a cable is, the lower the potential loss. The finer a cable is, the more it will heat up and the greater the loss of electricity into heat.
THE LOWER THE VOLTAGE, THE GREATER THE CHANCE OF A VOLTAGE DROP

As we will see below, for most 12V circuits, it is recommended to stay within a 3% voltage drop so that enough power arrives to power your 12V equipment.
For the time being, I don’t want to confuse you further, so remember the following:
KEY CONCEPT #2
The higher the voltage, the greater the speed of electrical charges within the cable. At low voltages (e.g., 12V) , the current heats the cable more and some of it is lost in heat, so it is important to consider cable length.
THE HIGHER THE VOLTAGE,
THE GREATER THE SPEED OF THE CHARGES THROUGH THE CABLE


3. What are watts?
Now that we understand what amps (amount of charges passing through the cable section at a given time) and volts (the speed of these charges within the cable) are, we are left with only one last step: watts!
Watts, are simply the unit of measurement of electrical power, that is, how much “energy” an apparatus consumes to operate (e.g., a light bulb, a fan, a refrigerator etc.) or produces (e.g., a solar panel, an alternator, a generator etc.).
To understand watts, just pay attention to them: look at the electrical appliances and apparatuses around you: your phone charger, your PC, your ceiling fan, your lights, your washing machine etc. On each one, there should be a label (or in the instruction booklets!), specifying how many watts it consumes.
Below, I leave you examples of some of the equipment that can be found on RVs with their consumption in watts:
ALL ELECTRICAL APPARATUS HAVE AN ELECTRICAL POWER (IN WATTS),
THAT CAN REFER TO THE CONSUMPTION OR PRODUCTION OF ELECTRICITY


A light bulb, in order to work, needs 3Watts. A Maxxfan for example, eats 60W. A refrigerator can reach 100W, while a solar panel can produce 200Watts.
I know what you must be wondering, “in simple terms, what are watts?”
Well, imagine watts as the “electrical charges” that arrive (or depart) from each electrical component. Watts measure the “power” consumed (the electrical energy absorbed/produced by each apparatus).
Let’s try to visualize it with an infographic, which is perhaps easier to understand (don’t get lost yet, that will become clear shortly 😉 ).
EACH APPARATUS, HAS A DIFFERENT CONSUMPTION OR PRODUCTION POWER

If you’re still a bit baffled, or not totally clear about what watts are and what we need them for, don’t despair that it will be soon!
In fact, now it is time to introduce the Sacred Formula of Electricity: W=V*A.

This extremely simple formula is what describes the whole workings of electricityand the missing piece to unite everything we have learned so far:
- 1Watt is equal to an amount of electrical charge (1Aampere) reaching the apparatus with a “speed” of 1Volt.
By multiplying amperes (charges passing through the cable section), by volts (the speed at which these charges travel), we can find watts (the power reaching the electrical apparatus at a given instant).
Before continuing, a small note:
Electrical apparatuses are all built to operate at a certain voltage: there are 5V apparatuses (e.g., USB chargers), 12V (e.g., RV lights), 24V (e.g., truck batteries), 110V (e.g., American appliances), 220V (e.g., European appliances), etc.
Getting the supply voltage of an apparatus wrong can burn it out or even make it explode: a 12V apparatus should be powered at 12V, a 24V apparatus should be powered at 24V etc.
EXAMPLE TO UNDERSTAND THE WATTS: THE TWO FANS!
That being said, there may be similar devices designed to operate at different voltages: for example, a 12V fan (for RV) and a 220V fan (for home).
The two fans, consume the same watts to operate (the same amount of electricity, to make the same air).
These watts, however, come in two different ways:

In the first case, the fan consumes 60W, which is the result of a voltage of 220V, multiplied by a current of just 0.27Aampere (60W=220V*0.27A).
In a nutshell, in this case they pass through the cable few electrical charges at a time, but they flow very fast!
In the second case, the fan consumes 60W, which is the result of a voltage of 12V, multiplied by a current of 5Amps (60W=12V*5A).
In this case, more current (more charges) flows in the cable, but at a slower rate.
The power consumption is the same (60Watts), however, the cable section, as you can see from the drawing, is different: in the second case, where the current intensity is higher (amperes), the cable section is larger!
In conclusion, we deduce from this example that:
The lower the circuit voltage, the larger the cross-sectional area of the cable we will need to safely power a given apparatus.
If you’ve ever noticed, the cables used in houses are usually very thin: this is because in the house we use electricity with a 220V voltage (very high), and this results in very low amperages through the cables.
In contrast, in cars or RVs, mainly 12V circuits are used (24V in trucks and boats), which is why the cables are generally much larger in cross-section!
LET’S SUM UP: TO CHOOSE THE RIGHT SECTION OF A CABLE, WHAT YOU HAVE TO LOOK AT IS THE AMPERES THAT WILL HAVE TO PASS THROUGH IT (CURRENT INTENSITY)

TO FIND THE AMPERES, JUST USE THE SACRED FORMULA
Knowing the wattage of an electrical apparatus (Watts) and its operating voltage (Volts), both data found in all manuals/instruction booklets, one can easily calculate the amps required by the circuit using the sacred formula W=A*V.
Turning the formula around, we find that Ampere=Watt/Volt.
In our previous example, these are the amps that should go through our cables:

4. Table for Calculating the Section of 12V Cables.
Once you have calculated the amps that will need to pass through the electrical circuit, to calculate the cross section of 12V cable best suited to your needs, simply follow the table below.
(Note: I also added the wattage in watts, if that is more convenient for you).
On the left columns, you find the amps/watts required by the circuit.
On the first line instead, you find the length of the electrical circuit, understood as the sum of the length of the positive and negative cable (in a 12V circuit, as we have seen it is possible for some of the current to be dissipated in heat, which is why calculating the distance to be traveled is important for choosing the appropriate cable cross section).
By crossing the row with the column, you find the cross-section of the cable to be used (in mm2), which will allow you to power your devices while staying within a voltage drop of 3% (in a nutshell, no problem 😉 ).
Note Camper Electric System: If you are building the electrical system of an RV, and you need to connect powerful batteries and inverters where the current intensity exceeds 150/200Amps, I recommend you read the dedicated section further below (in this case, there is more to consider in choosing the optimal section to get the most out of your system!).
EXAMPLES OF TABLE USE
Apparatus: 3Watt bulb
Total Length of the Circuit: 5 Meters
12V Cable Minimum: 1.5mm2 (could be less, but in mobile vehicles it is not recommended to go below 1.5mm2)
Apparatus: 60W fan
Total Length of the Circuit: 5 Meters
12V Cable Minimum: 2.5mm2
Apparatus: 100W refrigerator
Total Length of the Circuit: 10 Meters
12V Cable Minimum: 6mm2
Apparatus: 200W Solar Panel
Total Length of the Circuit: 5 Meters
12V Cable Minimum: 10mm2
Apparatus: 1000Watt generator
Total Length of the Circuit: 4 Meters
12V Cable Minimum: 25mm2
5. Tips for Sectioning Your 12V Cables.

That said, following a chart to the letter can sometimes be misleading: the table is an aid to help you choose, but there are other factors to consider when choosing your cables, and below I want to leave you with some food for thought so that you will never (but really NEVER!) go wrong 😉
TIPS TO KEEP IN MIND
1) If you are building circuits inside an RV, boat, or other mobile vehicle, do not use wires below 1.5mm2.
For low-power circuits (such as the 3W LED light we saw earlier in the example), probably a 0.5mm2 or 0.75mm2 wire would be more than sufficient to power it.
That said, it is important to think that in a mobile vehicle the cable will be under continuous vibration throughout its life, and the copper threads that make up the cable could break or cut if the cable is too thin.
To avoid problems in the long run, it is advisable to use cables from 1.5mm2 and up (the cost per meter changes by a few cents, and is an added security on the longevity of the system). In addition, a cable that gets too thin can be the cause of a fire start (which as we have seen happens when too many amps pass through a cable that is too thin).
2) Some appliances have an inrush current, and the correct cord is suggested in the instruction manual
Some household appliances (e.g., refrigerator, hot plates, hair dryer etc.) may require inrush current. What does it mean? Let’s take the example of a refrigerator.
A given refrigerator, according to the manual uses a power of 60Watts. The moment it is turned on, however, for a few seconds, it does not consume 60W, but 120W. This is the inrush power: for a few seconds, the appliance consumes twice as much current as it does when turned on.
If we sectioned the cable on 60W (for 5Amp at 12V), we would end up with an undersized cable, which once 120W (for 10Amp at 12V) passed through, could overheat and create a fire start.
For this reason, whenever a “complex” household appliance (such as a refrigerator, dishwasher, or whatever) is installed, it is important to read the instruction booklet: there the manufacturer normally recommends the cross-section of the cable to be used and probably also the appropriate fuse to protect the circuit.
3) In Doubt, choose a cable with a larger cross section.
If you are undecided between two cable sizes, always choose the one with the larger cross-sectional area.
The only disadvantage of choosing an oversized cable is that it costs slightly more.
The danger of choosing an undersized cable, is to burn the connected equipment and create a fire start.
I would say there is nothing more to add 🙂
4) If you are setting up an off-grid system, consider oversizing “key” cables to achieve maximum efficiency without heat loss
In cable cross-section tables (like the one above), a voltage drop of 3% is considered. This means that by choosing the cable shown in the table, the voltage reaching the electrical apparatus can drop up to 3% from the source (e.g., battery).
By dropping the voltage by 3%, the power output drops by 3% (Watt=Ampere*Volt). This is not a problem in most circuits.
In the case of the bulb, for example, 12V*0.25A=3Watts. By decreasing the 12V by 3%, we get 3W/(12*0.97)V=0.257A.
In this hypothetical case, the additional current consumption, due to voltage drop is 0.007A, practically nothing 🙂
In the case, however, of a 3000W inverter (to give an example), which at steady state and without counting the inrush, can get to consume 3000W/12V=250A, a 3% voltage drop starts to have a more relevant effect: 3000W/11.67=257A.
In this case, we are losing 7Amp of current solely because of an undersized cable. This 7amp, can become 7Ampere*hour (7ah) for each hour of inverter operation.
With this example, you can see that a “right” cable, which allows a voltage drop of 3%, can result in higher current consumption in the long run and worsen the yield of the inverter.
Using a 3000W inverter for 5-6 hours per day (for TV, phones, hot plate, kettle, air conditioner etc.) can result in a loss of 20-30ah per day, solely because of a cable.
If your plant is very large, you could probably consider this loss not excessive. Multiply that by all the days you use the RV, though, and it will eventually result in a not inconsiderable waste of energy.
In summer maybe the need for those 20-30ah can be felt less, but in winter when the panels produce little, they could make a difference.
For this reason, I recommend over-sizing the largest cables in the system (those that handle a lot of current such as the cables between batteries, bus bars and inverters) to stay under 1 percent voltage loss.
After all, they are short cables, so the higher cost is there yes, but it is limited, and once mounted you will have maximized the electrical efficiency of your system throughout its life.
5) If the amperages start to be very high (above 250/300A), the cables will start to be really big and difficult to cut and crimp. In such cases, you should consider increasing the voltage of the 12V circuit to a higher one (e.g. 24V, 36V, 48V etc.) to decrease the wire cross section.
Increasing the voltage of electrical circuits has two advantages: lower voltage drop (charges at higher voltages travel faster in cables and less energy is dissipated in heat), and thinner (and cheaper!) cables.
The downside of a higher voltage, is that if you have to power 12V accessories, you will probably need a transformer to bring the current from the circuit voltage to a voltage usable by your electrical accessories.
6) If you cannot get and/or crimp large cross-section cables, you can use two smaller cables in parallel (but I do not recommend this unless you can do otherwise)
As we have seen, an electrical cable is composed of many braided copper threads. Each copper wire, carries a portion of the amps passing through the cable.
It goes without saying, that by adding another wire equal to the previous one between two poles A and B, we double the copper threads between the two, and thus the ampere rating of the system.
Mounting two cables in parallel is a solution for when a larger cable is not available.
That said, there are various tricks to consider, all arising from the fact that if one of the two cables for whatever reason is badly fixed or blows, all the electric current will flow into the other cable, creating a fire start if this is not fuse protected or sized at least to carry the minimum circuit current.
Therefore, in case you decide to use two cables, it is important: that the two cables are identical (length and cross section), that they are properly secured, and that they are individually protected with a suitable fuse. Also, if the installation is on a mobile vehicle, it is good to check them regularly to make sure everything stays in place.
Personally, my advice is to go to a specialty electrical store and order the right size coarse cables, resorting to parallel connections only in the absence of alternatives.
6. Tips for Choosing Cables for Batteries and Inverters.
for your Do-It-Yourself Camper

In this section, I explain how to size these cables correctly 🙂
FOREWORD
In an RV (or otherwise mobile vehicle), I recommend you keep the system at 12V if your maximum electrical consumption is less than 3000/3500W (AC with inverter + direct DC current).
If you need more electrical power, I recommend that you upgrade the entire system to 24V (and use a transformer where needed): this way you can have higher power while maintaining lower amperages (and thus using thinner cables).
If you are interested in how a 24V system works let me know in the comments at the bottom of the page and I can write a supplementary article on it 😉
CALCULATE THE CABLE CROSS SECTION BETWEEN 12V BATTERIES IN PARALLEL
The cables that are used to connect the batteries together usually measure from 20-40cm (so the length of the red+black circuit is between 40-80cm).
On such a short length, the voltage drop is very small.
In addition, between the batteries that make up a battery bank, not all the current required by the circuit passes, but only a portion (50% if there are two batteries, 66%-33% if there are 3 batteries etc.).
To choose the correct cable cross-section between batteries, it is therefore still important to start with your consumption: large consumption will require larger cables, while if you have to connect are a light bulb, regardless of how large your batteries are, a tiny cable is more than enough.
And here I re-emphasize it: battery capacity does not impact cable cross-section! Cable cross section is impacted by consumption (the energy required by your electrical equipment!). The batteries may be huge, but if the power consumption is low, the cables will still be thin.
To calculate the correct cable cross section between your batteries, start from the maximum consumption you calculated of all your electrical equipment connected at the same time.
Example. 3000W Inverter + Combined DC Circuits for 500W = 3500W
We divide 3500W/12V=291Ampere
In the case of two batteries, 291 Amps/ 2 Batteries = 145.5 Amps will pass through the cable connecting them.
In the case of three batteries, 291/3=97A (between the first and second batteries) and 97A*2=194A (between the second and third batteries) will pass in the cables between them.
Once you have found the amperages they will need to withstand, follow this table to choose the correct section for your needs:

This, always remaining under a voltage (and thus power) drop of 1 percent.
NOTE: As the current intensity (amperes) within the cable increases, the relative distance in the range of centimeters changes little/no maximum electrical capacity. As you can see from the table, a 0.50m long cable or a 1m long cable have the same maximum electric current carrying capacity above 50mm2 in cross section (the short cable, gets much hotter).
CALCULATE THE 12V CABLE CROSS SECTION BETWEEN BATTERIES AND BUS BARS
The section of the 12V cable between batteries and bus bars is calculated taking into account the maximum possible consumption of your equipment.
Continuing with the previous example, if your power consumption is in the range of 3500W maximum, the cables (red/positive and black/negative) between batteries and bus bars should conduct 3500W/12V=291Ampere maximum.
In this case, looking at the table above, you will notice that even the 120mm2 seems tight, and you would even have to go up to a giant cable of 150mm2 (to stay under 1% voltage drop in all cases).
That said, since in real life you rarely (if ever!) use all electrical equipment to the maximum at the same time, you can safely choose 120mm2 cable, protecting it with a 250A or 300A fuse :).
Having made this observation, wiring your batteries/bus bars with a cable as close as possible to the cross-section shown in the table will allow you to minimize the system’s voltage drop (energy being lost in heat), and maximize the energy efficiency of your system 🙂
CALCULATE THE 12V CABLE CROSS SECTION FOR AN INVERTER
Using the above table, you can also calculate the optimal cross-sectional area for your 12V inverter cables:
3000W inverter at 12V (<1m)
Cable cross section: 3000W/12V=250A –> 120mm2 cable
2500W inverter at 12V (<1m)
Cable cross section: 2500W/12V= 208A –> 105mm2 cable
2000W inverter at 12V (<1m)
Cable cross section: 2000W/12V= 166A –> 70mm2 cable
7. Where to Buy Cables for 12V Circuits.

In fact, in the large chain Brico stores (e.g., Leroy Merlin, EuroBrico, BricoCasa etc.) it is normally easy to find the thinnest electrical cables (1.5mm2, 2.5mm2, 4mm2, 6mm2, 10mm2), but they hardly deal with cables of larger cross sections.
To get the biggest cables at the best price, the ideal would be. Turn to specialized electrical stores near you, who normally sell cables by the meter at really competitive prices and might be able to order you the size cables you need with the appropriate lugs (and if you’re lucky, maybe already crimp them as well!).
Alternatively, if you don’t have electrical stores nearby, you can order power cords online, but at a generally higher price:
12V CABLES – ONLINE OPTIONS
- Red/Black Cable Coil for 12V 1.5mm2 – ideal for wiring lights, fans, probes, pumps
- Red/Black Cable Coil for 12V 2.5mm2/4mm2 – Ideal for Wiring Ceiling Fans, Water Pumps, Diesel/Gas Heaters
- Ebrom cables (by the meter) for 12V 6mm2/10mm2+ – ideal for solar panels, charge controllers, column chargers and smaller/medium refrigerators
- Ebrom cables (by the meter) for 12V 16mm2, 25mm2, 35mm2, 50mm2, 70mm2, 90mm2, – ideal cables for b2b charger from alternator, isolators, parallelers, large refrigerators, batteries, bus bars and inverters
- Ebrom cables (per meter) for 12V of 105-120mm2 – To connect large banks of service batteries to bus bars and bus bars to power inverters above 2500/3000W
7. Conclusions
I hope this article will help you wire your electrical system with more confidence and less doubt 🙂
As every time, I would like to ask you to write to me in the commentsif the article was useful to you, if you think something could be improved, or if you still have doubts that you haven’t found an answer to 🙂
Plus, if you’d like, let me know what insights you’d like to read in the blog (about fuses? lugs?, electrical system design? etc.)…I’m happy to write something that I know can be useful to others! 😀
Below I leave you with 3 more articles on RV wiring that might help you with your Do-It-Yourself RVing projects or upgrading your RV’s existing electrical system:
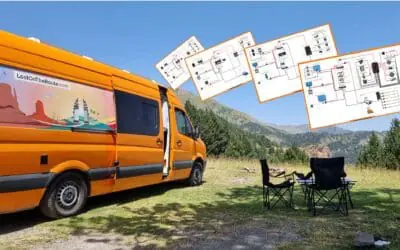
Complete Guide to a Do-It-Yourself Camper’s Electrical System – With Diagram!
Converting a Van: Complete Guide to Connecting Electrical Cables Without Mistaking.
Diagrams for the Electrical System of a Motorhome – Ready to Assemble!
In addition, it is not always necessary and cost-effective to invest in a complete electrical system; if you have smaller projects in mind, or if you simply want to increase the electrical range of your van without putting a dent in the existing system, you might be interested in considering a Portable Power Station:
The Search for Best Portable Camper Power Station: Bluetti vs. Ecoflow
Thanks for reading, and as always, see you in the next article! 😀
ARE YOU BUILDING OR UPGRADING YOUR RV’S ELECTRICAL SYSTEM AND STILL DON’T FEEL CONFIDENT?
ASK ME FOR A CONSULTING SESSION!
What’s in it for YOU?
- Consulting to Create a Suitable Electrical System to Meet YOUR Energy Needs.
- Electrical System Diagram Adapted to Your Needs
- Instructions on the order in which to mount the system and safety precautions
- List of Materials/Accessories to Buy, to buy the right and not waste money on wrong components
- All sections of Cables and Fuses to be used
What’s in it for Me?
- A few pennies to support the costs of the blog and fueling arancino 🙂
- The Happiness of having helped someone create a dream
Guarantee: 100% Satisfied or Refunded!
With my consultancy I aim to make it as easy as possible for you to research and design your electrical system, resolve all your doubts, and assist you in Do-It-Yourself installation. In case my work is not as useful to you as you hoped, I offer a full refund with no time limit or questions 🙂
€59,90
BEFORE YOU GO, CAN I ASK YOU FOR SOME FEEDBACK?
Writing detailed articles like this takes a lot of time and effort.
If you liked it, can I ask you to leave me a feedback message in the comments at the bottom of the page?
For a content-creator, knowing that you are being read and that your efforts are useful to someone is the best motivation to keep writing and doing better 🙂
Let me know what you liked or what you think could be added.
If you like, you can also share thearticle to help other people find it!
Thanks for the help 🙂

Read the Van Conversion Guides

Bluetti vs Ecoflow | Which is the Best Portable Power Station for RV/Vanlife?
The Portable Power Station is an increasingly used accessory on camper vans and RVs, but when does it really make sense to purchase and own or install one? In this article we try to shed some light on how these systems work, the best options on the market, and the...

Van Conversion DIY: How Much Does It Costs? | My Experience
How much does it cost an entirely DIY van to campervan conversion? The queen of all questions... In this article, I want to show you all the costs of my conversion from start to finish, so that you too can get an idea of what it might cost! ...
Van Electrical Diagrams for your DIY Project – Ready to Install
The Electrical System is often one of the most complicated steps in a DIY van conversion. How much energy is needed? What apparatus/devices to purchase? How to connect them? How much would it cost? These are all doubts and questions that normally everyone finds...

Van Interior Conversion: Best DIY Ideas for your Project!
The Interior Outfitting of a DIY converted van is both an aesthetic and structural choice. In this article, you will find useful information and inspiration ideas for customizing the Walls, the Ceiling, and the Floor of your Van! DIY CAMPERVAN SET-UP:...

Kitchen for Camper | Best DIY Ideas for your Van Conversion
Cooking in Camper is one of those things, that makes you feel at home wherever you are! Gas, Diesel or Electric Stove? What equipment and accessories you need on the Road? How much space do you need? How to assemble the kitchen in your Camper? In this article you will...

The Best Fridge for Your Campervan – Which One to Choose?
Buying a trivalent or compressor RV refrigerator? Horizontal or vertical? 12V or 110/220V? In this article you will find all the information you need to choose the best fridge for Your Van, tailored to your Needs! 🙂 THE REFRIGERATOR IN THE VAN:...

Van Conversion: How to Build a DIY Bed for your Camper Van
A Camper is not a Camper if it does not have a bed. Where to Sleep and... Dream! In this Guide you can find the inspiration you need for creating a DIY Bed in Your Campervan, And I'll show you step by step how I built a Complete Bed/Dinette on my VW Crafter....
DIY Camper Bathroom: How to Self-Build a Toilet
If you are Campering a Van you surely must have wondered: How does the Bathroom in a Motorhome work? In this Guide I show you the various types of Bathrooms on the market, I explain how they work, and I show you how you can Build yourself an entirely...
Best 12V Fan for RV | DIY Installation Guide | Van Conversion
A Roof Fan helps keep your Vehicle's humidity under control and change stale air. In this guide you will find everything you need to know about mounting a Maxxfan Deluxe fan on the roof of YOUR van. ROOF FAN: WHAT IS IT FOR? Keeping an RV's...
How to Build a Shower in a Do-It-Yourself Camper
A Shower in the RV for some people is not necessary, for others it is a real necessity to be totally independent! In this guide I'll tell you how I built the shower of my converted van entirely Do-It-Yourself! INSTALLING A SHOWER IN A...
Complete Guide and Electrical Scheme for your D-I-Y Van Conversion
You dream of transforming your Campervan DIY and have never touched an electrical cable before? Or do you want to implement some changes to your Factory RV? In this guide you will find EVERYTHING (absolutely EVERYTHING!) you need to know to create the perfect DIY...
Converting a Van: How to Connect Electric Cables Without Mistaking
Want to know how to "connect" the electric cables in practice in a converted van? Stripping, Crimping, Wire Leads, Clamps, Tubing, Cable Ties and much more... You've come to the right place to learn All That! How to wire your van's electrical...

Converting a Van: All the Camper Products I’ve Used and Where to Buy Them
Where to look for useful tools, accessories and products for campervans? Is it better to rely on local stores or online? In this article, I'll share my experience and show you what I used for my project. 80% OF THE TIME IT TAKES TO CONVERT A VAN,...
Heating for a Do-It-Yourself Camper: Gas, Diesel or Electric?
No one likes to be cold at home, not even if this is on Wheels! In this article, I'll show you all the possibilities to warm up your Van / RV and enjoy the warmth even on the coldest winter days. HOW TO HEAT UP A DIY CAMPER VAN Winter is definitely not...

Van Insulation: Complete DIY Guide for Beginners
A cosa serve l'isolamento in un Furgone Camperizzato? Come funziona la trasmissione di calore? Quali materiali si possono usare per coibentare il tuo Camper e quali sono i loro vantaggi e svantaggi? In questa Guida, troverai tutte le risposte a queste domande, ed a...
Ultimate DIY Water System Guide for Van Conversion
How much water do you need in your motorhome? Which Tanks to Choose? How to install them? Pipes, Pump, Joints... Find out everything you need to know about creating your RV's water system! VAN CONVERSION: THE WATER/HYDRAULIC SYSTEM Installing a water...

How To Homologate a camper van in Italy – The Complete Guide
If you're entertaining the idea of building a do-it-yourself van to turn it into a Camper, this page is for you! Is it possible to homologate a do-it-yourself motorhome in Italy in 2021? Short Answer: Ni. It is possible yes, but not easy. When I first...

Convert a Van: 10 Things to Know Before You Start
Converting a Van for many is a dream. It's freedom, it's creativity, it's life. Let's not forget though, that converting a van Is also no joke at all. 10 things to know before starting a van conversion When I threw myself, a bit crazily, into the project of...

Van Conversion: How to Install your Windows DIY
Do you have a Van you'd like to convert but it doesn't have the windows you'd like? In this guide, you'll find everything you need to know about installing totally DIY windows for your future RV! Do-It-Yourself Windows: Where to Start? One of the first...

DIY Van Conversion: How to Choose the Best Van for You
Choosing a van is like choosing a Companion of Adventure: it has to be the right one! Which van do I want to convert? This is the first question that will come to your mind if you are thinking of embarking on a Do-It-Yourself conversion. Then again, choosing a...
The Best Vans for DIY Conversion
WHAT ARE THE BEST VANS FOR A DO-IT-YOURSELF CONVERSION? When you're first approaching the idea of converting a van into a camper, the model choice can be a headache. How tall is this one? How long is that? Total length or just of the cargo area? What is the difference...


0 Comments